
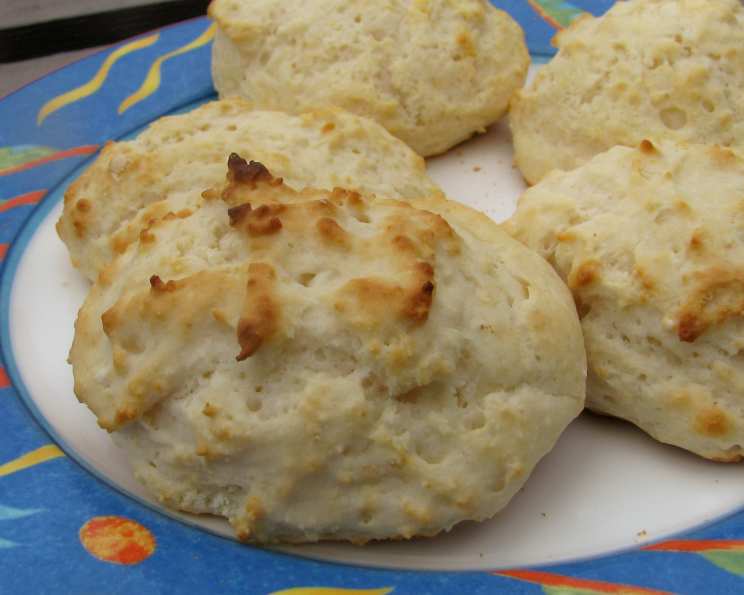
Biscuits for Two: A Cozy Kitchen Classic
My grandmother, Nana Rose, always had a trick up her sleeve for making the most of small moments. Weekday mornings were a blur of activity, but on Sundays, things slowed down. That’s when she’d whip up a small batch of biscuits, just enough for her and Grandpa Joe. The warm, buttery scent wafting from their tiny kitchen is a memory etched in my heart, a symbol of simple pleasures and shared love. These biscuits, though humble, were always the perfect start to a perfect day.
Recipe Overview
- Prep Time: 5 minutes
- Cook Time: 8-10 minutes
- Total Time: 13-15 minutes
- Servings: 2
- Yields: 5 biscuits
- Dietary Type: Vegetarian
Ingredients
- 1 1/4 cups Bisquick
- 1/2 cup milk
Equipment Needed
- Baking sheet
- Mixing bowl
- Measuring cups
- Measuring spoons
- Optional: 2 1/2 inch biscuit cutter
Instructions
-
Preheat your oven to 400 degrees F (200 degrees C). Ensure the oven rack is positioned in the center for even baking.
-
In a mixing bowl, combine the Bisquick and milk.
-
Stir the ingredients together until a soft dough forms. Be careful not to overmix, as this can result in tough biscuits. A few streaks of flour are perfectly fine.
-
For drop biscuits: Using a spoon or small cookie scoop, drop rounded spoonfuls of the dough onto an ungreased baking sheet. Space them about an inch apart.
-
For rolled biscuits: Lightly dust a clean work surface with flour.
-
Turn the dough out onto the floured surface. Gently knead the dough about 10 times. This helps develop the gluten and create a slightly more structured biscuit.
-
Using a rolling pin, roll the dough out to about 1/2 inch (1.25 cm) thick.
-
Use a 2 1/2 inch biscuit cutter (or a sharp knife) to cut out the biscuits. Avoid twisting the cutter, as this can seal the edges and prevent the biscuits from rising fully.
-
Place the cut biscuits onto an ungreased baking sheet, spacing them about an inch apart.
-
Bake for 8 to 10 minutes, or until the biscuits are golden brown on top. Keep a close eye on them, as baking times can vary depending on your oven.
-
Remove from the oven and let cool slightly on the baking sheet before serving.
Expert Tips & Tricks
- Cold ingredients are key. For the flakiest biscuits, use cold milk. You can even chill the Bisquick for 15 minutes before starting.
- Don’t overmix the dough! Overmixing develops the gluten too much, resulting in tough biscuits. Mix just until the ingredients are combined.
- Handle the dough gently. Avoid overworking the dough when rolling or kneading. The less you handle it, the more tender the biscuits will be.
- For extra-golden tops: Brush the tops of the biscuits with melted butter or milk before baking. This will enhance their color and flavor.
- If you don’t have a biscuit cutter: Use a sharp knife to cut the dough into squares or triangles.
- For taller biscuits: Place the cut biscuits close together on the baking sheet. This will help them rise upwards instead of spreading outwards.
- Reheating Biscuits: If reheating, wrap in foil and bake at 350°F (175°C) for about 5-10 minutes, or until warmed through. You can also microwave them for a few seconds, but they might become a little chewy.
Serving & Storage Suggestions
Serve these warm biscuits with butter, jam, honey, or gravy. They are also delicious as a side with scrambled eggs, soup, or chili.
- Room Temperature: Biscuits are best enjoyed fresh, but they can be stored at room temperature in an airtight container for up to 2 days. They may lose some of their softness.
- Refrigerator: For longer storage, keep the biscuits in an airtight container in the refrigerator for up to 4 days. Reheat before serving.
- Freezer: To freeze, let the baked biscuits cool completely. Wrap them individually in plastic wrap and then place them in a freezer bag or container. They can be frozen for up to 2 months. To reheat, bake directly from frozen at 350°F (175°C) for about 10-15 minutes, or until warmed through.
Nutritional Information
(Estimated per serving, based on 5 biscuits per batch)
| Nutrient | Amount per Serving | % Daily Value |
|---|---|---|
| Calories | 381 kcal | 19% |
| Total Fat | 14.6 g | 22% |
| Saturated Fat | 4.6 g | 23% |
| Cholesterol | 10.1 mg | 3% |
| Sodium | 839.5 mg | 35% |
| Total Carbohydrate | 53.5 g | 18% |
| Dietary Fiber | 1.7 g | 7% |
| Sugars | 9.3 g | 19% |
| Protein | 8.4 g | 17% |
Variations & Substitutions
- Cheese Biscuits: Add 1/2 cup of shredded cheddar cheese to the dough before mixing.
- Herb Biscuits: Stir in 1 tablespoon of chopped fresh herbs, such as rosemary, thyme, or chives, to the dough.
- Sweet Biscuits: Add 2 tablespoons of sugar to the dough for a slightly sweeter biscuit.
- Buttermilk Biscuits: Substitute buttermilk for the milk for a tangier flavor.
- Gluten-Free Biscuits: Use gluten-free Bisquick mix. Be sure to follow the package instructions.
- Garlic Biscuits: Add 1 teaspoon of garlic powder to the dry mix.
FAQs (Frequently Asked Questions)
Q: Can I make these biscuits ahead of time?
A: Yes, you can prepare the dough ahead of time and store it in the refrigerator for up to 24 hours. Bake as directed when ready to serve.
Q: My biscuits are not rising properly. What am I doing wrong?
A: Make sure your baking powder is fresh. Also, avoid overmixing the dough, as this can prevent the biscuits from rising. Ensure your oven is properly preheated.
Q: Can I use margarine instead of butter?
A: While you can substitute margarine, butter provides a richer flavor and flakier texture.
Q: What if I don’t have Bisquick?
A: You can use a similar baking mix, but the results may vary slightly. A homemade version of Bisquick can be found online but would require a larger batch than needed for this recipe.
Q: How do I prevent the bottoms of my biscuits from burning?
A: Use a light-colored baking sheet and ensure the oven rack is positioned in the center. You can also place a piece of parchment paper on the baking sheet to prevent sticking and burning.
Final Thoughts
These simple biscuits for two are a perfect way to enjoy a homemade treat without a lot of fuss. Whether you’re starting a cozy weekend morning or just need a quick and comforting snack, these biscuits are sure to satisfy. Don’t be afraid to experiment with different flavors and additions to make them your own. And most importantly, share them with someone you love! I hope this recipe becomes a cherished part of your kitchen, just like it is in mine. Enjoy, and happy baking!