
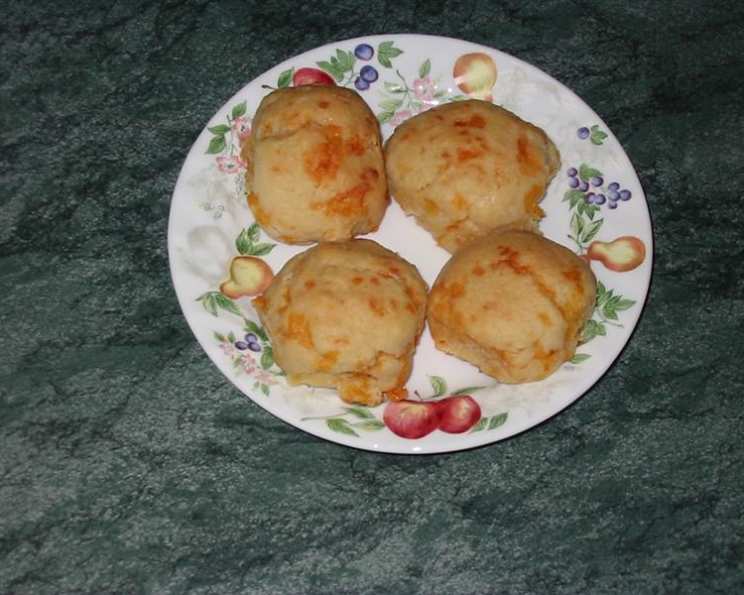
Bisquick Cheddar Scones: A Savory Bite of Nostalgia
The aroma of freshly baked cheese scones always transports me back to my grandmother’s cozy kitchen. She had a knack for whipping up simple, comforting recipes that filled the house with warmth and delicious smells. These Bisquick cheddar scones, with their golden-brown crust and fluffy, cheesy interior, are my attempt to recreate that magic – a little taste of home in every bite. The delightful buttery garlic aroma reminds me of the endless basket of biscuits that are served at a certain seafood restaurant. Now you can have them at home whenever you want.
Recipe Overview
- Prep Time: 8 minutes
- Cook Time: 16 minutes
- Total Time: 24 minutes
- Yields: 12-16 Scones
- Serves: 6-8
- Dietary Type: Vegetarian
Ingredients
- 2 1/2 cups Bisquick baking mix
- 1 cup sharp cheddar cheese, finely grated
- 3/4 cup whole milk
- 2 tablespoons butter, melted
- 1/8 teaspoon garlic powder
- 1/4 cup butter, melted (for topping)
- 1/2 teaspoon garlic powder (for topping)
- 1/2 teaspoon dried parsley flakes (for topping)
Equipment Needed
- Medium bowl
- Microwave
- Measuring cups and spoons
- Cookie sheet
- Pastry brush
Instructions
- Preheat your oven to 400 degrees Fahrenheit (200 degrees Celsius). It’s crucial to have your oven fully heated before baking to ensure the scones rise properly.
- In a medium bowl, combine the Bisquick baking mix and the finely grated cheddar cheese. Make sure the cheese is evenly distributed throughout the baking mix.
- Add the milk, 2 tablespoons of melted butter, and 1/8 teaspoon of garlic powder to the bowl.
- Mix the ingredients until just well combined. Be careful not to overmix the dough, as this can result in tough scones. A few streaks of flour are okay.
- Drop approximately 1/4-cup portions of the dough onto an ungreased cookie sheet. You can use a spoon or a small ice cream scoop to ensure uniform sizes. Space them slightly apart to allow for even baking.
- In a small bowl, combine the remaining 1/4 cup of melted butter, 1/2 teaspoon of garlic powder, and 1/2 teaspoon of dried parsley flakes. This flavorful butter mixture will give the scones a beautiful golden color and delicious savory taste.
- Brush this mixture generously over the tops of each unbaked scone. Make sure to coat each one evenly for maximum flavor and visual appeal.
- Bake for 14 to 16 minutes, or until the tops of the scones begin to turn light brown. Keep a close eye on them towards the end of the baking time, as ovens can vary.
- Serve warm. These scones are best enjoyed fresh out of the oven!
Expert Tips & Tricks
- Cheese Choice: While sharp cheddar is classic, experiment with other cheeses like Gruyere, pepper jack, or even a blend of your favorites.
- Make-Ahead Tip: You can prepare the dough ahead of time and store it in the refrigerator for up to 24 hours. Just be sure to bake them immediately after taking them out of the fridge for the best rise.
- Even Baking: For even baking, rotate the cookie sheet halfway through the baking time. This ensures that all the scones are exposed to the same amount of heat.
- Herby Twist: Add a tablespoon of fresh, chopped herbs like chives, rosemary, or thyme to the dough for an extra layer of flavor.
- Adjusting for Altitude: If you live at a high altitude, you may need to adjust the baking time or slightly reduce the amount of liquid.
Serving & Storage Suggestions
These Bisquick cheddar scones are perfect served warm alongside a hearty soup, a fresh salad, or as a savory addition to brunch. They are also delicious on their own with a pat of butter or a dollop of cream cheese.
- Storage: Store leftover scones in an airtight container at room temperature for up to 2 days. For longer storage, you can freeze them for up to 2 months.
- Reheating: To reheat, warm the scones in a preheated oven at 350 degrees Fahrenheit (175 degrees Celsius) for 5-10 minutes, or until heated through. You can also microwave them for a quick reheat, but they may lose some of their crispness. For frozen scones, thaw them overnight in the refrigerator before reheating.
Nutritional Information
Here’s an estimate of the nutritional information per scone:
| Nutrient | Amount per Serving | % Daily Value |
|---|---|---|
| Calories | 411 kcal | N/A |
| Calories from Fat | 238 g | 58% |
| Total Fat | 26.4 g | 40% |
| Saturated Fat | 13.8 g | 69% |
| Cholesterol | 54.3 mg | 18% |
| Sodium | 849.1 mg | 35% |
| Total Carbohydrate | 33.5 g | 11% |
| Dietary Fiber | 1.1 g | 4% |
| Sugars | 7.6 g | 30% |
| Protein | 9.8 g | 19% |
Note: Nutritional information is an estimate and may vary based on specific ingredients and portion sizes.
Variations & Substitutions
- Gluten-Free: Use a gluten-free baking mix instead of Bisquick. You may need to adjust the amount of liquid slightly.
- Spicy Scones: Add a pinch of cayenne pepper or a dash of hot sauce to the dough for a spicy kick.
- Italian Herbs: Substitute the parsley flakes with Italian seasoning for a different flavor profile.
- Different Cheese: Experiment with different types of cheese, such as Monterey Jack, Havarti, or even crumbled feta for a unique twist.
- Add-Ins: Consider adding chopped bacon, sun-dried tomatoes, or olives to the dough for extra flavor and texture.
FAQs (Frequently Asked Questions)
Q: Can I use a different type of milk?
A: Yes, you can substitute whole milk with other types of milk, such as 2% milk, almond milk, or soy milk. Keep in mind that using different types of milk may affect the texture and flavor of the scones.
Q: Can I make these scones ahead of time and bake them later?
A: Yes, you can prepare the dough ahead of time and store it in the refrigerator for up to 24 hours. Just be sure to bake them immediately after taking them out of the fridge for the best rise.
Q: How do I prevent the scones from becoming too dry?
A: Avoid overbaking the scones. Bake them until the tops are lightly browned and a toothpick inserted into the center comes out clean. Also, be careful not to overmix the dough.
Q: Can I freeze these scones?
A: Yes, you can freeze the baked scones. Allow them to cool completely before wrapping them individually in plastic wrap and placing them in a freezer-safe bag. They can be frozen for up to 2 months.
Q: What if I don’t have Bisquick baking mix?
A: While Bisquick is ideal for the recipe and will maintain the recipe’s texture and taste, in a pinch, you can try a homemade baking mix substitute using flour, baking powder, salt, and shortening. However, the results may vary.
Final Thoughts
These Bisquick cheddar scones are a delightful and easy way to bring a touch of warmth and comfort to your kitchen. With their savory flavor and fluffy texture, they are sure to be a hit with family and friends. Don’t be afraid to experiment with different cheeses, herbs, and spices to create your own unique version of this classic recipe. So, gather your ingredients, preheat your oven, and get ready to enjoy a batch of these irresistible scones. I’d love to hear about your creations and variations – please share your experiences and feedback!