
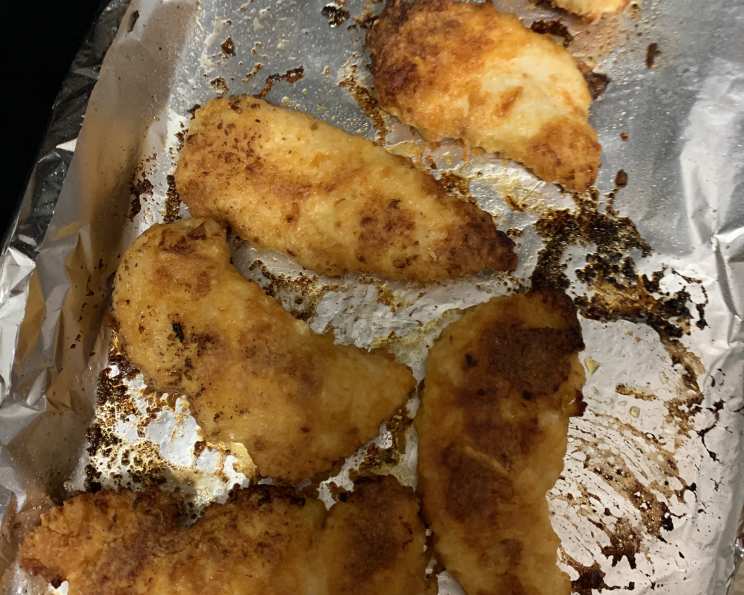
Bisquick Chicken Fingers: A Nostalgic & Delicious Classic
There’s something incredibly comforting about chicken fingers. For me, they evoke memories of childhood birthday parties, school lunches, and those nights when my mom needed a quick and easy dinner solution. While we often ordered takeout, there was one version that always stood out: the homemade Bisquick chicken fingers. The slightly sweet, cheesy crust combined with the tender chicken was simply irresistible, and even now, the aroma of them baking in the oven brings back a wave of happy nostalgia. It’s a recipe I’ve made countless times, a true testament to its simplicity and enduring appeal.
Recipe Overview
- Prep Time: 15 minutes
- Cook Time: 14 minutes
- Total Time: 29 minutes
- Servings: 3-4
- Yield: Varies by chicken breast size
- Dietary Type: Not suitable for gluten-free or dairy-free diets
Ingredients
- 3 boneless, skinless chicken breast halves, cut into 1/2-inch strips
- 2/3 cup Bisquick baking mix
- 1/2 cup grated Parmesan cheese
- 1/2 teaspoon garlic salt
- 1/2 teaspoon paprika
- 1 large egg, slightly beaten
- 3 tablespoons butter or margarine, melted
Equipment Needed
- Cookie sheet
- Aluminum foil
- Cooking spray
- Plastic resealable bag
- Shallow dish for egg
- Small bowl for melted butter
- Measuring cups and spoons
Instructions
- Preheat your oven to 450 degrees F (232 degrees C). Ensure your oven rack is positioned in the center.
- Line a cookie sheet with aluminum foil. This makes for easy cleanup. Spray the foil generously with cooking spray to prevent the chicken from sticking.
- In a plastic resealable bag, combine the Bisquick baking mix, grated Parmesan cheese, garlic salt, and paprika. Seal the bag tightly and shake well to ensure all ingredients are evenly distributed. This creates your flavorful breading.
- Place the slightly beaten egg in a shallow dish. This will act as a binder for the breading.
- Dip half of the chicken strips into the beaten egg, ensuring they are completely coated. Let the excess egg drip off before proceeding to the next step.
- Transfer the egg-coated chicken strips to the bag containing the Bisquick mixture. Seal the bag securely and shake vigorously until the chicken strips are thoroughly coated with the breading.
- Carefully remove the coated chicken strips from the bag and arrange them in a single layer on the prepared cookie sheet. Be sure to leave a little space between each strip to allow for even cooking.
- Repeat steps 5-7 with the remaining chicken strips and Bisquick mixture.
- Once all the chicken is arranged on the cookie sheet, drizzle the melted butter or margarine evenly over the chicken fingers. This adds flavor and helps them to brown beautifully.
- Bake in the preheated oven for 12-14 minutes, turning the chicken fingers halfway through the baking time to ensure even browning and cooking. Check for doneness – the internal temperature should reach 165°F (74°C)
Expert Tips & Tricks
- Achieving Extra Crispy Chicken: For an even crispier crust, consider adding a tablespoon or two of panko breadcrumbs to the Bisquick mixture. The larger crumbs create extra texture and crunch.
- Don’t Overcrowd the Pan: Overcrowding the cookie sheet will steam the chicken rather than bake it, resulting in a less crispy final product. Work in batches if necessary.
- Even Coating is Key: Ensure the chicken strips are thoroughly coated with the Bisquick mixture. Bare spots will result in uneven browning and dry patches.
- Preventing Soggy Chicken: Let excess egg drip off the chicken before placing it in the bag with the breading mixture. Too much egg can lead to a soggy coating.
- Flavor Boost: Experiment with different seasonings in the Bisquick mixture. Onion powder, Italian seasoning, or a pinch of cayenne pepper can add a unique twist.
- Melted Butter Substitute: If you prefer not to use butter or margarine, a light drizzle of olive oil can also work. Spraying the breaded chicken lightly with cooking spray before baking is another option for promoting browning.
Serving & Storage Suggestions
Serve these delicious Bisquick chicken fingers immediately while they’re hot and crispy. They pair perfectly with a variety of dipping sauces, such as honey mustard, barbecue sauce, ranch dressing, or even a simple ketchup. For a complete meal, serve them alongside french fries, coleslaw, a fresh salad, or roasted vegetables.
Leftover chicken fingers can be stored in an airtight container in the refrigerator for up to 3-4 days. For longer storage, freeze them in a single layer on a baking sheet before transferring them to a freezer bag. They can be frozen for up to 2-3 months.
To reheat refrigerated chicken fingers, bake them in a preheated oven at 350 degrees F (175 degrees C) for about 10-15 minutes, or until heated through. Frozen chicken fingers can be reheated in the same way, but may require a longer baking time. You can also reheat them in an air fryer for a crispier result. Avoid microwaving them, as this can make them soggy.
Nutritional Information
Here’s an approximate nutritional breakdown per serving, based on the listed ingredients:
| Nutrient | Amount per Serving | % Daily Value |
|---|---|---|
| Calories | 342 kcal | N/A |
| Calories from Fat | 171 kcal | N/A |
| Total Fat | 19g | 29% |
| Saturated Fat | 9.4g | 46% |
| Cholesterol | 137.5mg | 45% |
| Sodium | 604mg | 25% |
| Total Carbohydrate | 14.6g | 4% |
| Dietary Fiber | 0.6g | 2% |
| Sugars | 2.7g | N/A |
| Protein | 27.1g | 54% |
Please note: Nutritional information is an estimate and can vary based on specific ingredients and portion sizes.
Variations & Substitutions
- Gluten-Free Chicken Fingers: Substitute the Bisquick baking mix with a gluten-free all-purpose flour blend. You may need to add a binder, such as xanthan gum, to help the breading adhere.
- Dairy-Free Chicken Fingers: Omit the Parmesan cheese and use a dairy-free Parmesan alternative or nutritional yeast for a cheesy flavor. Substitute the butter with a dairy-free margarine or olive oil.
- Spicy Chicken Fingers: Add a pinch of cayenne pepper or red pepper flakes to the Bisquick mixture for a spicy kick.
- Herb-Infused Chicken Fingers: Incorporate dried herbs like thyme, rosemary, or oregano into the Bisquick mixture for an herbaceous flavor profile.
- Honey-Glazed Chicken Fingers: Drizzle the baked chicken fingers with honey for a touch of sweetness.
- Lemon-Pepper Chicken Fingers: Add lemon zest and freshly cracked black pepper to the Bisquick mixture for a bright and zesty flavor.
FAQs (Frequently Asked Questions)
Q: Can I use chicken tenders instead of chicken breasts?
A: Absolutely! Chicken tenders work perfectly well in this recipe. Simply adjust the baking time as needed, since they are typically thinner than chicken breast strips.
Q: Can I prepare the chicken fingers ahead of time?
A: Yes, you can bread the chicken fingers and store them in the refrigerator for up to 24 hours before baking. Be sure to cover them tightly to prevent them from drying out.
Q: Can I use an air fryer instead of baking them in the oven?
A: Yes, air frying is a great option! Preheat your air fryer to 400 degrees F (200 degrees C) and cook the chicken fingers for about 8-10 minutes, flipping halfway through, until they are golden brown and cooked through.
Q: How can I make the chicken fingers healthier?
A: To reduce the fat content, use less butter or margarine, or spray the breaded chicken fingers with cooking spray instead. You can also use whole wheat Bisquick for added fiber.
Q: My chicken fingers are browning too quickly. What should I do?
A: If the chicken fingers are browning too quickly, reduce the oven temperature to 425 degrees F (220 degrees C) and continue baking until they are cooked through. You can also tent the cookie sheet with aluminum foil to prevent further browning.
Final Thoughts
These Bisquick chicken fingers are more than just a recipe; they’re a gateway to cherished memories and a testament to simple, satisfying cooking. They’re perfect for busy weeknights, family gatherings, or whenever you’re craving a comforting and delicious meal. Don’t be afraid to experiment with different variations and seasonings to create your own signature version. So, gather your ingredients, preheat your oven, and get ready to enjoy a batch of these irresistible chicken fingers. And most importantly, share your creations with loved ones and create new memories around the table!