
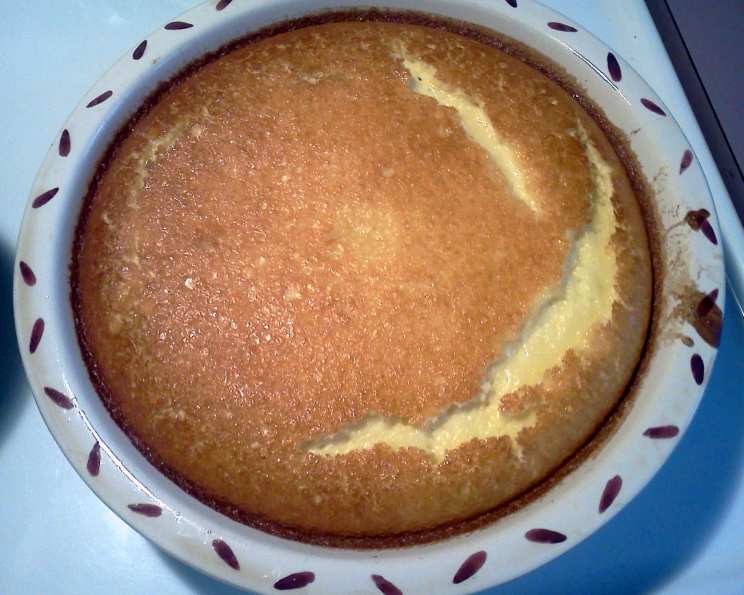
Bisquick Custard Pie: A Slice of Nostalgia
The scent of nutmeg always takes me back to my grandmother’s kitchen. Sunlight streaming through the window, the gentle whir of her ancient blender, and the promise of something warm and comforting baking in the oven. While she was a master of intricate pastries, it was her impossibly simple custard pie, light as a cloud and kissed with nutmeg, that truly captured my heart. It was a hug in dessert form, a taste of pure, unadulterated love.
Recipe Overview
- Prep Time: 10 minutes
- Cook Time: 30 minutes
- Total Time: 40 minutes
- Servings: 6-8
- Yield: 1 pie
- Dietary Type: Comfort Food
Ingredients
- 1/2 cup Bisquick
- 1/2 cup sugar
- 4 eggs
- 2 cups milk
- 1 cup flaked coconut
- 1 teaspoon vanilla
- 1/4 cup butter, melted
- 1/4 teaspoon nutmeg
Equipment Needed
- Blender
- 9-inch pie dish
- Measuring cups and spoons
- Oven
Instructions
-
Preheat your oven to 350 degrees Fahrenheit (175 degrees Celsius). This ensures the pie bakes evenly and prevents a soggy crust.
-
In a blender, combine all of the ingredients: Bisquick, sugar, eggs, milk, flaked coconut, vanilla, and melted butter.
-
Blend the mixture thoroughly until it is completely smooth. This step is crucial for achieving a light and creamy texture. There should be no lumps of Bisquick or visible pieces of coconut.
-
Butter a 9-inch pie dish. This prevents the pie from sticking and makes it easier to serve.
-
Pour the blended mixture into the prepared pie dish. Ensure the liquid is evenly distributed.
-
Sprinkle the top of the pie with nutmeg. If you’re feeling festive, add some colored sprinkles for a touch of fun, just like my mom used to do!
-
Bake in the preheated oven for 30 minutes, or until the custard is set. The pie is done when a knife inserted into the center comes out clean, or with just a few moist crumbs clinging to it. The center should be slightly jiggly but not liquid.
-
Let the pie cool completely before slicing and serving. This allows the custard to firm up and prevents it from falling apart.
-
For an extra touch of indulgence, serve with a dollop of Cool Whip or freshly whipped cream.
Expert Tips & Tricks
- Preventing a Soggy Bottom: Even though this recipe doesn’t have a traditional crust, the melted butter in the mix helps to prevent sogginess. Make sure your pie dish is well-buttered.
- Achieving the Perfect Texture: Blending all the ingredients ensures a smooth, consistent custard. Don’t skimp on the blending time!
- Spice it Up: Feel free to experiment with different spices. A pinch of cinnamon or cardamom can add a warm, inviting flavor.
- Coconut Toasting: For a deeper coconut flavor, lightly toast the flaked coconut before adding it to the blender. Just be careful not to burn it!
- Rum Flavoring: A teaspoon of rum flavoring can elevate the flavor profile of this pie.
Serving & Storage Suggestions
This Bisquick Custard Pie is best served chilled. Let it cool completely at room temperature, then refrigerate for at least an hour before serving. It’s delightful on its own, but a dollop of whipped cream or a scoop of vanilla ice cream elevates it to another level.
Leftovers can be stored in the refrigerator for up to 3 days. Cover the pie tightly with plastic wrap or transfer it to an airtight container to prevent it from drying out. While freezing is not recommended due to the custard’s texture changing, the pie is best enjoyed fresh within a few days.
Nutritional Information
| Nutrient | Amount per Serving | % Daily Value |
|---|---|---|
| Calories | 345 kcal | N/A |
| Total Fat | 19.5g | 29% |
| Saturated Fat | 11.9g | 59% |
| Cholesterol | 155.9mg | 51% |
| Sodium | 303.3mg | 12% |
| Total Carbohydrate | 34.9g | 11% |
| Dietary Fiber | 1.6g | 6% |
| Sugars | 23.3g | N/A |
| Protein | 8.2g | 16% |
Note: Nutritional information is an estimate and can vary based on specific ingredients and serving sizes.
Variations & Substitutions
- Dairy-Free: Substitute the milk with almond milk, soy milk, or coconut milk for a dairy-free version. You may need to adjust the sweetness slightly depending on the type of milk you use.
- Gluten-Free: While Bisquick typically contains gluten, you can find gluten-free baking mixes that work as a substitute. Make sure to check the label and ensure it’s a 1:1 replacement.
- Fruit Variations: Add a layer of fresh fruit to the bottom of the pie dish before pouring in the custard mixture. Berries, sliced peaches, or apples are all delicious options.
- Chocolate Chip: Stir in 1/2 cup of chocolate chips to the blended mixture for a chocolatey twist.
- Spice it Up: Infuse the milk with spices like cinnamon sticks or star anise for a more complex flavor. Remove the spices before blending.
FAQs (Frequently Asked Questions)
Q: Can I make this pie ahead of time?
A: Absolutely! This pie is perfect for making ahead of time. Simply bake it as directed and store it in the refrigerator until you’re ready to serve. It will keep well for up to 3 days.
Q: Can I use a store-bought pie crust instead of blending it all together?
A: While you can use a store-bought crust, this recipe is designed to be crustless. Using a crust will change the texture and baking time.
Q: My pie is browning too quickly. What should I do?
A: If your pie is browning too quickly, tent it loosely with aluminum foil during the last 10-15 minutes of baking.
Q: Can I reduce the amount of sugar in the recipe?
A: Yes, you can reduce the sugar slightly, but keep in mind that it will affect the overall sweetness and texture of the pie. Start by reducing it by 1/4 cup and adjust to your liking.
Q: Can I freeze this pie?
A: Freezing is not recommended, as the custard texture can become grainy and watery upon thawing.
Final Thoughts
This Bisquick Custard Pie is a testament to the fact that simple ingredients, when combined with a little love, can create something truly extraordinary. It’s a recipe that’s perfect for busy weeknights or lazy Sunday afternoons. Whether you’re a seasoned baker or a beginner in the kitchen, I encourage you to give this recipe a try. It’s a guaranteed crowd-pleaser and a delightful way to create lasting memories. So, preheat your oven, gather your ingredients, and get ready to experience the warm, comforting embrace of a slice of homemade nostalgia. Don’t forget the sprinkles! And if you’re feeling adventurous, try adding a dash of rum extract, it’s a secret ingredient that elevates the flavor to another level. Enjoy!