
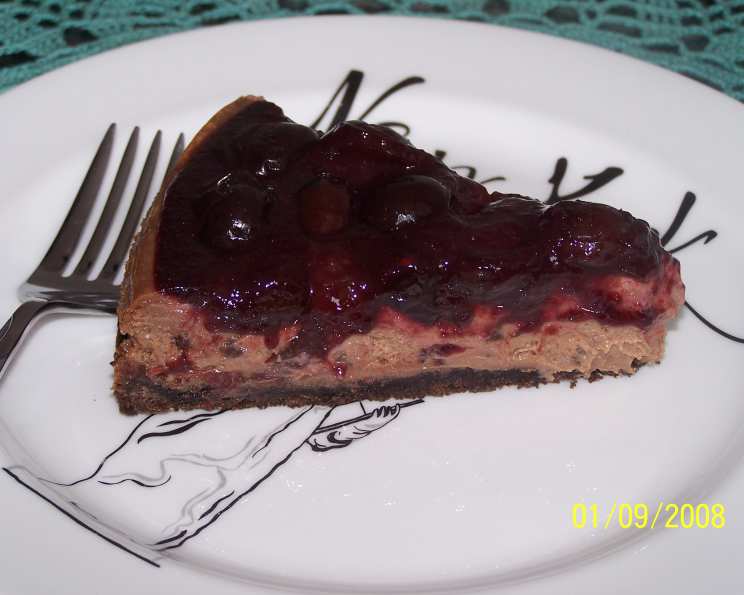
Black Forest Cherry Cheesecake: A Decadent Delight
Some of my fondest childhood memories revolve around my grandmother’s baking. Her kitchen, always warm and filled with the comforting aroma of vanilla and chocolate, was my happy place. One dessert that always stood out was her Black Forest cake – layers of rich chocolate, whipped cream, and juicy cherries. While this Black Forest Cherry Cheesecake isn’t exactly Grandma’s cake, it captures that same delightful essence. It’s a creamy, dreamy combination of cheesecake indulgence and classic Black Forest flavors, and I can’t wait to share it with you!
Recipe Overview
- Prep Time: 30 minutes
- Cook Time: 50 minutes
- Cooling Time: 1 hour 40 minutes
- Chill Time: 8 hours
- Servings: 14-16
- Yield: 1 cheesecake
- Dietary Type: Not specified (contains dairy, eggs, and gluten)
Ingredients
For the Cherry Topping:
- 2 cups pitted dark sweet cherries
- ¼ cup sugar
- 1 tablespoon fresh lemon juice
- 2 teaspoons cornstarch
For the Crust:
- 1 ⅓ cups chocolate graham cracker crumbs
- ¼ cup sugar
- 1 tablespoon butter or 1 tablespoon margarine, melted
- 1 large egg white
- Cooking spray
For the Filling:
- 1 cup nonfat sour cream
- ½ cup fat-free sweetened condensed milk
- 8 ounces reduced-fat cream cheese, softened (1/3 less fat)
- 8 ounces fat-free cream cheese, softened
- 1 ¼ cups sugar
- 3 tablespoons unsweetened cocoa
- 2 teaspoons vanilla extract
- 2 large eggs
- ½ cup miniature semisweet chocolate chips
- 36 dark sweet cherries, pitted and halved
Equipment Needed
- Blender or food processor
- Small saucepan
- Mixing bowls
- Fork
- 10-inch springform pan
- Cooking spray
- Mixer
- Wire rack
Instructions
- Prepare the Cherry Topping: Place 2 cups of the pitted dark sweet cherries in a blender or food processor, and process until smooth.
- In a small saucepan, combine the pureed cherries, ¼ cup sugar, lemon juice, and cornstarch. Bring the mixture to a boil over medium heat, then cook for 1 minute, stirring constantly, until the sauce has thickened.
- Pour the cherry topping into a bowl, then cover and chill in the refrigerator for at least an hour, or until ready to use.
- Preheat your oven to 350°F (175°C).
- Prepare the Crust: In a medium bowl, combine the chocolate graham cracker crumbs, ¼ cup sugar, melted butter (or margarine), and egg white. Toss with a fork until the mixture is well-blended and resembles damp sand.
- Coat the bottom and sides of a 10-inch springform pan with cooking spray.
- Press the crumb mixture evenly into the bottom of the prepared springform pan.
- Bake the crust at 350°F (175°C) for 10 minutes.
- Remove the crust from the oven and cool it on a wire rack.
- Reduce the oven temperature to 300°F (150°C).
- Prepare the Filling: In a large bowl, combine the nonfat sour cream, fat-free sweetened condensed milk, reduced-fat cream cheese, and fat-free cream cheese.
- Beat the mixture at medium speed with a mixer until well-blended and smooth. Scrape down the sides of the bowl as needed to ensure everything is incorporated.
- Add the 1 ¼ cups sugar, unsweetened cocoa, and vanilla extract to the cream cheese mixture. Beat well until the ingredients are fully incorporated and the batter is smooth and homogenous.
- Add the eggs one at a time, beating well after each addition. Be careful not to over-mix at this stage, as it can incorporate too much air into the batter, leading to cracks during baking.
- Stir in the miniature semisweet chocolate chips.
- Pour the cheese mixture into the prepared pan, spreading it evenly over the cooled crust.
- Bake the cheesecake at 300°F (150°C) for 50 minutes or until the cheesecake is almost set. The center will still have a slight jiggle, but it will firm up as it cools.
- Turn off the oven and cool the cheesecake in the closed oven for 40 minutes. This slow cooling helps prevent cracking.
- Remove the cheesecake from the oven and cool it completely on a wire rack.
- Spread the chilled cherry topping evenly over the cooled cheesecake.
- Top the cheesecake decoratively with the 36 pitted and halved dark sweet cherries.
- Cover the cheesecake with plastic wrap and chill in the refrigerator for at least 8 hours, or preferably overnight, to allow the flavors to meld and the cheesecake to fully set.
Expert Tips & Tricks
- Room Temperature Ingredients: Ensuring your cream cheese and eggs are at room temperature is crucial for a smooth, lump-free filling. Take them out of the refrigerator at least an hour before you begin baking.
- Preventing Cracks: To minimize the risk of cracks, avoid over-mixing the filling. The gradual cooling process in the oven also helps. You can also bake the cheesecake in a water bath, which provides even heat distribution, but that adds complexity to the recipe.
- Crust Variation: For a richer crust, try using chocolate wafers instead of graham crackers. Simply process them into crumbs and follow the recipe as directed.
- Topping Alternatives: If you don’t have fresh cherries available, you can use frozen or canned cherries. Just be sure to drain them well and adjust the sugar in the topping as needed. You can also use a prepared cherry pie filling for a quick and easy topping.
Serving & Storage Suggestions
To serve, carefully remove the sides of the springform pan. For a clean slice, use a warm, damp knife. Serve chilled for the best flavor and texture.
Leftover cheesecake should be stored in an airtight container in the refrigerator. It will keep for up to 5 days. For longer storage, you can freeze the cheesecake. Wrap it tightly in plastic wrap and then in foil, and it will last for up to 2 months. Thaw it in the refrigerator overnight before serving.
Nutritional Information
| Nutrient | Amount per Serving | % Daily Value |
|---|---|---|
| Calories | 233.7 kcal | N/A |
| Calories from Fat | 57 g | 25% |
| Total Fat | 6.4 g | 9% |
| Saturated Fat | 3.7 g | 18% |
| Cholesterol | 41.1 mg | 13% |
| Sodium | 226 mg | 9% |
| Total Carbohydrate | 39.7 g | 13% |
| Dietary Fiber | 1.3 g | 5% |
| Sugars | 35.3 g | 141% |
| Protein | 6.6 g | 13% |
Note: Nutritional information is an estimate and may vary based on specific ingredients and portion sizes.
Variations & Substitutions
- Gluten-Free: Substitute gluten-free graham crackers or a gluten-free cookie for the crust. Ensure all other ingredients are also gluten-free.
- Chocolate Lover’s Dream: Add a tablespoon of instant espresso powder to the filling for a deeper chocolate flavor. You could also swirl melted dark chocolate into the cheesecake batter before baking.
- Seasonal Twist: In the fall, try using a cranberry sauce topping instead of the cherry topping for a festive holiday dessert.
- Lighter Version: Use all fat-free cream cheese and a sugar substitute to further reduce the calorie content.
FAQs (Frequently Asked Questions)
Q: Can I use a different size springform pan?
A: While a 10-inch springform pan is recommended, you can use a smaller one. However, you may need to adjust the baking time and the cheesecake will be thicker.
Q: How do I know when the cheesecake is done?
A: The cheesecake is done when the edges are set, but the center still jiggles slightly. It will continue to set as it cools.
Q: Can I make the cheesecake ahead of time?
A: Yes! This cheesecake is actually better when made a day or two in advance, as it allows the flavors to fully meld.
Q: What if my cheesecake cracks?
A: Don’t worry if your cheesecake cracks! It’s a common occurrence and won’t affect the taste. You can easily cover it with the cherry topping.
Q: Can I freeze the cheesecake?
A: Yes, you can freeze the cheesecake for up to 2 months. Wrap it tightly in plastic wrap and then in foil. Thaw it in the refrigerator overnight before serving.
Final Thoughts
This Black Forest Cherry Cheesecake is more than just a dessert; it’s a celebration of flavors and textures. The creamy cheesecake, the rich chocolate, and the burst of sweet cherries create a truly unforgettable experience. Don’t be intimidated by the steps; this recipe is surprisingly easy to follow, and the results are well worth the effort. Gather your ingredients, preheat your oven, and get ready to create a masterpiece that will delight your friends and family. I encourage you to try this recipe, share your feedback, and perhaps even pair it with a glass of your favorite dessert wine. Happy baking!