
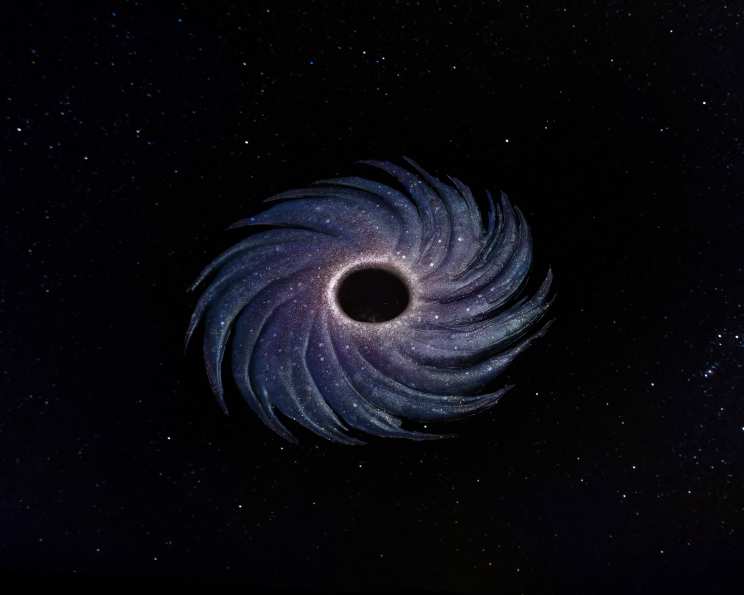
Black Hole Baked Alaska: A Culinary Journey to the Cosmos
I’ll never forget the first time I saw a real, proper Baked Alaska. It was at a fancy restaurant downtown, and the waiter theatrically flambéed the meringue tableside. The crackling sugar, the contrasting temperatures, and the sheer spectacle of it all were mesmerizing. Years later, when I started experimenting with molecular gastronomy, I knew I had to put my own spin on this classic. That’s how this Black Hole Baked Alaska came to be – a dessert that marries classic technique with a touch of cosmic wonder. It’s delicious, unexpected, and always a conversation starter.
Recipe Overview
- Prep Time: 1 hour 45 minutes
- Cook Time: 5 minutes
- Total Time: 2 hours 50 minutes
- Servings: 8
- Yields: 1 cake
- Dietary Type: Not specified (contains dairy, eggs)
Ingredients
Black Hole Chocolate Disc:
- 1 cup lavender chocolate melts (two shades of color)
- Edible gold glitter
Baked Alaska:
- 1 fudge bundt cake (store-bought)
- Banana split ice cream (or any flavor you prefer)
Meringue:
- 2 egg whites
- 1/4 teaspoon salt
- 1/8 teaspoon cream of tartar
- 4 tablespoons sugar
- 1/2 teaspoon vanilla
Equipment Needed
- Airbrushing machine
- Parchment paper
- Turn table
- Offset, narrow spatula
- Stand mixer
- Torch
Instructions
- Begin by preparing the Black Hole Chocolate Disc. You’ll need an airbrushing machine and edible colors in addition to the chocolate melts and parchment paper.
- Melt the lavender chocolate in two separate pots until completely liquid. Using two different shades of lavender will give the black hole a more dimensional look.
- Place a circle of parchment paper on a turn table. Pour the darker shade of melted chocolate onto the parchment first.
- Pour the remaining lighter shade of melted chocolate on top, creating a design of your choosing. Unleash your inner artist here!
- Use an offset, narrow spatula to create a galaxy design by making spiraled swiping motions from the inside out. Start from the center and work outwards, swirling the two chocolate colors together. This technique is what will give the chocolate its unique cosmic appearance.
- Once you’re satisfied with the design, allow the chocolate to set in a cool room for one hour. Don’t put it in the fridge, as this can cause the chocolate to bloom.
- Once the chocolate is set, carefully remove it from the parchment sheet. Rest the chocolate disc on something with a hole in the center (like a doughnut stand) to prepare for cutting out the center of the black hole.
- Using a hot blade (warming it slightly will help), carefully cut out a hole in the center of the chocolate disc.
- Smooth the edges of the hole with your finger to create a clean, finished look.
- Next, mix various galactic colors in an airbrush machine. I made mine darkest on the outer edges and lightest near the center, to mimic the appearance of a black hole.
- Airbrush your black hole, gradually building up the color.
- Now, prepare the Meringue. In a stand mixer, beat the egg whites, salt, and cream of tartar until soft peaks form. The cream of tartar helps stabilize the egg whites and gives the meringue a better texture.
- Gradually drizzle in the sugar and vanilla.
- Beat until stiff peaks form. The meringue should be glossy and hold its shape when the whisk is lifted.
- It’s time to assemble the Baked Alaska! Cut off the top of the store-bought fudge bundt cake.
- Scoop a layer of your chosen ice cream (banana split works perfectly!) on top of the ring, making sure to leave the hole in the middle. Don’t be afraid to pile it high!
- Coat the entire cake and ice cream with the meringue, ensuring an even layer. This is what will protect the ice cream from melting during the torching process.
- Using a torch, carefully torch the meringue until it is golden brown and toasted. Work quickly and evenly to prevent the ice cream from melting.
- Once the meringue is torched, chill the Baked Alaska in the freezer until ready to serve. This will ensure that the ice cream remains firm.
- Just before serving, carefully place the chocolate black hole topper onto the frozen dessert.
- Serve immediately and enjoy!
Expert Tips & Tricks
- For a more intense lavender flavor in the chocolate disc, infuse the cream (if your chocolate requires cream to melt) with dried lavender buds for about 30 minutes before melting. Strain before using.
- If you don’t have an airbrushing machine, you can use edible spray paint to color the chocolate disc.
- To prevent the ice cream from melting too quickly while torching the meringue, make sure the Baked Alaska is thoroughly frozen before torching. You can even freeze it for a few hours or overnight.
- If you’re feeling adventurous, try adding a layer of crumbled brownies or cookies between the cake and the ice cream for added texture and flavor.
- Make the chocolate disc a day or two in advance to save time on the day of serving.
Serving & Storage Suggestions
Serve the Black Hole Baked Alaska immediately after assembling. The contrast between the warm, toasted meringue and the cold ice cream is what makes this dessert so special.
If you have any leftovers (though unlikely!), store them in the freezer in an airtight container. The meringue may lose some of its crispness, but the dessert will still be delicious. It’s best to consume the leftovers within a few days.
Do not attempt to store the assembled Baked Alaska at room temperature, as the ice cream will melt.
Nutritional Information
(Estimated values; will vary based on specific ingredients used)
| Nutrient | Amount per Serving | % Daily Value |
|---|---|---|
| Calories | 450 kcal | 23% |
| Total Fat | 25g | 38% |
| Saturated Fat | 15g | 75% |
| Cholesterol | 80mg | 27% |
| Sodium | 200mg | 8% |
| Total Carbohydrate | 50g | 17% |
| Dietary Fiber | 2g | 8% |
| Sugars | 40g | N/A |
| Protein | 5g | 10% |
Variations & Substitutions
- For a gluten-free version, use a gluten-free bundt cake.
- Use dairy-free ice cream and meringue (made with aquafaba) for a vegan version.
- Experiment with different ice cream flavors. Coffee, chocolate, or pistachio would all be delicious.
- Instead of a chocolate disc, try creating a sugar glass decoration in the shape of a planet or constellation.
- For a different flavor profile, add a drizzle of salted caramel or a sprinkle of chopped nuts before serving.
FAQs (Frequently Asked Questions)
Q: Can I make the Black Hole Baked Alaska ahead of time?
A: Yes, you can make the chocolate disc a day or two in advance. Assemble the entire Baked Alaska a few hours before serving, but no more than that, to maintain the ice cream’s consistency.
Q: What if I don’t have a torch?
A: You can broil the meringue in the oven for a few minutes until it’s golden brown. Watch it carefully to prevent burning!
Q: Can I use different types of chocolate for the disc?
A: Absolutely! Experiment with different colors and flavors to create your own unique galaxy design.
Q: Is it essential to use cream of tartar in the meringue?
A: While not strictly essential, cream of tartar helps stabilize the egg whites and gives the meringue a better texture and volume. It’s highly recommended for best results.
Q: Can I use a homemade cake instead of a store-bought one?
A: Of course! If you prefer a homemade cake, feel free to substitute it for the store-bought bundt cake. Make sure it’s fully cooled before assembling the Baked Alaska.
Final Thoughts
This Black Hole Baked Alaska is more than just a dessert; it’s an experience. The combination of textures, flavors, and visual appeal is sure to impress your guests. Don’t be intimidated by the seemingly complex steps – with a little patience and creativity, you can create a truly out-of-this-world treat. So, gather your ingredients, put on some space-themed music, and embark on this culinary adventure! I encourage you to try this recipe and share your own cosmic creations with me. Bon appétit, and may your desserts always be stellar!