
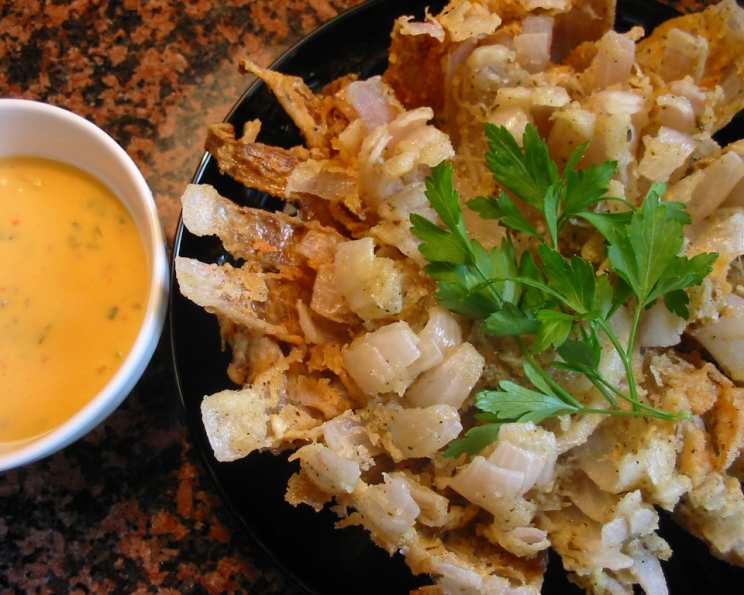
The Bloomin’ Onion: A Culinary Masterpiece
The first time I saw a Bloomin’ Onion, it was like witnessing a culinary magic trick. A golden, crispy blossom erupting from a plate, its petals beckoning with savory delight. It was at a bustling county fair, the air thick with the aroma of fried everything, but this was different. This was a showstopper, a shareable feast that made me feel like I was celebrating something special, even if it was just a Tuesday night at the fair. I was immediately taken by this marvel and knew I had to learn how to make one myself!
Recipe Overview
- Prep Time: 30 minutes
- Cook Time: 10 minutes
- Total Time: 40 minutes
- Servings: 4
- Yield: 1 onion
- Dietary Type: Not Gluten-Free
Ingredients
- 1 large red onion (3/4 pound or more)
- 1 egg
- 1 cup milk
- 1 cup flour
- 1 1/2 teaspoons salt
- 1 1/2 teaspoons cayenne pepper
- 1/2 teaspoon black pepper
- 1/4 teaspoon oregano
- Pinch of thyme
- Pinch of cumin
- Oil (for frying)
Dipping Sauce Options:
- Your favorite thousand island dressing (a milder choice)
Or, for a zesty kick:
- 1/2 cup mayonnaise
- 2 teaspoons ketchup
- 2 tablespoons creamed horseradish
- 1/4 teaspoon paprika
- 1/4 teaspoon salt
- Pinch of oregano
- Pinch of pepper
- Pinch of cayenne
Equipment Needed
- Large bowl
- Medium bowl
- Whisk
- Deep fryer or large pot
- Onion blossom cutter (optional)
- Paper towels
Instructions
-
Begin by preparing the wet dredge. In a large bowl, beat the egg and combine it with the milk. Ensure the mixture is well-combined and smooth. This is where your onion will take its first dip, so make sure the bowl is large enough to accommodate the whole onion.
-
Next, prepare the dry dredge. In a separate, medium-sized bowl, mix together the flour, salt, cayenne pepper, black pepper, oregano, thyme, and cumin. Whisk these ingredients together thoroughly to ensure even distribution of the spices, which is crucial for a consistent flavor in every bite.
-
Onion Prep: Peel the onion, and slice off about 1/2-1 inch off of both ends. This creates a stable base and ensures even cooking. Then, carefully remove a 1-inch core from the center of the onion.
-
Creating the Blossom: This is the most crucial step! Slice the onion with an onion blossom cutter, or if you don’t have one, carefully slice the onion into 16 equal vertical slices. It’s vital to avoid cutting all the way to the bottom; leave about 1/4 inch or more intact. This keeps the onion together while allowing it to bloom during frying.
-
Gently separate the “petals” of the onion to ensure that the batter coats each layer evenly. Be careful not to break them off completely.
-
Dredging Process: Now for the breading. First, dredge the onion in the egg mixture, making sure it’s fully coated. Then, transfer it to the flour mixture, ensuring all surfaces are covered. Shake off any excess flour.
-
Repeat the dredging process. Dip the onion in the egg mixture again, followed by another coating in the flour mixture. Again, remember to shake off any excess flour. This double coating ensures a crispy and flavorful crust.
-
Refrigeration Break: Place the dredged onion on a plate and allow it to rest in the refrigerator for 15 minutes. This helps the coating adhere better and prevents it from falling off during frying.
-
Heating the Oil: In a deep fryer or large pot, heat enough oil to fully cover the onion to 350ºF (175ºC). Use a thermometer to ensure accurate temperature control for best results. If you do not have a thermometer, drop a small amount of the flour mixture into the oil. If it sizzles and turns brown quickly, the oil is ready.
-
Frying: Carefully fry the onion right side up in the hot oil for approximately 10 minutes, or until it turns golden brown and crispy. Monitor the onion closely, turning it gently if needed, to ensure even cooking and prevent burning.
-
Draining and Serving: Once golden brown, remove the onion from the oil and place it on paper towels to drain excess oil. Serve immediately with your choice of dipping sauce.
Expert Tips & Tricks
- Spice it Up: Adjust the amount of cayenne pepper to control the heat level. For a smoky flavor, try adding a pinch of smoked paprika to the flour mixture.
- Perfect Blooming: If the onion isn’t blooming enough during frying, gently use a pair of tongs to coax the petals apart.
- Temperature is Key: Maintaining a consistent oil temperature is crucial for even cooking and a crispy crust.
- Make-Ahead Tip: You can prepare the onion up to the point of frying and store it in the refrigerator for a few hours. However, it’s best to fry it just before serving for optimal crispness.
- Avoid Soggy Onion: Ensure you shake off the excess flour during the dredging process. This prevents the formation of a thick, soggy layer of batter.
Serving & Storage Suggestions
Serve the Bloomin’ Onion immediately while it’s hot and crispy. Present it on a large platter with your chosen dipping sauce on the side. It’s best enjoyed fresh, but if you have leftovers, store them in an airtight container in the refrigerator. Reheat in a preheated oven at 350°F (175°C) for about 10-15 minutes to restore some of the crispness, though it won’t be quite as good as freshly fried. Leftovers are not recommended for freezing as the texture will suffer.
Nutritional Information
Please note that these values are estimates and may vary depending on specific ingredients and preparation methods.
| Nutrient | Amount per Serving | % Daily Value |
|---|---|---|
| Calories | 450 kcal | 23% |
| Total Fat | 25g | 38% |
| Saturated Fat | 5g | 25% |
| Cholesterol | 75mg | 25% |
| Sodium | 1500mg | 63% |
| Total Carbohydrate | 50g | 17% |
| Dietary Fiber | 4g | 16% |
| Sugars | 8g | – |
| Protein | 10g | 20% |
Variations & Substitutions
- Gluten-Free: Use a gluten-free flour blend instead of all-purpose flour.
- Spicier Bloom: Add a dash of hot sauce to the egg mixture for an extra kick.
- Different Dips: Experiment with various dipping sauces such as ranch dressing, blue cheese dressing, or a spicy aioli.
- Baked Version: While it won’t be as crispy, you can bake the onion at 400°F (200°C) for about 30-40 minutes for a healthier alternative. Lightly spray with oil before baking.
FAQs (Frequently Asked Questions)
Q: Why is it important to leave the bottom of the onion intact when slicing?
A: Leaving the bottom intact keeps the onion together, allowing it to bloom without falling apart during frying.
Q: Can I use a different type of onion?
A: While red onions are commonly used, you can also use yellow or white onions. The flavor may vary slightly.
Q: How do I keep the oil at a consistent temperature?
A: Use a deep-fry thermometer to monitor the oil temperature and adjust the heat as needed. Avoid overcrowding the fryer, as this can lower the oil temperature.
Q: What if my batter keeps falling off the onion?
A: Ensure the onion is dry before dredging, and that you’re shaking off excess flour between each coat. Refrigerating the dredged onion for 15 minutes also helps the batter adhere better.
Q: Can I prepare the dipping sauce ahead of time?
A: Absolutely! The dipping sauce can be made several hours or even a day in advance. Store it in the refrigerator until ready to serve.
Final Thoughts
The Bloomin’ Onion isn’t just an appetizer; it’s an experience. It’s the kind of dish that brings people together, sparking conversation and creating memories. While it may seem intimidating at first, with a little patience and these step-by-step instructions, you can recreate this iconic dish in your own kitchen. Don’t be afraid to experiment with different spices and dipping sauces to customize it to your taste. So go ahead, give it a try, and prepare to amaze your friends and family with this show-stopping culinary creation! And if you dare, pair this magnificent appetizer with a frosty mug of your favorite brew, you won’t regret it.