
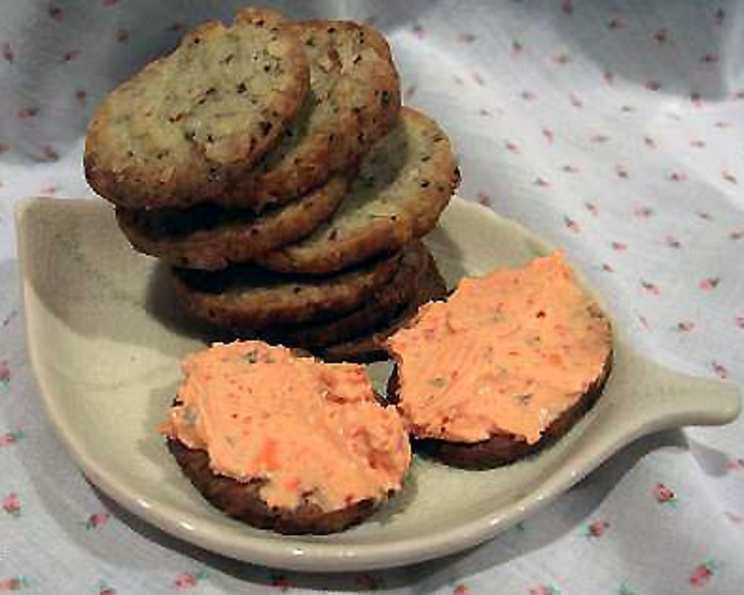
Blue Cheese-Walnut Bites: A Culinary Symphony of Flavor
I still remember the first time I tasted a sophisticated cheese and nut combination. It was at a holiday gathering, tucked away on a beautifully arranged platter amidst a flurry of festive treats. While everyone else gravitated toward the sugar cookies and gingerbread, I was drawn to these savory morsels – crumbly, intensely flavored, and utterly addictive. The bold tang of blue cheese perfectly harmonized with the earthy crunch of walnuts, leaving an unforgettable impression. These Blue Cheese-Walnut Bites are my humble attempt to recreate that initial spark of culinary delight, a small bite that holds a universe of flavor.
Recipe Overview
- Prep Time: 2 hours 15 minutes (includes chilling)
- Cook Time: 8-10 minutes
- Total Time: 2 hours 33 minutes
- Yields: Approximately 72 appetizer bites
- Dietary Type: Not Gluten-Free
Ingredients
- 1 1/2 cups all-purpose flour
- 2-3 teaspoons cracked black pepper (adjust to your preference)
- 8 ounces blue cheese (good quality, crumbled)
- 1/4 cup butter (unsalted, cold, cut into cubes, no substitutes)
- 1 cup chopped walnuts
- 2 egg yolks, slightly beaten
Equipment Needed
- Medium mixing bowl
- Pastry blender (or food processor)
- Plastic wrap
- Baking sheet (ungreased)
- Wire rack
Instructions
-
In a medium mixing bowl, combine the all-purpose flour and cracked black pepper. Make sure the pepper is evenly distributed for a consistent flavor.
-
Using a pastry blender (or a food processor pulsed briefly), cut in the blue cheese and butter until the mixture resembles coarse crumbs. The key here is to work quickly to keep the butter cold; this will ensure a flaky, tender bite. Don’t over-process if using a food processor.
-
Add the chopped walnuts and egg yolks to the mixture.
-
Stir until just combined. Be careful not to overmix the dough, as this can lead to tough bites. The dough should come together but still be slightly crumbly.
-
Form the mixture into a ball. Lightly knead until the mixture clings together. If the dough is too dry, add a teaspoon of ice water at a time until it comes together.
-
Divide the dough in half. Shape each half into a log, approximately 9 inches long. Aim for a uniform thickness to ensure even baking.
-
Wrap the logs tightly in plastic wrap.
-
Chill the logs in the refrigerator for at least 2 hours. This chilling step is crucial, as it allows the gluten to relax and the butter to solidify, preventing the bites from spreading too much during baking. You can even chill them overnight for convenience.
-
Preheat your oven to 425 degrees Fahrenheit (220 degrees Celsius). Ensure your oven is properly calibrated for consistent results.
-
Remove the chilled logs from the refrigerator. Using a sharp knife, cut each log into 1/4-inch thick slices. A thin, sharp knife will create clean cuts without crumbling the dough.
-
Place the slices 1 inch apart on an ungreased cookie sheet. This spacing allows for even air circulation and prevents the bites from sticking together.
-
Bake for 8 to 10 minutes, or until the bottoms and edges are golden brown. Keep a close eye on them, as they can burn quickly. The baking time may vary depending on your oven, so check them after 7 minutes.
-
Transfer the baked bites immediately to a wire rack to cool. This prevents them from continuing to cook on the hot baking sheet.
-
Serve warm or at room temperature.
-
To make ahead, store tightly covered in the refrigerator for up to 1 week.
Expert Tips & Tricks
- Use high-quality blue cheese: The flavor of the blue cheese is the star of this recipe, so choose a good quality one that you enjoy. Roquefort, Gorgonzola, or Stilton are all excellent choices.
- Toast the walnuts: Toasting the walnuts before adding them to the dough intensifies their flavor and adds a pleasant crunch. To toast, spread them on a baking sheet and bake at 350°F (175°C) for 5-7 minutes, or until fragrant. Let them cool completely before chopping.
- Keep the ingredients cold: Cold butter is essential for creating a flaky texture. If your kitchen is warm, consider chilling the flour and blue cheese as well.
- Don’t overmix the dough: Overmixing develops the gluten in the flour, resulting in tough bites. Mix only until the dough comes together.
- Freeze for later: These bites freeze exceptionally well. After baking and cooling completely, store them in an airtight container in the freezer for up to 3 months. Reheat in a preheated oven at 350°F (175°C) for 5-7 minutes, or until warmed through.
- Rolling in herbs: Consider finely chopping fresh rosemary or thyme and rolling the logs in the herbs before chilling. This adds another layer of flavor and visual appeal.
Serving & Storage Suggestions
These Blue Cheese-Walnut Bites are incredibly versatile and can be served in a variety of ways. Serve them warm or at room temperature as an appetizer at your next gathering. They pair wonderfully with a glass of red wine, such as Cabernet Sauvignon or Merlot. For a sophisticated presentation, arrange them on a platter with a selection of other cheeses, fruits, and crackers. You can also use them as a flavorful addition to a cheese board.
Leftovers can be stored in an airtight container at room temperature for up to 2 days, or in the refrigerator for up to 1 week. For longer storage, freeze them in an airtight container for up to 3 months. To reheat, bake in a preheated oven at 350°F (175°C) for 5-7 minutes, or until warmed through.
Nutritional Information
| Nutrient | Amount per Serving | % Daily Value (approximate) |
|---|---|---|
| Calories | 38.4 kcal | 2% |
| Calories from Fat | 24 g | 64% |
| Total Fat | 2.7 g | 4% |
| Saturated Fat | 1.1 g | 5% |
| Cholesterol | 9.3 mg | 3% |
| Sodium | 48.8 mg | 2% |
| Total Carbohydrate | 2.3 g | 0% |
| Dietary Fiber | 0.2 g | 0% |
| Sugars | 0.1 g | 0% |
| Protein | 1.3 g | 2% |
Note: Nutritional information is an estimate and can vary based on specific ingredients and portion sizes.
Variations & Substitutions
- Gluten-Free: Substitute the all-purpose flour with a gluten-free blend. You may need to add a bit more liquid to bring the dough together.
- Different Cheese: Experiment with different types of cheese, such as goat cheese or sharp cheddar.
- Different Nuts: Pecans or hazelnuts can be used in place of walnuts.
- Sweet and Savory: Add a tablespoon of honey or maple syrup to the dough for a touch of sweetness.
- Spice it up: Add a pinch of cayenne pepper or red pepper flakes for a spicy kick.
FAQs (Frequently Asked Questions)
Q: Can I make the dough ahead of time?
A: Absolutely! The dough can be made up to 2 days in advance and stored in the refrigerator, tightly wrapped in plastic wrap. This is a great way to break up the preparation process.
Q: Can I freeze the baked bites?
A: Yes, these bites freeze very well. After baking and cooling completely, store them in an airtight container in the freezer for up to 3 months.
Q: What if my dough is too dry?
A: If the dough is too dry and crumbly, add a teaspoon of ice water at a time until it comes together. Be careful not to add too much water, as this can make the dough sticky.
Q: Can I use salted butter instead of unsalted?
A: Yes, you can use salted butter, but you may want to reduce the amount of salt added to the dough. Taste the dough before baking and adjust the seasoning accordingly.
Q: What’s the best way to crumble the blue cheese?
A: The easiest way to crumble blue cheese is with your fingers. Simply break it apart into small pieces. Alternatively, you can use a fork or a cheese grater with large holes.
Final Thoughts
These Blue Cheese-Walnut Bites are more than just an appetizer; they’re a culinary experience. The combination of salty blue cheese, crunchy walnuts, and a hint of black pepper creates a symphony of flavors that will tantalize your taste buds. I encourage you to try this recipe and experiment with different variations to create your own signature bite. Whether you’re hosting a party or simply looking for a delicious snack, these bites are sure to impress. Don’t be afraid to share your creations and feedback – I’d love to hear about your culinary adventures! Consider serving these alongside a crisp Sauvignon Blanc or a robust Pinot Noir for a truly unforgettable pairing. Happy baking!