
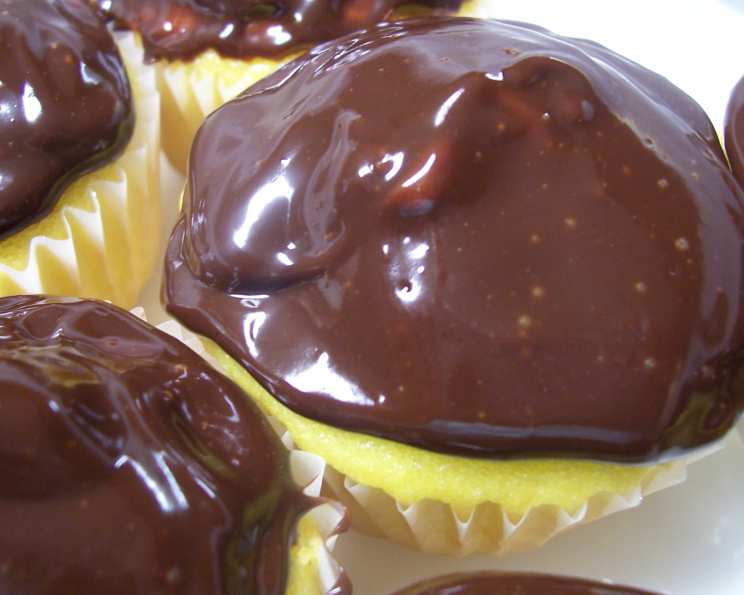
Boston Cream Cupcakes: A Decadent Delight
There’s something undeniably comforting about a Boston Cream Donut. That fluffy, yellow cake, the creamy vanilla filling, and the rich, glossy chocolate glaze… it’s a symphony of textures and flavors that instantly transports me back to childhood Saturday mornings spent with my dad. He’d always bring a box home, and I’d strategically choose the one with the most chocolate. These Boston Cream Cupcakes capture that same magic, but in an even more accessible and fun format – perfect for sharing (or not!).
Recipe Overview
- Prep Time: 20 minutes
- Cook Time: Varies based on cupcake recipe
- Total Time: At least 1 hour chilling time, plus baking time
- Servings: 20-24 cupcakes
- Yield: 20-24 cupcakes
- Dietary Type: Not specified, but can be modified to be gluten-free or dairy-free
Ingredients
- 20-24 yellow cupcakes (homemade from your favorite recipe)
- 2 cups prepared vanilla pudding (homemade from your favorite recipe or prepared from a mix)
- 1 tablespoon vanilla extract
- 1 cup heavy cream
- 1 (12 ounce) bag Ghirardelli semi-sweet chocolate chips (or other good quality brand)
Equipment Needed
- Piping bag or decorator’s gun with a large tip
- Saucepan
- Whisk
- Wax paper
- Covered container
Instructions
-
First, prepare your vanilla pudding. If using a mix, follow the instructions on the package. If making from scratch, prepare according to your recipe. Once the pudding is ready, stir in the vanilla extract and mix well. This intensifies the vanilla flavor, elevating the simple pudding into something truly special.
-
Load the vanilla pudding into a piping bag fitted with a large round tip, or a decorator’s gun with a nozzle large enough to inject the pudding. A wide opening is essential for achieving a satisfying burst of creaminess in each cupcake.
-
Carefully poke the tip of the piping bag or decorator’s gun into the center of each yellow cupcake. Gently inject about 1 tablespoon of vanilla pudding into the cupcake. It’s perfectly fine if a little bit of the pudding puffs out the top; this just indicates that you’ve reached the perfect filling level.
-
Once all the cupcakes have been injected with pudding, cover them and chill them in the refrigerator while you prepare the chocolate topping. Chilling them at this stage helps the pudding set slightly and prevents it from melting when the warm chocolate is added.
-
In a medium saucepan, heat the heavy cream over medium heat. Watch carefully; you want the cream to get just hot enough that tiny bubbles begin to form around the edges of the pan. Do not let it boil! Overheating the cream can cause the chocolate to seize later on.
-
As soon as the heavy cream reaches that stage of simmering, immediately remove the saucepan from the heat. Add the bag of semi-sweet chocolate chips to the hot cream.
-
Whisk the chocolate chips and heated cream together vigorously until the chocolate is completely melted and the mixture is smooth and glossy. The residual heat from the cream should be sufficient to melt the chocolate, but if not, you can gently return the pan to very low heat for a few seconds at a time, whisking constantly, until melted. Be careful not to overheat the chocolate.
-
Lay out a sheet of wax paper to provide a clean surface for the cupcakes to cool on after they’re glazed. Grab your slightly chilled, pudding-filled cupcakes.
-
Spoon some of the warm chocolate topping onto the center of a cupcake, covering the small opening where you injected the pudding. Add more topping around the edges to completely coat the top of the cupcake. Don’t be shy with the chocolate!
-
Carefully transfer the glazed cupcake onto the wax paper to cool and set.
-
Repeat the spooning and glazing process until all the cupcakes are covered with the chocolate topping.
-
Once all the cupcakes are glazed, place them in a covered container and chill them in the refrigerator for at least 1 hour. Chilling allows the chocolate topping to firm up, creating a delightful contrast with the soft cupcake and creamy filling. The chocolate will get firmer, but not completely hard.
-
You may have some extra chocolate topping. Don’t discard it! This decadent topping is delicious on ice cream, fruit, or even just eaten by the spoonful. Store any leftover topping in a covered container in the refrigerator for up to 1 week.
Expert Tips & Tricks
- For a more intense chocolate flavor, use dark chocolate chips instead of semi-sweet.
- If your chocolate topping becomes too thick, add a tablespoon of hot cream at a time, whisking until you reach the desired consistency.
- For a neater presentation, use a small offset spatula to smooth the chocolate topping over the cupcakes.
- To prevent the cupcake from getting soggy, avoid overfilling it with pudding.
- If you want to add a decorative touch, sprinkle the tops of the glazed cupcakes with chocolate shavings or sprinkles before the chocolate sets.
Serving & Storage Suggestions
These Boston Cream Cupcakes are best served chilled. Arrange them on a platter for an impressive presentation. They are perfect for parties, potlucks, or a special treat for yourself.
Store leftover cupcakes in a covered container in the refrigerator for up to 3 days. The chocolate topping will soften slightly over time, but the cupcakes will still be delicious.
These cupcakes are not recommended for freezing, as the pudding filling may change texture upon thawing.
Nutritional Information
| Nutrient | Amount per Serving | % Daily Value |
|---|---|---|
| Calories | 362.7 kcal | N/A |
| Calories from Fat | 209 g | 58% |
| Total Fat | 23.2 g | 35% |
| Saturated Fat | 13.9 g | 69% |
| Cholesterol | 19.4 mg | 6% |
| Sodium | 92.4 mg | 3% |
| Total Carbohydrate | 43.9 g | 14% |
| Dietary Fiber | 3.5 g | 14% |
| Sugars | 37.9 g | 151% |
| Protein | 3.5 g | 7% |
Variations & Substitutions
- Gluten-Free: Use your favorite gluten-free yellow cupcake recipe.
- Dairy-Free: Use dairy-free pudding (made from coconut milk or almond milk) and dairy-free chocolate chips. Substitute the heavy cream with full-fat coconut cream for the ganache.
- Different Flavors: Experiment with different flavored puddings, such as chocolate, butterscotch, or even pistachio.
- Espresso Boost: Add a teaspoon of instant espresso powder to the heavy cream when making the chocolate topping for a mocha twist.
FAQs (Frequently Asked Questions)
Q: Can I use store-bought cupcakes?
A: Absolutely! This recipe is a great way to elevate store-bought cupcakes. Just be sure they are plain yellow cupcakes.
Q: Can I make the pudding from scratch?
A: Yes, using homemade vanilla pudding will enhance the flavor even more. Just make sure it is cooled before injecting it into the cupcakes.
Q: The chocolate topping is too thick. What can I do?
A: Add a tablespoon of hot cream at a time, whisking until you reach the desired consistency.
Q: Can I make these cupcakes ahead of time?
A: Yes, you can make the cupcakes a day in advance and store them in an airtight container. Assemble the cupcakes with the pudding and chocolate topping a few hours before serving.
Q: How do I store leftover chocolate topping?
A: Store leftover topping in a covered container in the refrigerator for up to 1 week. Reheat gently in the microwave or in a saucepan over low heat before using.
Final Thoughts
These Boston Cream Cupcakes are a delightful twist on a classic dessert. They’re simple to make, incredibly delicious, and always a crowd-pleaser. So, gather your ingredients, preheat your oven (or grab those store-bought cupcakes!), and get ready to create a batch of these irresistible treats. Don’t be afraid to experiment with different flavors and toppings to make them your own. And please, share your creations and feedback – I can’t wait to hear how they turn out! Enjoy!