
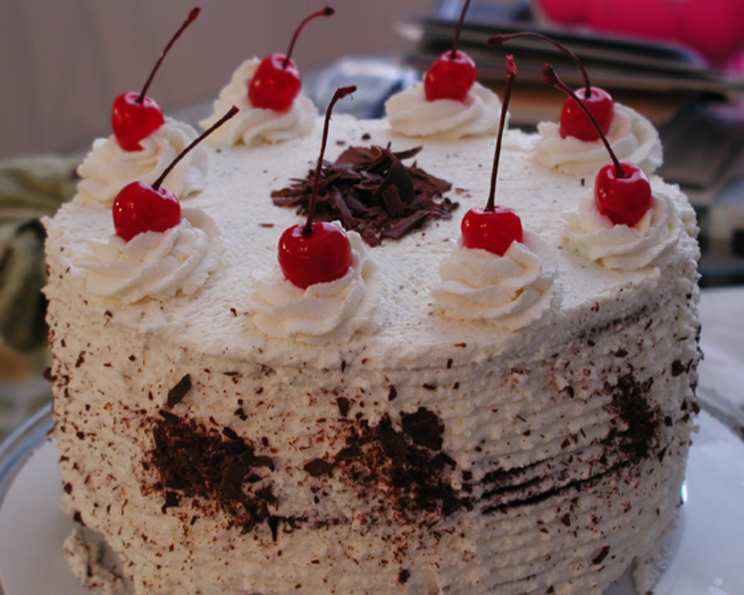
Box-Mix Black Forest Cake: An Effortless Indulgence
Black Forest cake. The name alone conjures up images of dense chocolate, sweet cherries, and fluffy whipped cream. While traditionally a complex bake, requiring multiple components and precise execution, my own introduction to this iconic dessert came in a surprisingly simple form. My grandmother, a woman who believed in the power of shortcuts without sacrificing flavor, presented her version at every family gathering. It wasn’t the most authentic, but it was always made with love—and a box of devil’s food cake mix. That first bite, the melding of chocolate, cherry, and cream, cemented Black Forest cake as a cornerstone of my dessert memories, and I’m thrilled to share this approachable take with you.
Recipe Overview
- Prep Time: 20 minutes
- Cook Time: According to cake mix directions
- Total Time: 1 hour + chilling time
- Servings: 12-16
- Yield: 1 cake
- Dietary Type: Not specified
Ingredients
- 1 (18 ounce) box devil’s food cake mix
- Eggs (or as called for by your cake mix)
- ⅓ cup oil (or as called for by your cake mix)
- 1 ⅓ cups water (or as called for by your cake mix)
- 1 (8 ounce) container whipped topping (Cool Whip)
- 1 tablespoon almond flavoring
- 2 tablespoons vanilla
- 1 (5 1/8 ounce) package instant vanilla pudding
- 1 (20 ounce) can cherry pie filling
- 1 ounce chocolate sprinkles
- Maraschino cherries, for garnish
Equipment Needed
- 9″ x 13″ x 2″ baking pan
- Mixing bowls
- Electric mixer
- Fork
- Spatula or knife
Instructions
-
Preheat your oven according to the instructions on the devil’s food cake mix box. Prepare the cake batter by combining the cake mix, eggs, oil, and water in a large mixing bowl. Beat with an electric mixer until well combined.
-
Pour the batter into a greased and floured 9″ x 13″ x 2″ baking pan. Bake according to the cake mix directions. Baking times can vary, so check for doneness by inserting a toothpick into the center of the cake. If the toothpick comes out clean or with just a few moist crumbs, the cake is done.
-
While the cake is baking, prepare the cherry pie filling. In a bowl, combine the entire can of cherry pie filling with the almond flavoring. Stir well to ensure the almond flavoring is evenly distributed throughout the cherries.
-
As the cake bakes, prepare the vanilla pudding. In a separate bowl, prepare the instant vanilla pudding according to the package directions. Add the vanilla flavoring (2 tablespoons) to the pudding while mixing. This intensifies the vanilla flavor and complements the other components of the cake.
-
Once the cake is removed from the oven, allow it to cool slightly, but while it is still warm, use a fork to poke holes all over the top surface. This will allow the cherry pie filling to seep into the cake, adding moisture and flavor.
-
Spread the cherry pie filling evenly over the warm, poked cake. Ensure the filling covers the entire surface for a uniform distribution of cherry goodness.
-
In the bowl with the prepared vanilla pudding, gently fold in the whipped topping (Cool Whip) until fully combined. Be careful not to overmix, as this can deflate the whipped topping.
-
Carefully spread the pudding and whipped topping mixture over the cherry pie filling layer. Use a spatula or knife to create a smooth, even surface, completely covering the cherries.
-
Decorate the cake by sprinkling chocolate sprinkles over the pudding and whipped topping layer. Arrange maraschino cherries on top for an elegant finishing touch. Get creative with your arrangement!
-
Cover the cake with plastic wrap or foil and refrigerate for at least two hours, or preferably overnight, to allow the flavors to meld and the cake to chill thoroughly. This chilling time is crucial for the cake’s texture and flavor.
Expert Tips & Tricks
- Cake Mix Upgrade: For a richer chocolate flavor, substitute coffee for water when preparing the cake mix. The coffee enhances the chocolate without making the cake taste like coffee.
- Cherry Boost: If you want an even more intense cherry flavor, consider adding a handful of chopped fresh or frozen cherries to the cherry pie filling.
- Even Layers: Ensure the cake bakes evenly by using oven thermometers. Rotate the baking pan halfway through the baking process. This is especially important if your oven has hot spots.
- Whipped Cream Stability: If you’re concerned about the whipped topping deflating, stabilize it with a teaspoon of powdered sugar or cornstarch before folding it into the pudding.
- Make-Ahead Marvel: This cake is perfect for making ahead of time. In fact, it tastes even better after a day or two in the refrigerator, as the flavors have more time to meld together.
Serving & Storage Suggestions
Serve the Black Forest cake chilled, straight from the refrigerator. Cut into squares or slices and serve on individual plates. A dollop of extra whipped cream or a fresh cherry makes a lovely garnish.
Store leftover cake covered in the refrigerator for up to 3-4 days. The cake can also be frozen for longer storage. Wrap individual slices tightly in plastic wrap and then place them in a freezer-safe container. Frozen cake can last for up to 2 months. Thaw in the refrigerator overnight before serving. Because of the whipped topping, it’s best to avoid leaving the cake at room temperature for extended periods.
Nutritional Information
| Nutrient | Amount per Serving | % Daily Value |
|---|---|---|
| Calories | 414 kcal | N/A |
| Calories from Fat | N/A | N/A |
| Total Fat | 18.5 g | 28% |
| Saturated Fat | 5.4 g | 26% |
| Cholesterol | 68.1 mg | 22% |
| Sodium | 577.9 mg | 24% |
| Total Carbohydrate | 58.4 g | 19% |
| Dietary Fiber | 1.3 g | 5% |
| Sugars | 29.5 g | N/A |
| Protein | 4.9 g | 9% |
Nutritional information is an estimate and can vary based on specific ingredients and serving sizes.
Variations & Substitutions
- Gluten-Free: Use a gluten-free devil’s food cake mix to make this cake gluten-free.
- Dairy-Free: Substitute the Cool Whip with a dairy-free whipped topping alternative and use a dairy-free instant vanilla pudding mix.
- Boozy Cherry: Soak the maraschino cherries in Kirsch (cherry liqueur) for an extra layer of flavor. You can also add a tablespoon of Kirsch to the cherry pie filling.
- Chocolate Shavings: Instead of sprinkles, top the cake with chocolate shavings for a more sophisticated look. Use a vegetable peeler to create shavings from a bar of dark chocolate.
- Seasonal Fruit: Experiment with different fruit fillings depending on the season. Try blueberry pie filling in the summer or apple pie filling in the fall.
FAQs (Frequently Asked Questions)
Q: Can I use a different size pan?
A: While a 9″ x 13″ pan is recommended, you could use two 9-inch round cake pans. Adjust the baking time accordingly.
Q: Can I make this cake without Cool Whip?
A: Yes, you can use homemade whipped cream instead. Make sure to stabilize it with a bit of powdered sugar to help it hold its shape.
Q: How do I prevent the cake from sticking to the pan?
A: Grease and flour the pan thoroughly before pouring in the batter. Alternatively, use baking spray with flour.
Q: Can I freeze the cake?
A: Yes, this cake freezes well. Wrap it tightly in plastic wrap and then in foil. Thaw overnight in the refrigerator.
Q: Why is it important to poke holes in the cake?
A: Poking holes allows the cherry pie filling to soak into the cake, adding moisture and flavor. This step is crucial for achieving the classic Black Forest cake texture.
Final Thoughts
This Box-Mix Black Forest Cake is a testament to the fact that deliciousness doesn’t always require hours in the kitchen. It’s a simple, approachable dessert that delivers all the comforting flavors of the classic cake without the fuss. Whether you’re a seasoned baker or a beginner, I encourage you to try this recipe and make it your own. Experiment with variations, share it with loved ones, and savor every bite. Happy baking!