
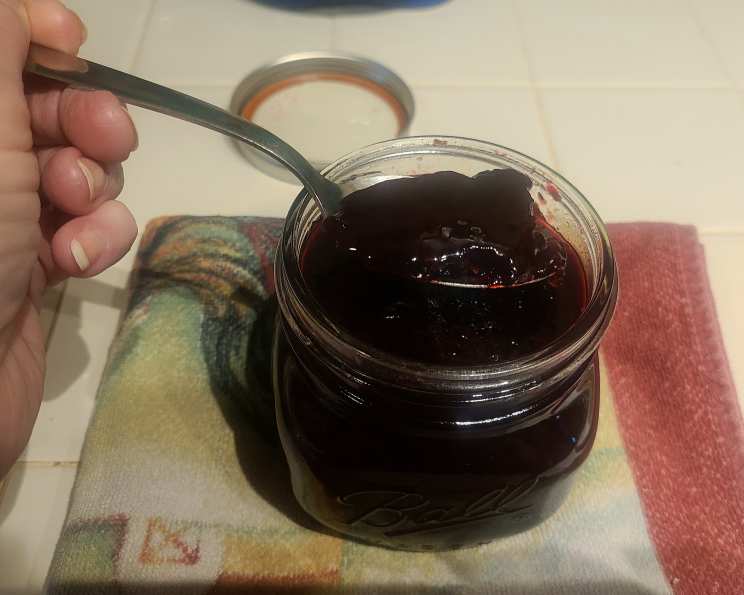
Luscious Homemade Boysenberry Jam: A Taste of Summer Preserved
The scent of simmering berries always brings me back to my grandmother’s kitchen. I can almost feel the warmth of the sun-drenched fruit warming on her counter, ready to be transformed. Of all the jams she made, boysenberry was my favorite – a deep, complex flavor that tasted like sunshine and endless summer days. Every spoonful spread on toast or dolloped on yogurt was a little piece of her love, a memory I cherish and now recreate in my own kitchen. This recipe is my ode to those days, and I hope it brings a bit of that magic to you.
Recipe Overview
- Prep Time: 30 minutes
- Cook Time: 30 minutes
- Total Time: 1 hour
- Yields: Approximately 10 cups
- Dietary Type: Vegetarian, Gluten-Free
Ingredients
- 6 lbs boysenberries
- 4 1/2 lbs sugar
- 1 lemon, juice of
- 1 teaspoon butter
Equipment Needed
- Large, heavy-bottomed pot
- Colander
- Wooden spoon or heat-resistant spatula
- Sterilized jars and lids
- Cold plate for testing set
Instructions
-
Begin by gently washing the boysenberries in a colander to remove any dirt, leaves, or stems. Handle them with care, as they are delicate. Drain well.
-
Pour the drained berries into a large, heavy-bottomed pot. The heavy bottom is essential to prevent scorching during the long cooking process.
-
Heat the berries over high heat, bringing them to a vigorous boil.
-
Once the berries are boiling rapidly, gradually add the sugar in a slow, steady stream. This is important to maintain the boil and prevent the temperature from dropping too drastically. Pouring all the sugar in at once can cause the berries to stop boiling, which will affect the jam’s final texture and setting.
-
Continue boiling the berry and sugar mixture on the highest heat setting for 30 minutes, stirring constantly with a wooden spoon or heat-resistant spatula. Constant stirring is crucial. The jam will be prone to sticking and burning to the bottom of the pot if left unattended. Make sure to scrape the bottom of the pot regularly to prevent this.
-
After the 30-minute hard boil, the jam should appear noticeably thicker. It’s time to test for set.
-
To test for set, place a small plate in the freezer when you begin the cooking process. This will ensure it’s cold enough when you need it. Spoon a teaspoonful of the hot jam onto the cold plate.
-
Return the plate to the freezer for 1-2 minutes. Then, push the jam gently with your finger. If it wrinkles slightly, it’s ready. If it remains runny, continue to boil the jam for a few more minutes and test again. Remember that the jam will continue to thicken as it cools.
-
Once the jam has reached the desired set, remove it from the heat.
-
Stir in the lemon juice and butter. The lemon juice aids in the setting process by increasing the acidity, ensuring a firm and stable jam. The butter helps to dissolve any foam that may have formed on the surface during boiling, resulting in a clearer jam.
-
Allow the jam to cool for about 10 minutes before ladling it into hot, sterilized jars. This resting period helps to prevent the fruit from floating to the top of the jars.
-
Carefully ladle the hot jam into the prepared jars, leaving about ¼ inch of headspace at the top.
-
Wipe the rims of the jars with a clean, damp cloth to remove any spills or drips.
-
Place the lids on the jars and screw on the bands until they are fingertip tight.
-
At this point, you can choose to process the jars in a hot water bath for long-term storage, following proper canning procedures. Or, you can proceed directly to cooling and storing the jam in the refrigerator.
-
Let the filled jars cool completely, undisturbed, on a kitchen towel. As they cool, you should hear a popping sound, indicating that the lids have sealed properly.
Expert Tips & Tricks
- Use a heavy-bottomed pot: This is crucial to prevent the jam from scorching and burning.
- Stir constantly: Don’t skip this step! Consistent stirring ensures even cooking and prevents sticking.
- Be patient: Achieving the correct set takes time and patience. Don’t rush the process.
- Adjust sugar levels: While this recipe follows the traditional high-sugar method, you can experiment with reducing the sugar slightly. However, be aware that this may affect the jam’s setting ability and shelf life.
- Lemon power: Don’t skip the lemon juice; it helps with pectin and also balances the sweetness.
- Make smaller batches: If you’re new to jam making, start with a smaller batch to gain confidence. This will also make it easier to control the cooking process.
Serving & Storage Suggestions
This homemade boysenberry jam is incredibly versatile.
- Serving: Spread it on toast, scones, or biscuits. Dollop it on yogurt, oatmeal, or ice cream. Use it as a filling for cakes, pastries, or thumbprint cookies. It also pairs beautifully with cheese and charcuterie boards.
- Storage: If you’ve processed the jars in a hot water bath, they can be stored in a cool, dark place for up to a year. Once opened, store in the refrigerator for up to two weeks. If you haven’t processed the jars, store them in the refrigerator immediately after cooling. They will last for several weeks. You can also freeze jam for longer storage.
Nutritional Information
Note: Nutritional information is an estimate and may vary based on specific ingredients and serving sizes.
| Nutrient | Amount per Serving | % Daily Value |
|---|---|---|
| Calories | 234 kcal | 12% |
| Total Fat | 0.1 g | 0% |
| Saturated Fat | 0.03 g | 0% |
| Cholesterol | 0 mg | 0% |
| Sodium | 0.6 mg | 0% |
| Total Carbohydrate | 59.4 g | 20% |
| Dietary Fiber | 1.8 g | 7% |
| Sugars | 55.7 g | N/A |
| Protein | 0.4 g | 1% |
Variations & Substitutions
- Mixed Berry Jam: Substitute some of the boysenberries with raspberries, blackberries, or strawberries for a more complex flavor profile.
- Spiced Boysenberry Jam: Add a pinch of ground cinnamon, nutmeg, or cloves to the jam during the cooking process for a warm and comforting flavor.
- Low-Sugar Jam: Use a sugar substitute designed for jam making, but be sure to follow the product’s instructions carefully, as they often require added pectin.
- Boysenberry Butter: For a creamier spread, blend the cooked jam with softened butter after it has cooled slightly.
- Citrus Zest: Add the zest of a lemon or orange along with the juice for an extra layer of flavor.
FAQs (Frequently Asked Questions)
Q: Why is my jam not setting?
A: Several factors can cause jam not to set, including insufficient cooking time, not enough sugar, or a lack of acidity. Make sure to boil the jam for the full recommended time and test for set using the cold plate method. Adding lemon juice ensures adequate acidity.
Q: How do I sterilize my jars?
A: Wash jars and lids in hot, soapy water. Rinse well. Place jars on a baking sheet and heat in a 200°F (93°C) oven for at least 10 minutes. Simmer lids in hot (not boiling) water to soften the sealing compound.
Q: Can I use frozen boysenberries?
A: Yes, you can use frozen boysenberries. However, they may release more liquid during cooking, so you may need to extend the cooking time to achieve the desired set.
Q: How long will the jam last?
A: Properly processed jam can last up to a year in a cool, dark place. Once opened, store in the refrigerator for up to two weeks. Unprocessed jam should be stored in the refrigerator immediately and will last for several weeks.
Q: What does the butter do in the recipe?
A: The butter helps to dissolve any foam that may form on the surface of the jam during boiling, resulting in a clearer, more visually appealing finished product.
Final Thoughts
Creating this boysenberry jam is more than just following a recipe; it’s a chance to capture the essence of summer and preserve it for enjoyment throughout the year. The vibrant color, the intense flavor, and the memories it evokes make it a truly special treat. I encourage you to give this recipe a try, experiment with different variations, and share your homemade jam with friends and family. It’s a gift that will surely be appreciated. Enjoy!