
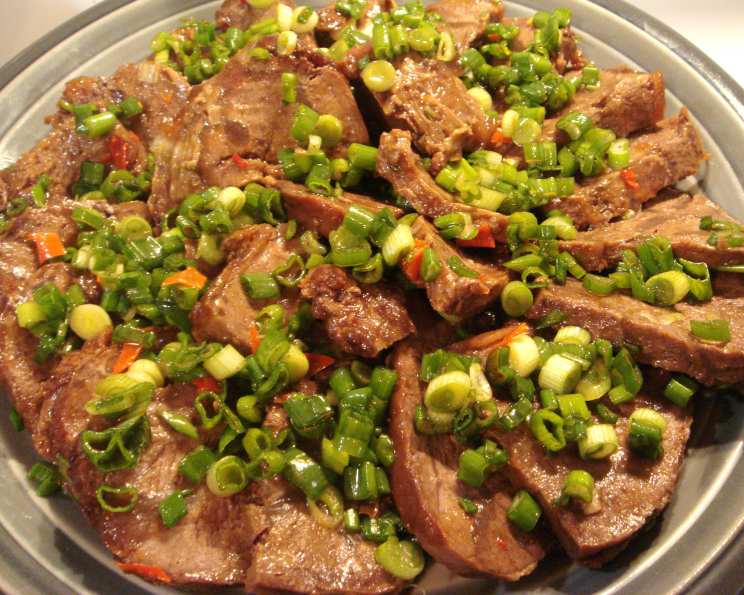
Braised Beef Shank: A Taste of Home
The aroma of braised beef shank always transports me back to my grandmother’s kitchen. I can almost see her now, standing by the stove, carefully tending to the simmering pot. The rich, savory scent would fill the entire house, a promise of the comforting and deeply flavorful meal to come. Her secret, she always said, was patience and love – letting the beef slowly transform into something truly special. To this day, that unmistakable smell is synonymous with family, warmth, and the simple joy of sharing a delicious meal together.
Recipe Overview
- Prep Time: 10 minutes
- Cook Time: 50 minutes
- Total Time: 60 minutes
- Servings: 5-6
- Yield: 5-6 servings
- Dietary Type: Varies (see notes)
Ingredients
- 20 cups water
- 2 lbs beef shank
- ¼ cup aged soy sauce
- 5 small red chili peppers, finely chopped (remove seeds if prefer)
- 1 cup green onion, chopped
- ½ cup soy sauce glaze (to taste)
- 4 tablespoons sesame seed oil
Equipment Needed
- Large soup pot
- Tongs
Instructions
-
Begin by bringing 10 cups of water to a rolling boil in a large pot.
-
Carefully add the beef shank to the boiling water and bring the water back to a boil.
-
Once boiling again, cook the beef shank for exactly 1 minute. This blanching process helps to remove any impurities and ensures a cleaner, more flavorful braise.
-
Drain the beef shank thoroughly and set it aside. Discard the water.
-
In a large soup pot, combine the remaining 10 cups of water and the ¼ cup of aged soy sauce. Stir to combine.
-
Add the blanched beef shank to the pot containing the soy sauce mixture. Bring the mixture to a boil over high heat.
-
Once boiling, reduce the heat to medium. The liquid should be simmering gently, not bubbling vigorously.
-
Cover the pot tightly with a lid. This is crucial for maintaining consistent temperature and moisture during the braising process.
-
Braise the beef shank for 40 minutes, or until it is tender. Use a fork to test for doneness; the beef should yield easily when pierced.
-
During the braising process, at the 20-minute mark, carefully turn the beef shank over in the pot using tongs. This ensures even cooking and flavor distribution.
-
Once the beef shank is tender, remove the pot from the heat and allow the beef to cool slightly in the braising liquid. This helps retain moisture and prevents the beef from drying out.
-
Once cooled enough to handle, remove the beef shank from the pot and slice it against the grain into thin pieces. This will maximize tenderness.
-
In a separate bowl, combine the chopped green onion, finely chopped red chili peppers (remember to remove the seeds if you prefer less heat), soy sauce glaze (use to taste, starting with a smaller amount and adding more as needed), and sesame seed oil.
-
Add the sliced beef shank to the bowl with the sauce mixture and toss gently to coat evenly.
-
Serve immediately and enjoy!
Expert Tips & Tricks
- Achieving Maximum Tenderness: The key to a perfectly braised beef shank is low and slow cooking. Resist the urge to rush the process. The longer it braises, the more tender it will become. If, after 40 minutes, the beef is still tough, continue braising in 10-minute increments, checking for tenderness each time.
- Flavor Enhancement: For a deeper, richer flavor, consider searing the beef shank in a hot pan with a little oil before adding it to the braising liquid. This creates a beautiful crust and adds complexity to the dish.
- Adjusting the Spice Level: The amount of red chili peppers can be adjusted to suit your personal preference. For a milder flavor, use fewer peppers or remove the seeds entirely. For a spicier dish, use more peppers or leave the seeds in.
- Make-Ahead Preparation: This dish can be made a day or two in advance. The flavors will actually meld and improve over time. Simply store the braised beef shank in the braising liquid in the refrigerator. Reheat gently before slicing and serving.
Serving & Storage Suggestions
Serve the braised beef shank immediately while it’s warm. It pairs beautifully with steamed rice, noodles, or a simple green salad. Garnish with extra chopped green onions and a sprinkle of sesame seeds for an appealing presentation.
Leftovers can be stored in an airtight container in the refrigerator for up to 3-4 days. Reheat gently in a saucepan over low heat, adding a little extra water or broth if needed to prevent drying out. You can also reheat it in the microwave, but be careful not to overcook it.
While not ideal, you can freeze the braised beef shank for longer storage. Place it in a freezer-safe container or bag, removing as much air as possible. It can be frozen for up to 2-3 months. Thaw it overnight in the refrigerator before reheating.
Nutritional Information
| Nutrient | Amount per Serving | % Daily Value |
|---|---|---|
| Calories | 361.5 kcal | N/A |
| Calories from Fat | 163 g | 45% |
| Total Fat | 18.1 g | 27% |
| Saturated Fat | 3.9 g | 19% |
| Cholesterol | 70.8 mg | 23% |
| Sodium | 954.4 mg | 39% |
| Total Carbohydrate | 6.2 g | 2% |
| Dietary Fiber | 1.3 g | 5% |
| Sugars | 3.1 g | 12% |
| Protein | 42.2 g | 84% |
Variations & Substitutions
- Gluten-Free: To ensure the dish is gluten-free, double-check that the soy sauce glaze and aged soy sauce are certified gluten-free. Tamari is a good gluten-free substitute for soy sauce.
- Lower Sodium: Use low-sodium soy sauce to reduce the sodium content of the dish.
- Vegetarian Adaptations: While this recipe is centered around beef, you can adapt the braising technique for hearty vegetables like mushrooms, eggplant, or tofu for a vegetarian version.
- Spice Variations: Experiment with different types of chili peppers or add a pinch of red pepper flakes for extra heat. You can also add other spices like ginger, garlic, or star anise to the braising liquid for a more complex flavor profile.
FAQs (Frequently Asked Questions)
Q: How do I know when the beef shank is done?
A: The beef shank is done when it is fork-tender and easily pulls apart. If it is still tough after 40 minutes of braising, continue cooking in 10-minute increments until it reaches the desired tenderness.
Q: Can I use a different cut of beef?
A: While beef shank is the ideal cut for this recipe, you can use other tough cuts of beef like chuck roast or short ribs as a substitute. The cooking time may need to be adjusted depending on the cut.
Q: Can I make this in a slow cooker?
A: Yes, you can adapt this recipe for a slow cooker. Sear the beef shank first, then combine all the ingredients in the slow cooker and cook on low for 6-8 hours, or until the beef is tender.
Q: What’s the best way to slice the beef shank?
A: It’s crucial to slice the beef shank against the grain to maximize tenderness. Look for the direction of the muscle fibers and slice perpendicular to them.
Q: Can I use regular soy sauce instead of aged soy sauce?
A: While you can use regular soy sauce, aged soy sauce has a richer, more complex flavor that enhances the dish. If using regular soy sauce, you may want to add a touch of molasses or brown sugar to deepen the flavor.
Final Thoughts
Braised beef shank is more than just a recipe; it’s an experience. The slow braising process transforms a humble cut of beef into a tender, flavorful masterpiece. It’s a dish that’s perfect for a cozy weeknight dinner or a special occasion. Gather your ingredients, embrace the process, and prepare to be transported by the comforting aroma and unforgettable taste of this classic dish. Don’t hesitate to experiment with variations and adjustments to make it your own. And most importantly, enjoy the process and share the love with your family and friends. Bon appétit!