
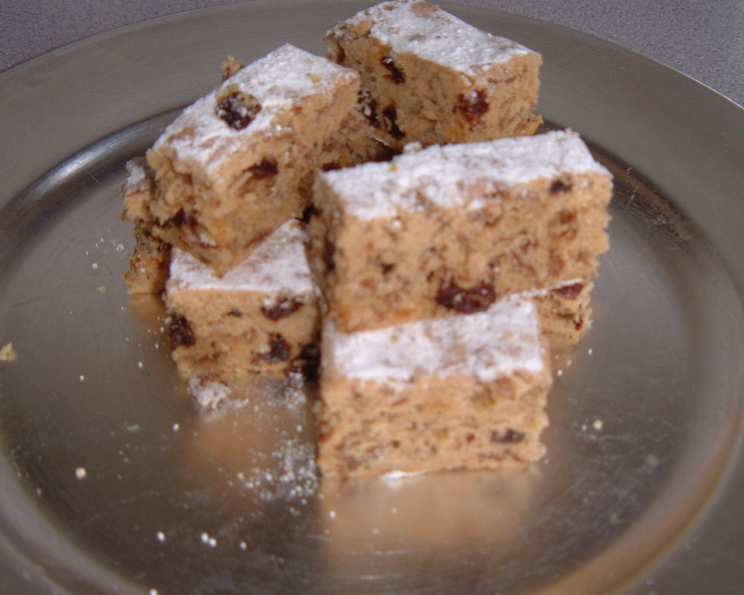
Bran Squares: A Taste of Nostalgia
My grandma, a woman who could coax flavor out of thin air, always had a knack for baking. While her pies and cakes were legendary, it was her unassuming bran squares that truly stole my heart. They weren’t flashy or fancy, but their comforting, slightly chewy texture and subtle sweetness were the perfect afternoon treat, especially paired with a steaming mug of tea. I can still picture her pulling a tray of these golden squares from the oven, the warm, inviting aroma filling her cozy kitchen. It’s a flavor I’ve been chasing ever since, and this recipe is a beautiful recreation of that treasured memory.
Recipe Overview
- Prep Time: 15 minutes
- Cook Time: 25 minutes
- Total Time: 40 minutes
- Servings: 12
- Yield: 1 9×13 inch pan
- Dietary Type: Vegetarian
Ingredients
- 1 cup butter, softened
- 2 cups brown sugar, packed
- 4 large eggs, beaten
- 2 teaspoons vanilla extract
- ½ teaspoon salt
- 2 cups bran flakes cereal
- 2 cups all-purpose flour
- 4 tablespoons confectioners’ sugar
- Raisins, to taste (optional)
Equipment Needed
- 9×13 inch baking pan
- Mixing bowl
- Electric mixer or whisk
- Measuring cups and spoons
Instructions
- Preheat your oven to 350 degrees Fahrenheit (175 degrees Celsius). Grease a 9×13 inch baking pan thoroughly. This is crucial to prevent the squares from sticking.
- In a large mixing bowl, cream together the softened butter and brown sugar until the mixture is light and fluffy. This step is vital for creating a tender final product. Use an electric mixer for best results, but a sturdy whisk and some elbow grease will also do the trick.
- Add the beaten eggs to the butter and sugar mixture and beat well to fully incorporate. Make sure each egg is fully blended before adding the next.
- Stir in the vanilla extract and salt. The vanilla adds depth of flavor, while the salt balances the sweetness.
- Slightly crush the bran flakes. You don’t want them completely pulverized, just broken down a bit. This will help them bind with the other ingredients. Add the crushed bran flakes and the flour to the wet ingredients.
- Add raisins to your liking, if desired. Consider other dried fruits as well, like chopped dates or cranberries.
- Fold the ingredients together gently until just combined. Be careful not to overmix the batter, as this can result in tough squares. A few streaks of flour are okay.
- Spread the batter evenly into the prepared 9×13 inch baking pan. Ensure the batter reaches all corners of the pan for even baking.
- Bake at 350 degrees Fahrenheit (175 degrees Celsius) for 25 minutes, or until the squares are set. To test for doneness, insert a toothpick into the center of the pan. If it comes out clean or with a few moist crumbs, the squares are ready. If the toothpick is wet with batter, bake for a few more minutes and check again.
- Remove the pan from the oven and let the squares cool completely in the pan before cutting. This allows them to set properly and prevents crumbling.
- Once cooled, dust the top of the squares generously with confectioners’ sugar. This adds a touch of sweetness and creates a beautiful visual appeal.
- Cut the bran squares into even pieces and serve. Enjoy!
Expert Tips & Tricks
- For a richer flavor, use brown butter instead of regular softened butter. Brown the butter in a saucepan over medium heat until it develops a nutty aroma and the milk solids turn golden brown. Let it cool slightly before using.
- If you prefer a chewier texture, add a tablespoon or two of molasses to the batter.
- To prevent the squares from sticking to the pan, line it with parchment paper before greasing. This makes removal and cleanup a breeze.
- If the top of the squares starts to brown too quickly during baking, tent the pan loosely with aluminum foil.
- For extra flavor, toast the bran flakes in a dry skillet over medium heat for a few minutes before adding them to the batter. This will enhance their nutty flavor.
Serving & Storage Suggestions
These bran squares are delicious served warm or at room temperature. They’re perfect as a snack, a dessert, or even a quick breakfast. Serve them with a glass of milk, a cup of coffee, or a scoop of vanilla ice cream.
Store leftover bran squares in an airtight container at room temperature for up to 3 days. For longer storage, refrigerate them for up to a week. You can also freeze them for up to 2 months. To freeze, wrap the squares individually in plastic wrap and then place them in a freezer-safe bag or container. Thaw them at room temperature before serving. You can also gently reheat them in a microwave or oven.
Nutritional Information
| Nutrient | Amount per Serving | % Daily Value |
|---|---|---|
| Calories | 320 kcal | 16% |
| Total Fat | 15g | 23% |
| Saturated Fat | 9g | 45% |
| Cholesterol | 75mg | 25% |
| Sodium | 150mg | 6% |
| Total Carbohydrate | 45g | 15% |
| Dietary Fiber | 2g | 8% |
| Sugars | 25g | N/A |
| Protein | 4g | 8% |
Note: Nutritional information is an estimate and may vary based on specific ingredients and portion sizes.
Variations & Substitutions
- Gluten-Free: Use a gluten-free flour blend in place of the all-purpose flour. Be sure to choose a blend that is designed for baking and contains xanthan gum.
- Dairy-Free: Substitute the butter with a dairy-free butter alternative or coconut oil.
- Nutty: Add a handful of chopped walnuts, pecans, or almonds to the batter for added crunch and flavor.
- Spiced: Add a teaspoon of cinnamon, nutmeg, or allspice to the batter for a warm and comforting flavor.
- Fruity: Experiment with different dried fruits, such as cranberries, dates, apricots, or cherries. You can also add fresh berries to the batter, but be aware that they may make the squares more moist.
- Lower Sugar: Reduce the amount of brown sugar by 1/4 to 1/2 cup or substitute with a sugar alternative like erythritol or stevia.
FAQs (Frequently Asked Questions)
Q: Can I use a different type of cereal instead of bran flakes?
A: While bran flakes provide the characteristic flavor and texture, you could experiment with other high-fiber cereals like shredded wheat or puffed wheat. Keep in mind that the taste and texture of the squares will be different.
Q: How do I prevent the squares from being too dry?
A: Be sure to measure the flour accurately and avoid overbaking the squares. Adding a tablespoon of applesauce or mashed banana can also help to keep them moist.
Q: Can I make these ahead of time?
A: Yes, these squares can be made a day or two in advance. Store them in an airtight container at room temperature.
Q: What is the best way to cut the squares neatly?
A: Let the squares cool completely before cutting. Use a sharp knife and wipe it clean between each cut. You can also use a pizza cutter for a clean, even cut.
Q: Can I freeze these bran squares?
A: Absolutely! Allow the squares to cool completely, then wrap them individually in plastic wrap and place them in a freezer-safe bag or container. They can be frozen for up to 2 months.
Final Thoughts
These bran squares are more than just a recipe; they’re a connection to the past, a reminder of simple pleasures, and a testament to the power of home baking. I encourage you to try this recipe and create your own memories with these comforting treats. Feel free to adapt it to your own taste preferences and share your creations with loved ones. Whether you enjoy them with a cup of tea, a glass of milk, or simply on their own, I hope these squares bring you as much joy as they’ve brought me. Don’t hesitate to experiment and make this recipe your own. After all, the best recipes are the ones that are shared and adapted, becoming part of a family’s culinary legacy. Happy baking!