
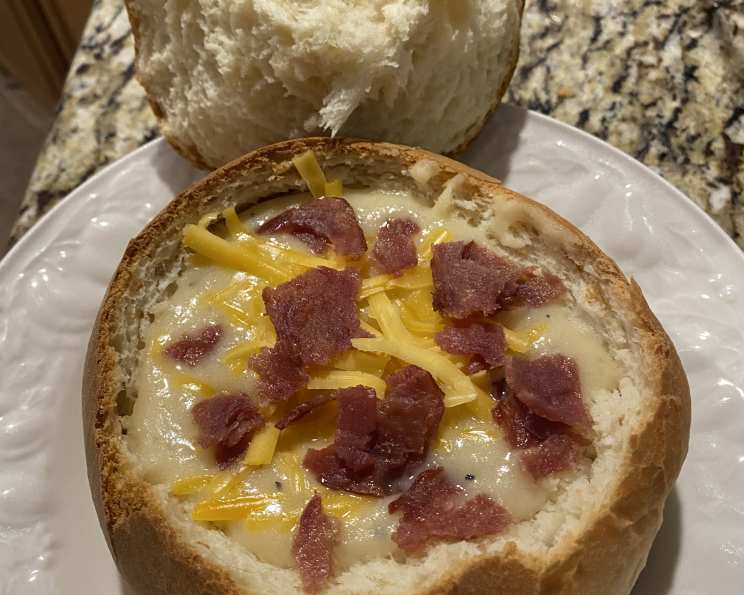
Bread Bowls Made Easy: A Bread Machine Recipe
The aroma of freshly baked bread has always been a trigger for my fondest childhood memories. I remember my grandmother, her hands dusted with flour, pulling loaves of bread from her ancient oven. The crust, a perfect golden brown, yielded to a soft, pillowy interior. She’d often scoop out the inside and fill the warm, crusty bowl with her hearty vegetable soup. The warmth that radiated from the bowl into my hands was only surpassed by the comfort of her love and the delicious soup. Now, with the help of a bread machine, I can recreate that experience in my own kitchen, filling these delightful homemade bread bowls with my own variations of heartwarming soups and stews.
Recipe Overview
- Prep Time: 20 minutes
- Cook Time: 20-25 minutes
- Total Time: 2 hours 20 minutes (includes rising time)
- Servings: 4
- Yield: 4 Bowls
- Dietary Type: Vegetarian
Ingredients
- 1/2 cup warm water (110-115 degrees F)
- 1/2 cup warm milk (110-115 degrees F)
- 1 large egg, room temperature
- 2 tablespoons butter, softened
- 1 teaspoon salt
- 1/4 cup sugar (or 2 tablespoons for less sweetness)
- 3 cups all-purpose flour
- 2 1/4 teaspoons active dry yeast
- Cornmeal, for baking pan
Equipment Needed
- Bread Machine
- Microwave-safe container (or saucepan)
- Measuring cups and spoons
- Floured surface
- Baking pan (preferably dark)
- Thin towel
- Cooling rack
- Sharp knife or bread knife
Instructions
-
Begin by preparing the liquid ingredients. In a microwave-safe container, combine the egg, milk, and water. Microwave on high for 40 seconds to warm the mixture. Alternatively, you can warm the milk and water separately and bring the egg to room temperature. The goal is to have a warm, not hot, liquid for activating the yeast.
-
Place the warmed liquid mixture into your bread machine. Follow the manufacturer’s instructions for adding ingredients, or add them in the order listed above.
-
Add the remaining ingredients: softened butter, salt, sugar, all-purpose flour, and active dry yeast.
-
Set your bread machine to the dough cycle. This recipe is designed for a 1.5-pound loaf.
-
Once the dough cycle is complete, carefully remove the dough from the bread machine and place it on a lightly floured surface.
-
Gently divide the dough into 4 equal portions.
-
Shape each portion into a round shape. Avoid overworking the dough; handle it just enough to form the rounds.
-
Sprinkle a thin layer of cornmeal evenly onto your baking pan. The cornmeal will prevent the bread bowls from sticking and add a pleasant texture to the bottom crust.
-
Place the dough rounds onto the prepared baking pan, spacing them evenly apart.
-
Cover the dough rounds with a clean, thin towel. This will help prevent a dry crust from forming during the rising process. Place the pan in a non-drafty area to rise for approximately one hour, or until the dough has doubled in size.
-
While the dough is rising, preheat your oven to 350°F (175°C). If you are at a higher elevation, preheat to 325°F (165°C).
-
Once the dough has doubled, carefully place the baking pan in the preheated oven.
-
Bake for 20-25 minutes at 350°F, or 15-20 minutes at 325°F for higher elevations. The bread bowls are done when they are golden brown on top. Keep a close watch, as baking times can vary depending on your oven.
-
Remove the baking pan from the oven and transfer the bread bowls to a cooling rack to cool completely.
-
To create the bowls, use a sharp knife or bread knife to cut a thin circle across the top of each bread bowl.
-
Hollow out the inside of each bread bowl to a thickness of approximately 1/4 to 1/2 inch. You can save the scooped-out bread for breadcrumbs, croutons, or a snack.
-
Fill the warm bread bowls with your favorite chili, chowder, stew, or any other hearty soup. Serve immediately and enjoy!
Expert Tips & Tricks
- Using a dark baking pan tends to produce a better result. The darker color helps to brown the bottom of the bread bowls more evenly, creating a slightly denser texture that is ideal for holding fillings.
- Make sure your yeast is fresh! Old yeast might not activate properly, leading to a flat and dense bread bowl. You can test the yeast by mixing it with a little warm water and sugar. If it foams within 5-10 minutes, it’s good to go.
- Don’t skip the cornmeal! It adds a wonderful texture and prevents sticking.
- To get a crispier crust, brush the tops of the bread bowls with a little melted butter or an egg wash before baking.
- If your bread bowls are browning too quickly, tent them with aluminum foil during the last few minutes of baking.
- If the dough seems too sticky, add flour one tablespoon at a time until it forms a smooth ball.
- For a savory flavor, try adding garlic powder, onion powder, or Italian herbs to the dough.
Serving & Storage Suggestions
Serve these bread bowls immediately after baking for the best flavor and texture. The warm bread and flavorful filling create a comforting and satisfying meal.
Leftover bread bowls can be stored at room temperature in an airtight container for up to 2 days, or in the refrigerator for up to 5 days. For longer storage, wrap them tightly in plastic wrap and freeze for up to 3 months.
To reheat, you can warm the bread bowls in a preheated oven at 300°F (150°C) for about 10-15 minutes, or until heated through. You can also microwave them in short intervals, but be careful not to overheat them, as they can become tough. If frozen, thaw completely before reheating.
Nutritional Information
(Estimated, per bread bowl. Values may vary based on specific ingredients and serving size.)
| Nutrient | Amount per Serving | % Daily Value |
|---|---|---|
| Calories | 485 kcal | 24% |
| Total Fat | 9g | 12% |
| Saturated Fat | 5g | 25% |
| Cholesterol | 66mg | 22% |
| Sodium | 669mg | 29% |
| Total Carbohydrate | 87g | 32% |
| Dietary Fiber | 3g | 11% |
| Sugars | 13g | – |
| Protein | 13g | 26% |
Variations & Substitutions
- Whole Wheat Bread Bowls: Substitute up to half of the all-purpose flour with whole wheat flour for a nuttier flavor and added fiber.
- Gluten-Free Bread Bowls: Use a gluten-free all-purpose flour blend and ensure your yeast is also gluten-free. Follow the package instructions for the gluten-free flour, as baking times may vary.
- Dairy-Free Bread Bowls: Use a plant-based milk alternative such as almond, soy, or oat milk in place of the cow’s milk. Ensure your butter substitute is also dairy-free.
- Herb-Infused Bread Bowls: Add a tablespoon of dried herbs, such as rosemary, thyme, or oregano, to the dough for a more flavorful bread.
- Spicy Bread Bowls: Add a pinch of cayenne pepper or a dash of hot sauce to the dough for a little heat.
- Garlic Bread Bowls: Mix minced garlic and melted butter and brush on top of the bread bowls before baking.
FAQs (Frequently Asked Questions)
Q: Can I use rapid-rise yeast instead of active dry yeast?
A: Yes, you can use rapid-rise yeast. Add it directly to the flour without proofing. The rising time may be slightly shorter.
Q: My dough didn’t rise. What could be the reason?
A: Several factors can prevent dough from rising: the yeast might be old or inactive, the liquid might be too hot or too cold, or the room might be too cold. Make sure your yeast is fresh and the liquid is warm (110-115°F).
Q: Can I make the dough ahead of time and bake it later?
A: Yes, you can make the dough ahead of time. After the dough cycle is complete, punch down the dough, wrap it tightly in plastic wrap, and refrigerate for up to 24 hours. Let the dough come to room temperature before shaping and baking.
Q: My bread bowls are too dense. What went wrong?
A: Over-mixing the dough can lead to a dense bread bowl. Also, make sure you are using the correct amount of yeast and that it is fresh. Avoid adding too much flour.
Q: Can I freeze the baked bread bowls?
A: Yes, you can freeze the baked bread bowls. Wrap them tightly in plastic wrap and then in aluminum foil. They can be stored in the freezer for up to 3 months. Thaw completely before reheating.
Final Thoughts
I hope you enjoy this recipe for homemade bread bowls as much as I do. It’s a simple yet satisfying way to elevate your soup or stew night. Don’t be afraid to experiment with different flavors and fillings to create your own unique bread bowl experience. Share your creations with friends and family, and let me know what you think. Whether it’s a chilly autumn evening or a cozy winter night, these warm and comforting bread bowls are sure to be a hit!