
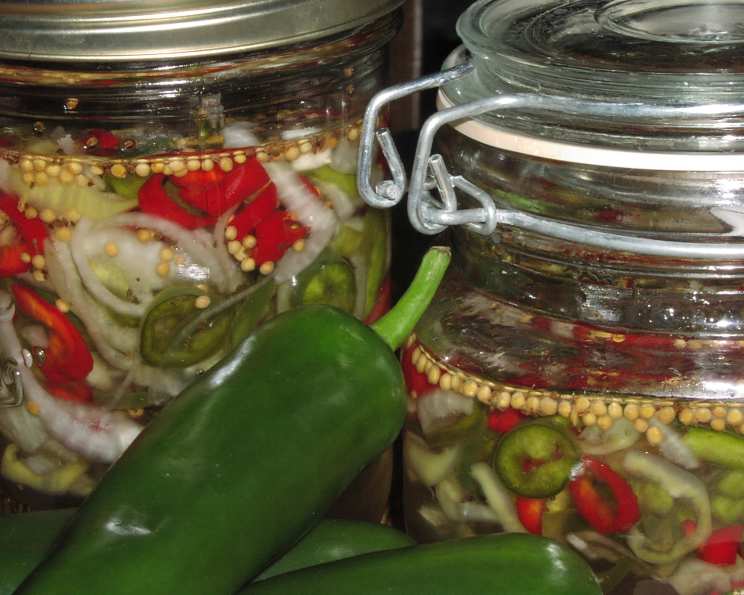
Sweet & Tangy Bread & Butter Peppers: A Culinary Time Capsule
My grandmother, bless her heart, had a garden that rivaled a small farm. Every summer, the kitchen would transform into a canning factory, filled with the sweet and vinegary aroma of pickled everything. While I wasn’t always thrilled to help with the hours of prepping and processing, the reward was a pantry overflowing with jars of sunshine to brighten the dreary winter months. These Bread & Butter Peppers were always a staple, a vibrant, crunchy condiment that instantly transported me back to those warm summer days in Grandma’s kitchen. It’s a taste of simpler times, a sweet and tangy reminder of family and tradition that I’m thrilled to share with you.
Recipe Overview
- Prep Time: 30 minutes
- Cook Time: 15 minutes
- Total Time: 2 hours 45 minutes (includes 2 hours standing time)
- Yields: 4 pints
- Serves: 15
- Dietary Type: Vegetarian
Ingredients
- 7 banana peppers, seeded and sliced
- 1 medium green pepper, julienned or 1 medium green tomato, halved and sliced
- 1 jalapeno pepper, seeded and sliced
- 1 small onion, sliced
- 1/4 cup canning salt
- 12-15 ice cubes
- 2 cups sugar
- 1 cup white vinegar
- 1 tablespoon mustard seeds
- 1/2 teaspoon celery seed
Equipment Needed
- Large bowl
- Large saucepan
- Sterilized pint jars with lids and rings
- Slotted spoon
- Measuring cups and spoons
Instructions
- In a large bowl, combine the sliced banana peppers, julienned green pepper (or sliced green tomato), sliced jalapeno pepper, sliced onion, and canning salt.
- Top the pepper mixture with ice cubes. This helps to draw out excess moisture and firm up the vegetables.
- Let the mixture stand for 2 hours at room temperature. This standing time is crucial for achieving the right texture and flavor. Don’t skip it!
- After 2 hours, rinse the pepper mixture thoroughly under cold running water to remove the salt. Drain very well. This step is important to prevent the peppers from being too salty.
- In a large saucepan, combine the sugar, white vinegar, mustard seeds, and celery seed.
- Bring the mixture to a boil over medium-high heat, stirring constantly until the sugar is completely dissolved.
- Once the sugar is dissolved and the mixture is boiling, reduce the heat slightly and cook for about 5 minutes. This allows the flavors to meld together.
- Pour the hot vinegar mixture over the drained pepper mixture in the large bowl.
- Let the peppers cool completely in the vinegar mixture.
- Using a slotted spoon, pack the cooled peppers into sterilized pint jars, leaving about 1/2 inch of headspace at the top.
- Pour the remaining vinegar mixture over the peppers in the jars, again leaving 1/2 inch of headspace.
- Wipe the rims of the jars clean with a damp cloth.
- Place the lids on the jars and tighten the rings securely, but not too tightly.
- Refrigerate the jars for at least 24 hours before serving. This allows the flavors to fully develop.
- Store the jars in the refrigerator for up to 3 months.
Expert Tips & Tricks
- Sterilizing Your Jars: To sterilize your jars, wash them thoroughly with hot, soapy water. Rinse well. Place the jars on a rack in a large pot and cover them with water. Bring the water to a boil and boil for 10 minutes. Turn off the heat and leave the jars in the hot water until you are ready to use them. Remove the jars with tongs, being careful not to touch the inside.
- Spice Level: Adjust the amount of jalapeno pepper to your liking. For a milder flavor, remove the seeds and membranes from the jalapeno. For a spicier flavor, leave the seeds and membranes in.
- Pepper Variety: Feel free to experiment with different types of peppers. Bell peppers, hot cherry peppers, or even poblano peppers would all work well in this recipe.
- Sweetness Adjustment: If you prefer a less sweet pickle, reduce the amount of sugar slightly. Taste the vinegar mixture before pouring it over the peppers and adjust the sweetness to your liking.
- Crisp Peppers: Ensuring the peppers stay crisp is achieved with the ice bath and prompt refrigeration. Don’t overcook the peppers in the vinegar mixture.
Serving & Storage Suggestions
These Bread & Butter Peppers are incredibly versatile. Serve them as a condiment on sandwiches, burgers, or hot dogs. They also make a delicious addition to salads, relish trays, or cheese boards. They pair wonderfully with grilled meats, poultry, or fish. Once opened, a jar of Bread & Butter Peppers should be stored in the refrigerator and consumed within a few weeks. While these are best refrigerated, they can be left at room temperature for a couple of hours during serving without worry. Due to the pickling process, freezing is not recommended as it can alter the texture of the peppers.
Nutritional Information
Here’s an approximate nutritional breakdown per serving:
| Nutrient | Amount per Serving | % Daily Value |
|---|---|---|
| Calories | 118.5 kcal | N/A |
| Fat | 0.3 g | 0% |
| Saturated Fat | 0 g | 0% |
| Cholesterol | 0 mg | 0% |
| Sodium | 1891.2 mg | 78% |
| Carbohydrate | 29 g | 9% |
| Fiber | 1 g | 4% |
| Sugars | 27.6 g | N/A |
| Protein | 0.6 g | 1% |
Note: Nutritional information is an estimate and may vary based on specific ingredients and portion sizes.
Variations & Substitutions
- Spicier Peppers: For extra heat, add a pinch of red pepper flakes to the vinegar mixture or use a hotter pepper like a Serrano.
- Sweeter Peppers: Instead of green bell pepper, try red or yellow bell peppers for a sweeter flavor.
- Pickling Spice: Add a tablespoon of pickling spice to the vinegar mixture for a more complex flavor.
- Herbs: Fresh herbs like dill or oregano can be added to the jars for a unique twist.
- Artificial Sweeteners: While not traditional, you could experiment with a sugar substitute to lower the overall sugar content. Be mindful that this may impact the texture and flavor slightly.
FAQs (Frequently Asked Questions)
Q: Can I use other types of vinegar?
A: While white vinegar is traditional, you could experiment with apple cider vinegar for a slightly different flavor profile. Avoid using balsamic vinegar, as its flavor is too strong and may not complement the peppers well.
Q: Do I really need to let the peppers stand with salt for 2 hours?
A: Yes, this step is crucial! It helps to draw out excess moisture, firm up the peppers, and prevent them from becoming soggy.
Q: How long will these Bread & Butter Peppers last?
A: When properly stored in sterilized jars in the refrigerator, these peppers will last for up to 3 months.
Q: Can I process these in a hot water bath for long-term storage?
A: This recipe is designed for refrigerator storage and has not been tested for safe water bath canning. It’s best to stick to refrigeration to ensure food safety.
Q: What if I don’t have canning salt? Can I use regular table salt?
A: Canning salt is preferred because it doesn’t contain iodine or anti-caking agents, which can darken the pickles and affect the flavor. If you must use table salt, use it sparingly, and be aware that it may slightly alter the color and taste.
Final Thoughts
I hope this recipe brings as much joy to your table as it has to mine. Whether you’re a seasoned canner or a curious beginner, these Bread & Butter Peppers are a fantastic way to preserve the flavors of summer and add a touch of sweetness and tang to your meals. Don’t be afraid to experiment with different peppers and spices to create your own unique version. I can’t wait to hear what you think! Pair these vibrant peppers with a grilled cheese sandwich for the ultimate comfort food experience, or alongside a crisp Sauvignon Blanc for a delightful contrast of flavors. Happy pickling!