
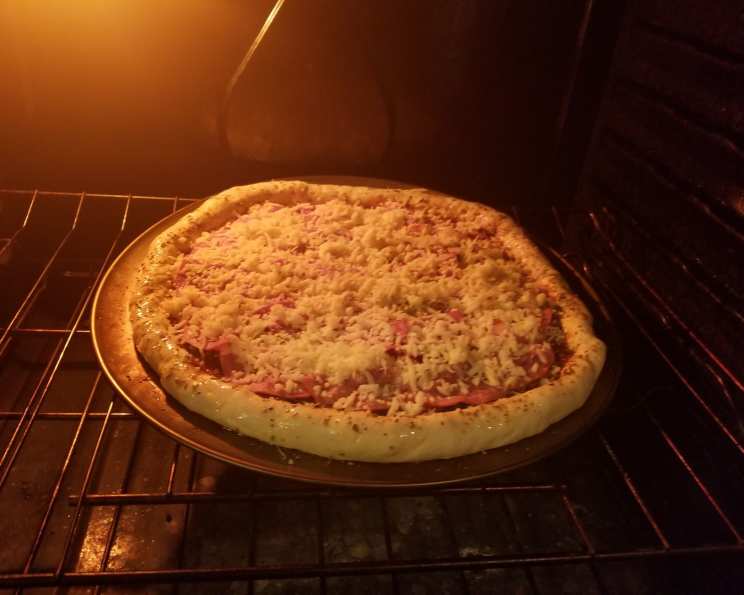
Bread Machine Basic Pizza Dough: The Cornerstone of Countless Culinary Creations
The aroma of baking bread has always held a special place in my heart. It conjures memories of my grandmother’s kitchen, a warm and inviting space where love was kneaded into every loaf. But my first foray into homemade pizza dough? That was a different story entirely. Armed with a rolling pin, a well-worn cookbook, and a healthy dose of optimism, I embarked on a mission to create the perfect pizza. The result, while edible, was far from perfect. It was dense, uneven, and tasted suspiciously like cardboard. Discouraged but not defeated, I turned to my trusty bread machine, and that’s where the magic truly began. Using my bread machine takes all the guesswork out of pizza dough, leaving me with more time to focus on my favourite toppings.
Recipe Overview
- Prep Time: 10 minutes
- Cook Time: 20-25 minutes
- Total Time: 35 minutes
- Yields: 1 pizza
- Serves: 4
- Dietary Type: Vegetarian
Ingredients
- 1 cup warm water
- 2 tablespoons vegetable oil or 2 tablespoons olive oil
- ¾ teaspoon salt
- 3 cups bread flour
- 2 teaspoons bread machine yeast
- 1 tablespoon cornmeal, for dusting
Equipment Needed
- Bread Machine
- Baking Sheet or Pizza Stone
Instructions
- Add the warm water to the bread machine pan. It’s crucial that the water isn’t too hot, as excessive heat can kill the yeast. Lukewarm is the ideal temperature.
- Pour in the vegetable oil or olive oil. The oil contributes to the dough’s elasticity and overall flavour. I often use olive oil for a richer, more authentic taste.
- Add the salt. The salt balances the sweetness of the dough and helps control the yeast activity.
- Measure the bread flour carefully and add it to the pan. Bread flour has a higher protein content than all-purpose flour, which leads to a chewier, more desirable crust.
- Make a well in the centre of the flour and add the bread machine yeast. Ensure the yeast is fresh for optimal results. Expired yeast can result in a flat, dense dough.
- Select the dough cycle on your bread machine and press start. Allow the machine to work its magic, kneading and proofing the dough. This typically takes about 1 hour and 30 minutes, but it varies depending on the machine.
- Once the dough cycle is complete, gently remove the dough from the bread machine pan.
- Preheat your oven to 425 degrees F (220 degrees C).
- Lightly dust a baking sheet or pizza stone with cornmeal. The cornmeal prevents the dough from sticking and adds a delightful crunch to the bottom crust.
- On a lightly floured surface, gently shape the dough into a circle or rectangle, depending on your preference. Roll it out to your desired thickness. For a thinner crust, roll it out more; for a thicker crust, leave it a little thicker.
- Transfer the shaped dough to the prepared baking sheet or pizza stone.
- Add your favourite pizza toppings. Get creative with your sauce, cheese, vegetables, and meats.
- Bake in the preheated oven for 20-25 minutes, or until the crust is golden brown and the cheese is melted and bubbly. Rotate the pizza halfway through baking to ensure even cooking.
- Remove the pizza from the oven and let it cool slightly before slicing and serving.
Expert Tips & Tricks
- For extra flavour: Consider adding a tablespoon of sugar or a teaspoon of garlic powder or Italian seasoning to the dough ingredients. Finely grated Parmesan cheese can also add a delicious cheesy flavour.
- Dough Consistency: If the dough appears too dry during the kneading process, add a tablespoon of water at a time until it reaches the right consistency – slightly tacky but not sticky. If it’s too wet, add a tablespoon of bread flour at a time.
- Proofing: While the bread machine handles the primary proofing, you can let the dough rest for an additional 10-15 minutes after shaping it on the baking sheet. This allows the gluten to relax, resulting in a more tender crust.
- Baking Stone Advantage: A baking stone or pizza stone will give you a crispier crust than a regular baking sheet. Preheat the stone in the oven for at least 30 minutes before baking the pizza.
- Par-Baking: If you like a really crispy crust, you can par-bake the dough for 5-7 minutes before adding the toppings. This sets the crust and prevents it from becoming soggy.
Serving & Storage Suggestions
Serve your freshly baked pizza immediately for the best taste and texture. A sprinkle of fresh herbs like basil or oregano can elevate the presentation.
Leftover pizza can be stored in an airtight container in the refrigerator for up to 3 days. To reheat, warm it in the oven at 350 degrees F (175 degrees C) until heated through, or use a skillet on the stovetop for a crisper crust.
For longer storage, you can freeze individual slices of pizza. Wrap them tightly in plastic wrap and then place them in a freezer bag. Frozen pizza can be stored for up to 2 months. Reheat directly from frozen in the oven.
You can also freeze the raw pizza dough after the dough cycle is complete. Divide the dough into portions, wrap them tightly in plastic wrap, and then place them in a freezer bag. Thaw the dough in the refrigerator overnight before shaping and baking.
Nutritional Information
| Nutrient | Amount per Serving | % Daily Value |
|---|---|---|
| Calories | 350 kcal | 18% |
| Total Fat | 8g | 10% |
| Saturated Fat | 1g | 5% |
| Cholesterol | 0mg | 0% |
| Sodium | 450mg | 19% |
| Total Carbohydrate | 60g | 22% |
| Dietary Fiber | 3g | 11% |
| Sugars | 2g | 4% |
| Protein | 9g | 18% |
Nutritional information is an estimate and can vary based on specific ingredients and portion sizes.
Variations & Substitutions
- Gluten-Free Pizza Dough: Substitute the bread flour with a gluten-free all-purpose flour blend. You may need to add a binder like xanthan gum to improve the dough’s elasticity. Follow the package instructions for the gluten-free flour blend.
- Whole Wheat Pizza Dough: Replace half of the bread flour with whole wheat flour for a nuttier flavour and increased fiber content.
- Herb-Infused Dough: Add 1-2 tablespoons of chopped fresh herbs like rosemary, thyme, or oregano to the dough ingredients for an aromatic twist.
- Spicy Pizza Dough: Add a pinch of red pepper flakes or a dash of hot sauce to the dough for a spicy kick.
- Sweet Pizza Dough: Add a tablespoon of honey or maple syrup to the dough for a slightly sweeter crust, perfect for dessert pizzas.
- Dairy-Free Pizza: Omit the cheese or use a dairy-free cheese alternative. Many plant-based cheese options are available that melt and taste great.
- Vegan Pizza: Ensure all toppings are vegan. Use a plant-based cheese alternative and choose vegetable-based toppings.
FAQs (Frequently Asked Questions)
Q: Can I use all-purpose flour instead of bread flour?
A: While you can use all-purpose flour, bread flour is recommended for a chewier crust due to its higher protein content.
Q: My dough didn’t rise. What went wrong?
A: Ensure your yeast is fresh and that the water isn’t too hot, as high temperatures can kill the yeast.
Q: Can I make this dough without a bread machine?
A: Yes, you can. Combine the ingredients, knead the dough for 8-10 minutes, and let it rise in a warm place for 1-1.5 hours, or until doubled in size.
Q: How do I prevent my pizza crust from getting soggy?
A: Par-bake the crust before adding toppings, use a baking stone, and avoid overloading the pizza with too much sauce or wet toppings.
Q: Can I add different toppings to the dough before baking?
A: Absolutely! Get creative with your toppings. You can add anything from vegetables and herbs to meats and cheeses.
Final Thoughts
This bread machine pizza dough is a simple yet transformative recipe that opens the door to endless culinary possibilities. Whether you’re a seasoned chef or a novice cook, this recipe provides a reliable foundation for creating delicious, homemade pizzas that are sure to impress. So, gather your ingredients, fire up your bread machine, and get ready to embark on a pizza-making adventure! Feel free to experiment with different toppings, herbs, and spices to create your own signature pizza masterpiece. And don’t forget to share your creations with friends and family – they’ll thank you for it!