
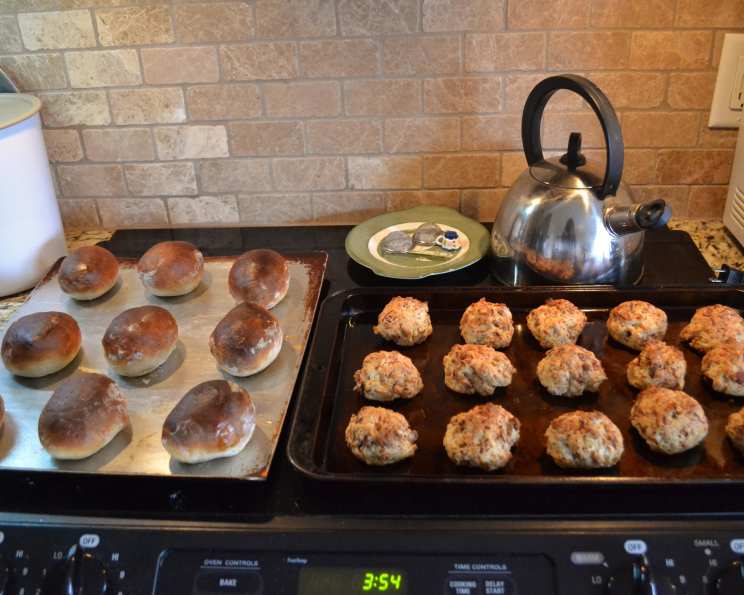
Homemade Bread Machine Broetchen: A Taste of Germany in Your Kitchen
My grandmother, Oma Elsa, was the heart of our family, and her kitchen was the epicenter of warmth and delicious smells. One of my fondest childhood memories is of her baking Broetchen, those crusty, airy rolls that seemed to transport you straight to a German bakery. The aroma of warm yeast and golden-brown crust filled her home, a promise of simple pleasures and shared moments. Though she never used a bread machine, the quest to replicate those flavors has been a long and fulfilling one, leading me to this bread machine version that brings me, and hopefully you, a little closer to that comforting taste of home.
Recipe Overview:
- Prep Time: 15 minutes
- Cook Time: 12-15 minutes
- Total Time: 2 hours 15 minutes
- Servings: 10
- Yields: 10 Rolls
- Dietary Type: Vegetarian
Ingredients:
- 1 cup milk, warmed (110F, 45C)
- 1 tablespoon vegetable oil
- 1 1/2 teaspoons salt
- 2 1/2 cups bread flour
- 2 1/2 teaspoons bread machine yeast
- 2 teaspoons sugar
- 1 egg white, beaten
- 1 – 1 1/2 cup ice
Equipment Needed:
- Bread Machine
- Measuring cups and spoons
- Clean work surface
- Greased baking sheet
- Clean cloth
- Sharp knife
- Small oven-safe pan (like a pie plate)
Instructions:
-
Begin by adding the ingredients to your bread machine pan in the order specified: warmed milk, vegetable oil, salt, bread flour, bread machine yeast, and sugar. This order is crucial for proper activation of the yeast.
-
Place the bread machine pan into the bread machine and set it to the “dough” setting. Allow the machine to complete its cycle. This process will typically take around 1.5-2 hours, depending on your machine.
-
Once the dough cycle is finished, prepare a clean, lightly floured surface by sprinkling approximately ½ cup of bread flour. Note that you may need more or less flour depending on the humidity in your kitchen.
-
Gently dump the dough out onto the floured surface. The dough should be soft and slightly sticky.
-
Knead the dough for approximately 10-12 strokes. This helps to develop the gluten and create a smooth, elastic texture.
-
Divide the dough and form it into 10 oblong rolls of equal size. Aim for a uniform shape and size for even baking.
-
Turn the rolls so that they are lightly dusted with flour on all sides. This will prevent them from sticking to the baking sheet and help create a crisp crust.
-
Let the rolls rest on the floured surface for 10 minutes. This allows the gluten to relax and makes them easier to handle.
-
Transfer the rolls onto a greased baking sheet, ensuring they are spaced evenly apart.
-
Cover the baking sheet with a clean cloth and let the rolls rise in a warm place until they have approximately doubled in size, usually around 35 minutes. This rise is essential for achieving a light and airy texture.
-
While the rolls are rising, position a rack in your oven about 6-7 inches from the top of the oven. Place another rack in the bottom third of the oven. Preheat the oven to 450F (230C).
-
Once the rolls have risen, and the oven is preheated, use a sharp knife to make a shallow slit in the top of each Broetchen, if desired. This allows the steam to escape during baking and helps create a beautiful crust.
-
Gently brush the tops of the Broetchen with the beaten egg white. This will give them a beautiful golden-brown color and a slightly glossy finish.
-
Place the ice in a small oven-safe pan (like a pie plate).
-
Place the pan of ice on the bottom oven rack and the baking sheet with the Broetchen on the top rack. The ice will create steam in the oven, which, combined with the egg wash, will give the Broetchen that characteristic soft yet firm crust.
-
Bake for 12-15 minutes, or until the Broetchen are golden brown. Keep a close eye on them, as baking times may vary depending on your oven.
Expert Tips & Tricks:
- Flour is Key: Using bread flour is essential for the structure of these rolls. All-purpose flour will not provide the necessary gluten development for that characteristic Broetchen chewiness.
- Humidity Adjustment: Adjust the amount of flour added during kneading based on the humidity. If the dough is too sticky, add a little more flour, a tablespoon at a time.
- The Steam Bath: The steam created by the ice is what gives Broetchen their signature crust. Don’t skip this step! You can also spritz the rolls with water several times during the first few minutes of baking if you don’t have ice.
- Oven Hot Spot Awareness: If your oven has hot spots, rotate the baking sheet halfway through the baking time to ensure even browning.
- Freezing for Later: These rolls freeze well. Allow them to cool completely, then wrap them individually in plastic wrap and store them in a freezer bag for up to 2 months. Reheat in a 350F oven for 5-7 minutes, or until warmed through.
Serving & Storage Suggestions:
Serve these Broetchen warm, straight from the oven. They are perfect for breakfast with butter and jam, as sandwich rolls for lunch, or as an accompaniment to dinner. Broetchen are best enjoyed fresh, but they can be stored at room temperature in an airtight container for up to 2 days. For longer storage, freeze them as described above. To reheat, simply pop them in a preheated oven at 350°F (175°C) for a few minutes until warmed through.
Nutritional Information:
| Nutrient | Amount per Serving | % Daily Value |
|---|---|---|
| Calories | 149.6 kcal | N/A |
| Calories from Fat | 23 g | 16% |
| Total Fat | 2.6 g | 4% |
| Saturated Fat | 0.8 g | 3% |
| Cholesterol | 3.4 mg | 1% |
| Sodium | 368.1 mg | 15% |
| Total Carbohydrate | 26.3 g | 8% |
| Dietary Fiber | 1.1 g | 4% |
| Sugars | 0.9 g | 3% |
| Protein | 4.8 g | 9% |
Note: Nutritional information is an estimate and may vary based on specific ingredients and portion sizes.
Variations & Substitutions:
- Seeded Broetchen: Sprinkle the rolls with sesame seeds, poppy seeds, or caraway seeds before baking for added flavor and texture.
- Herb-Infused: Add dried herbs like rosemary or thyme to the dough for a savory twist.
- Whole Wheat Broetchen: Substitute up to half of the bread flour with whole wheat flour for a nuttier flavor and added fiber. Keep in mind that this may result in a slightly denser roll.
- Dairy-Free: Substitute the milk with unsweetened almond milk or soy milk for a dairy-free version.
FAQs (Frequently Asked Questions):
Q: Can I make the dough ahead of time?
A: Yes, you can refrigerate the dough after the bread machine cycle is complete. Punch it down to release the air, wrap it tightly, and store it in the refrigerator for up to 24 hours. Allow it to come to room temperature before shaping and baking.
Q: Why is the steam bath so important?
A: The steam bath is crucial for creating the signature crust of Broetchen. It helps to gelatinize the starches on the surface of the dough, resulting in a crisp, shiny crust.
Q: Can I use active dry yeast instead of bread machine yeast?
A: Yes, but you’ll need to proof the active dry yeast first. Dissolve it in the warm milk with the sugar and let it sit for 5-10 minutes until foamy before adding it to the bread machine.
Q: My Broetchen are browning too quickly. What should I do?
A: If the Broetchen are browning too quickly, reduce the oven temperature by 25 degrees and cover them loosely with foil for the remaining baking time.
Q: Can I skip the egg wash?
A: You can skip the egg wash, but the Broetchen will not have the same golden-brown color and slightly glossy finish. For a vegan alternative, try brushing them with a mixture of maple syrup and water.
Final Thoughts:
These homemade bread machine Broetchen are a delightful way to bring a taste of Germany into your own kitchen. While they may not be exactly like the ones you find in a German bakery, they are a delicious and satisfying alternative. Don’t be afraid to experiment with different toppings, herbs, and variations to make them your own. I encourage you to give this recipe a try, share it with your loved ones, and experience the joy of baking and the simple pleasure of enjoying a warm, crusty roll. Guten Appetit!