
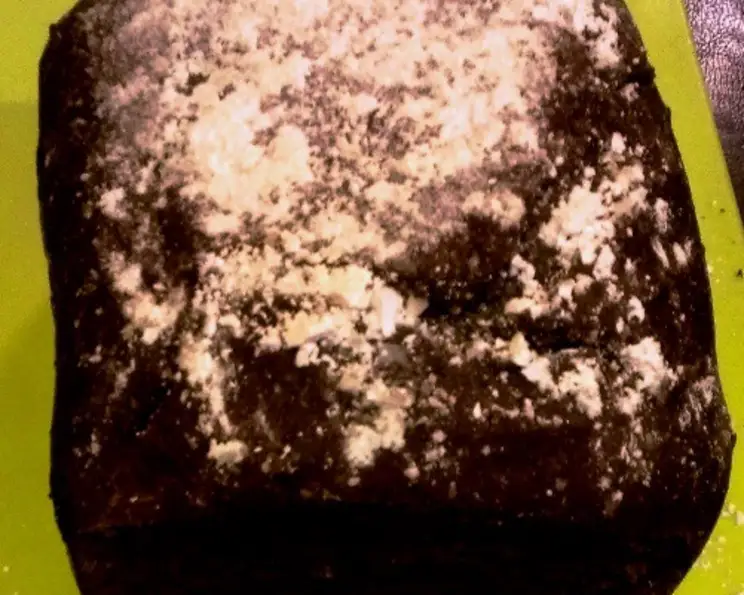
Bread Machine Brownie Bread: A Decadent Twist on Homemade Baking
The aroma of baking bread always takes me back to my grandmother’s kitchen. She wasn’t much for elaborate desserts, but she had a knack for transforming simple ingredients into something truly special. I can still picture her pulling a loaf of warm, fragrant bread from the oven, its crust golden brown and its interior soft and inviting. This Bread Machine Brownie Bread is a modern take on that comforting memory – a delightful fusion of rich brownie flavor and the ease of bread machine baking. It’s a treat that fills your home with the irresistible scent of chocolate and brings a smile to everyone’s face.
Recipe Overview
- Prep Time: 15 minutes
- Cook Time: 1 hour 10 minutes (approximately; varies by bread machine)
- Total Time: 1 hour 25 minutes
- Yields: 1 large loaf (approximately 2 loaves)
- Dietary Type: Not specified (can be modified, see variations)
Ingredients
- 1 cup water
- 2 tablespoons water
- ½ cup unsweetened cocoa powder
- 2 ½ teaspoons active dry yeast
- 3 cups bread flour
- ¾ cup sugar
- 1 ½ teaspoons salt
- 2 tablespoons oil
- 1 egg
- 1 egg yolk
- ½ cup walnut pieces
Equipment Needed
- Bread Machine
- Measuring cups and spoons
Instructions
- Begin by preparing the cocoa mixture: Bring 1 cup of water to a boil in a saucepan or microwave.
- Add the unsweetened cocoa powder to the boiling water. Stir until the cocoa is completely dissolved and the mixture is smooth.
- Cool the cocoa mixture to room temperature. This is crucial; adding hot liquid to the bread machine can kill the yeast. Patience is key here.
- Pour the cooled cocoa mixture into the bread machine pan.
- Add the remaining ingredients, except the walnut pieces, in the order recommended by your bread machine manufacturer’s manual. Typically, this involves adding the wet ingredients first, followed by the dry ingredients, and finally the yeast on top. This layering helps the yeast activate properly. Add the 2 tablespoons of water at this time as well.
- Select the “raisin bread” setting on your bread machine. This setting usually includes a kneading, rising, and baking cycle suitable for breads with added ingredients. This setting is important because it will give you a signal when it is time to add the nuts.
- Start the bread machine.
- Listen for the beeper that indicates it’s time to add the walnut pieces. This usually occurs during the second kneading cycle.
- Once the bread machine cycle is complete, carefully remove the loaf from the pan.
- Let the bread cool on a wire rack before slicing and serving. This allows the internal structure to set and prevents a gummy texture.
Expert Tips & Tricks
- Cocoa Quality Matters: Use high-quality unsweetened cocoa powder for the richest, most intense chocolate flavor. Dutch-processed cocoa will provide a smoother, less acidic flavor.
- Yeast Activation: To ensure your yeast is active, you can proof it before adding it to the bread machine. In a small bowl, combine the yeast with a teaspoon of sugar and a quarter cup of lukewarm water. Let it sit for 5-10 minutes. If the mixture becomes foamy, the yeast is active.
- Nut Variations: Feel free to experiment with different types of nuts, such as pecans, almonds, or hazelnuts. You can also add chocolate chips for an extra layer of chocolatey goodness.
- Doneness Check: Bread machine baking times can vary. If you’re unsure if the bread is done, use a toothpick to check. Insert a toothpick into the center of the loaf; if it comes out clean, the bread is ready.
- Preventing Sticking: To prevent the bread from sticking to the pan, lightly grease the bread machine pan before adding the ingredients.
- Slicing: Use a serrated bread knife for clean, even slices.
Serving & Storage Suggestions
This Bread Machine Brownie Bread is delicious served warm or at room temperature. It pairs perfectly with a scoop of vanilla ice cream, a drizzle of chocolate sauce, or a cup of coffee.
- Storage: Store leftover bread in an airtight container at room temperature for up to 3 days. For longer storage, wrap the bread tightly in plastic wrap and freeze it for up to 2 months.
- Reheating: To reheat frozen bread, thaw it at room temperature and then warm it in a 350°F (175°C) oven for 5-10 minutes.
- Serving Suggestion: Toast a slice of this bread and spread with a thin layer of cream cheese or nut butter for a delightful breakfast or snack.
Nutritional Information
(Note: Nutritional information is an estimate and will vary based on specific ingredients and portion size.)
| Nutrient | Amount per Serving | % Daily Value |
|---|---|---|
| Calories | 215 | 11% |
| Total Fat | 8g | 10% |
| Saturated Fat | 2g | 10% |
| Cholesterol | 37mg | 12% |
| Sodium | 300mg | 13% |
| Total Carbohydrate | 36g | 13% |
| Dietary Fiber | 2g | 8% |
| Sugars | 18g | N/A |
| Protein | 5g | 10% |
Variations & Substitutions
- Dairy-Free: Substitute the egg with an egg replacer or applesauce (about 1/4 cup). Use non-dairy milk or water in place of the egg yolk, adjusting the liquid as needed to achieve the desired dough consistency.
- Gluten-Free: Use a gluten-free bread flour blend designed for bread machines. You may need to add a binding agent like xanthan gum to improve the texture. Follow the instructions on the gluten-free flour blend for best results.
- Vegan: Combine the above substitutions for a completely vegan brownie bread.
- Chocolate Chips: Add ½ cup of chocolate chips along with the walnuts for a richer, sweeter treat.
- Espresso Boost: Add 1-2 teaspoons of instant espresso powder to the cocoa mixture to enhance the chocolate flavor.
- Spiced Bread: Add ½ teaspoon of cinnamon and ¼ teaspoon of nutmeg for a warm, spiced version, particularly delicious during the fall and winter.
FAQs (Frequently Asked Questions)
Q: Can I use regular all-purpose flour instead of bread flour?
A: Bread flour is recommended because it has a higher protein content, which helps create a stronger gluten structure and a chewier texture. However, you can use all-purpose flour, but the bread may be slightly less chewy.
Q: My bread machine doesn’t have a “raisin bread” setting. What should I do?
A: If your bread machine doesn’t have a “raisin bread” setting, use the “sweet bread” or “basic bread” setting, and manually add the nuts about halfway through the kneading cycle.
Q: Why is it important to let the cocoa mixture cool before adding it to the bread machine?
A: Hot liquid can kill the yeast, preventing the bread from rising properly. Cooling the cocoa mixture ensures that the yeast remains active and can do its job.
Q: Can I make this recipe without a bread machine?
A: Yes, you can! Combine the ingredients in a mixing bowl, knead the dough for 5-7 minutes, let it rise in a warm place for 1-2 hours, shape it into a loaf, and bake it in a preheated oven at 350°F (175°C) for 30-35 minutes.
Q: My bread came out dense and gummy. What went wrong?
A: Several factors can cause this, including using too much liquid, not enough yeast, or not allowing the bread to cool completely before slicing. Make sure to measure the ingredients accurately, use fresh yeast, and let the bread cool on a wire rack before slicing.
Final Thoughts
This Bread Machine Brownie Bread is a delightful and easy way to enjoy a decadent treat without a lot of fuss. The combination of rich chocolate flavor and the satisfying texture of homemade bread is truly irresistible. Don’t be afraid to experiment with different variations and substitutions to create your own signature brownie bread. I encourage you to try this recipe, share it with your loved ones, and let me know what you think! Perhaps serve it with a scoop of homemade ice cream or a rich chocolate sauce for an extra special dessert. Happy baking!