
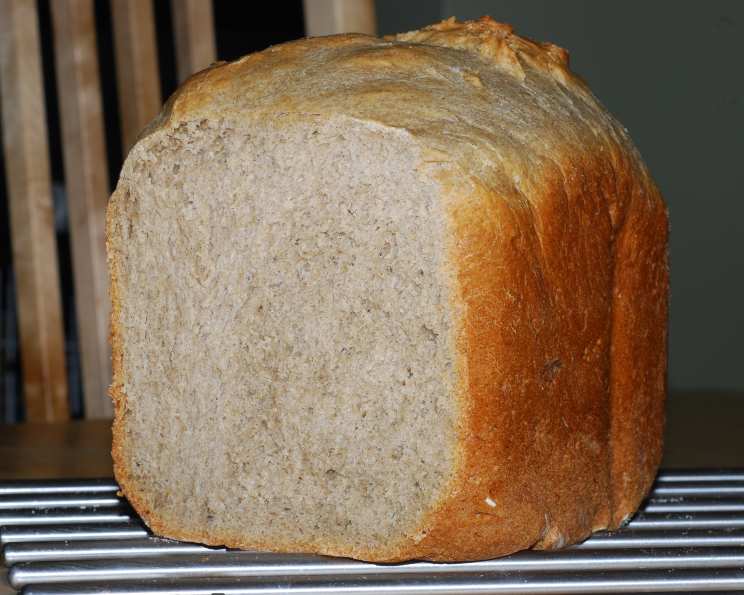
Bread Machine Buckwheat Bread: A Taste of Eastern Europe
The scent of freshly baked bread always transports me back to my grandmother’s kitchen. She wasn’t much for fancy desserts, but her bread was legendary, particularly her dark, earthy buckwheat loaf. It wasn’t just sustenance; it was a connection to her heritage, a comforting aroma that filled our home with warmth and love. This recipe captures that essence, bringing a touch of Eastern European tradition to your table with the ease of a bread machine.
Recipe Overview
- Prep Time: 15 minutes
- Cook Time: varies depending on bread machine cycle
- Total Time: 3 hours 10 minutes (including rise time)
- Yield: 1 large (1 1/2 pound) loaf
- Dietary Type: Vegetarian
Ingredients
- 2 1/4 teaspoons active dry yeast
- 2 2/3 cups bread flour
- 3/4 cup buckwheat flour
- 3/4 teaspoon salt
- 1 1/2 tablespoons sugar
- 1 egg
- 1 egg yolk
- 1/4 cup sour cream
- 1/4 cup vegetable oil
- 3/4 cup water
Equipment Needed
- Bread Machine
Instructions
- Carefully measure all ingredients. Accuracy is crucial for successful bread baking, especially when using a bread machine.
- Add all ingredients to the bread machine pan in the order recommended by your bread machine manufacturer. This order is essential, as it usually involves placing the wet ingredients at the bottom, followed by the dry ingredients, with the yeast on top and away from the wet ingredients. This prevents premature activation of the yeast.
- Select the appropriate bread cycle on your bread machine. For this recipe, a standard bread cycle is recommended. If your machine has a specific setting for whole wheat or European breads, it may also be suitable.
- Press start and allow the bread machine to complete its cycle. This typically includes kneading, rising, and baking. The total time can vary between machines, but it’s usually around 3 hours.
- Once the baking cycle is complete, carefully remove the bread pan from the machine, using oven mitts as it will be hot.
- Turn the pan upside down and gently shake to release the loaf. If the loaf is stuck, use a rubber spatula to loosen the sides.
- Place the loaf on a wire rack to cool completely before slicing. This prevents the bread from becoming soggy. Allow to cool for at least an hour.
Expert Tips & Tricks
- Flour Power: The combination of bread flour and buckwheat flour creates the perfect texture. Bread flour has a higher protein content, which helps develop gluten and gives the bread structure.
- Yeast Activation: Make sure your yeast is fresh. If you’re unsure, proof it by dissolving it in a little warm water with a pinch of sugar. If it foams up after a few minutes, it’s good to go.
- Liquid Temperature: The water should be lukewarm (around 105-115°F/40-46°C) to activate the yeast without killing it.
- Sour Cream Substitute: If you don’t have sour cream, you can substitute plain yogurt, but the flavor will be slightly different.
- Dough Consistency: If the dough seems too dry, add a tablespoon of water at a time until it forms a smooth, slightly sticky ball. If it’s too wet, add a tablespoon of bread flour at a time.
- Enhance the Crust: For a darker, shinier crust, brush the top of the loaf with an egg wash (beaten egg with a tablespoon of water) before baking.
- Flavor Boost: Add a teaspoon of caraway seeds or a tablespoon of molasses for a more intense flavor.
Serving & Storage Suggestions
This buckwheat bread is incredibly versatile. It’s fantastic served warm with butter or alongside soups and stews. It also makes excellent sandwiches. As Madge Rosenberg suggests, it’s traditionally served as an appetizer, thinly sliced and topped with caviar, sour cream, chopped egg, and minced onion. It pairs beautifully with smoked salmon, herring, and other Scandinavian or Eastern European delicacies.
To store the bread, wrap it tightly in plastic wrap or place it in an airtight container at room temperature. It will stay fresh for 2-3 days. For longer storage, slice the bread and freeze it in a freezer-safe bag. It can be frozen for up to 2 months. Thaw the slices at room temperature or toast them straight from the freezer. You can also refresh day-old bread by lightly sprinkling it with water and reheating it in a warm oven (300°F/150°C) for a few minutes.
Nutritional Information
| Nutrient | Amount per Serving* | % Daily Value |
|---|---|---|
| Calories | ~156 kcal | ~8% |
| Total Fat | ~5.4g | ~8% |
| Saturated Fat | ~1.2g | ~6% |
| Cholesterol | ~30mg | ~10% |
| Sodium | ~125mg | ~5% |
| Total Carbohydrate | ~23g | ~8% |
| Dietary Fiber | ~1.3g | ~5% |
| Sugars | ~1.5g | – |
| Protein | ~4g | ~8% |
*Approximate values based on dividing the original recipe’s total nutrition by 15 servings. May vary based on specific ingredients used.
Variations & Substitutions
- Gluten-Free Option: While this recipe relies on gluten for structure, you can experiment with gluten-free bread flour blends. Be aware that the texture will be different, and you may need to adjust the liquid content. Consider adding a binder like xanthan gum.
- Vegan Version: Replace the egg and egg yolk with an additional 1/4 cup of water and 1 tablespoon of ground flaxseed mixed with 3 tablespoons of water (let it sit for 5 minutes to thicken). Substitute the sour cream with a plant-based alternative like Tofutti Sour Cream or a thick cashew cream.
- Sweet Treat: Add 1/4 cup of raisins or dried cranberries for a touch of sweetness.
- Savory Twist: Incorporate 1/4 cup of chopped fresh herbs, such as rosemary or thyme, for a savory loaf. You could also add a clove or two of minced garlic.
- Different Flours: Substitute up to 1/2 cup of the bread flour with other whole grain flours, such as rye or spelt.
FAQs (Frequently Asked Questions)
Q: Can I make this bread without a bread machine?
A: While this recipe is designed for a bread machine, you can adapt it for a traditional oven. You’ll need to knead the dough by hand or with a stand mixer, let it rise, shape it into a loaf, and bake it in a preheated oven at 375°F (190°C) for about 30-40 minutes, or until golden brown.
Q: Why is the bread dense and heavy?
A: This can be due to several factors, including using old yeast, not enough liquid, or over-kneading the dough. Ensure your yeast is fresh, measure ingredients accurately, and avoid over-processing the dough in the bread machine.
Q: The crust is too hard. How can I prevent this?
A: Try reducing the baking time slightly or adding a tablespoon of oil to the dough. You can also brush the top of the loaf with melted butter or oil immediately after removing it from the bread machine.
Q: Can I use instant yeast instead of active dry yeast?
A: Yes, you can. Use the same amount of instant yeast (also called rapid-rise yeast) and add it directly to the dry ingredients. No need to proof it first.
Q: How do I know when the bread is done?
A: In a bread machine, the machine will automatically stop when the cycle is complete. The crust should be golden brown, and the loaf should sound hollow when tapped on the bottom.
Final Thoughts
This Bread Machine Buckwheat Bread is more than just a recipe; it’s an invitation to connect with a rich culinary tradition and create a delicious and satisfying loaf that will nourish both body and soul. Don’t be afraid to experiment with variations and make it your own. Bake a loaf today, share it with loved ones, and savor the simple pleasure of homemade bread. I encourage you to try this recipe and share your experiences – I’d love to hear your feedback! And remember, a slice of this bread pairs perfectly with a hearty bowl of borscht or a simple spread of cream cheese and smoked salmon.