
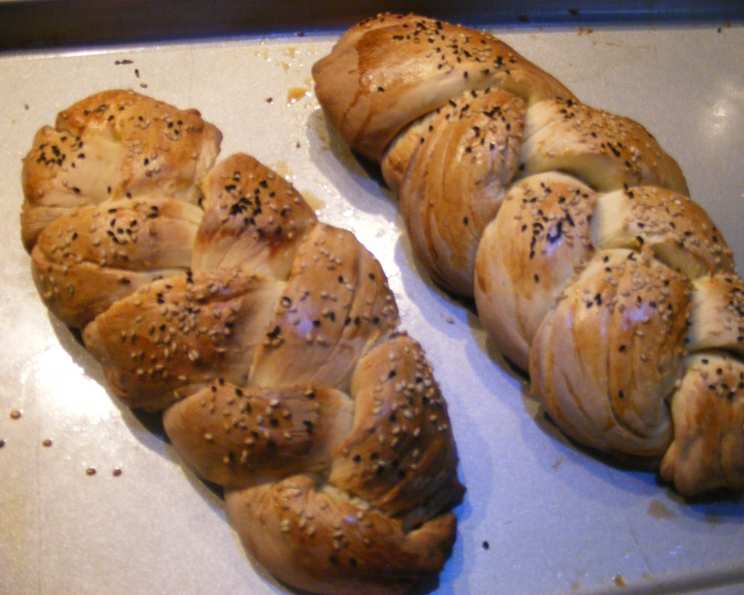
Bread Machine Challah: A Baker’s Delight
The aroma of challah baking always transports me back to my Bubbe’s kitchen. The warm, yeasty scent, mingling with the sweet notes of honey, was a constant companion during my childhood visits. Watching her nimble fingers braid the dough was mesmerizing, a testament to generations of tradition. While I cherish those memories, I’ve found a way to enjoy that comforting challah flavor without the all-day commitment – thanks to my trusty bread machine.
Recipe Overview
- Prep Time: 20 minutes
- Cook Time: 30 minutes
- Total Time: 2 hours 50 minutes (including dough cycle and rise time)
- Servings: 4-5
- Yield: 4-5 challahs
- Dietary Type: Dairy
Ingredients
- 1 cup water
- 3 ½ tablespoons oil
- 3 egg yolks
- 3 ½ cups flour, plus 2 tablespoons flour
- ½ cup sugar
- ¾ teaspoon salt
- 2 ¼ teaspoons dry yeast
- 1 egg
- Sesame seeds (optional) or poppy seeds (optional)
Equipment Needed
- Bread machine
- Measuring cups and spoons
- Lined baking sheet
- Mixing bowls
- Pastry brush
Instructions
- Prepare the Dough: Place all ingredients into the bread machine pan in the order recommended by your bread machine manufacturer. This usually means liquids first, followed by dry ingredients, with the yeast added last, nestled on top of the flour.
- Set the Machine: Select the dough cycle on your bread machine. The dough cycle usually lasts around 1.5 hours.
- Divide the Dough: Once the dough cycle is complete, carefully remove the dough from the bread machine pan. Place it on a lightly floured surface. Divide the dough into 4-5 equal pieces.
- Shape the Challahs: Take each piece of dough and divide it further into 3-6 ropes, depending on the desired complexity of your braid. Aim for ropes that are roughly the same length and thickness.
- Braid the Challah: Braid the ropes together to form the challahs. There are many braiding tutorials available online if you are unfamiliar with braiding challah. A classic 3-strand braid is simple and beautiful, while a 6-strand braid creates a more elaborate loaf.
- First Rise: Place the braided challahs on a baking sheet lined with parchment paper. Cover the challahs loosely with plastic wrap or a clean kitchen towel and let them rise in a warm place for about 30 minutes. This is a crucial step, so ensure they are in a warm area.
- Preheat the Oven: While the challahs are rising, preheat your oven to 350°F (175°C).
- Egg Wash and Seeds: In a small bowl, whisk the remaining egg. Gently brush the risen challahs with the egg wash. This will give them a beautiful golden-brown shine. If desired, sprinkle the challahs with sesame seeds or poppy seeds.
- Bake: Bake the challahs in the preheated oven for 30 minutes, or until they are golden brown and sound hollow when tapped on the bottom.
- Cool: Once baked, remove the challahs from the oven and let them cool on a wire rack before slicing and serving. This allows the internal structure to set, preventing a gummy texture.
Expert Tips & Tricks
- Yeast Quality: Always use fresh yeast for optimal results. If you’re unsure about the yeast’s viability, you can test it by proofing it in warm water with a pinch of sugar before adding it to the bread machine.
- Flour Power: The amount of flour needed can vary depending on the humidity and the type of flour used. If the dough seems too wet, add flour, one tablespoon at a time, until it forms a smooth, elastic ball.
- Shaping Secrets: For a more even bake, make sure the ropes are of uniform thickness when braiding. If the dough is too sticky to work with, lightly flour your hands and the work surface.
- Baking Time Adjustments: Ovens can vary, so keep an eye on the challahs during baking. If they start to brown too quickly, tent them loosely with foil.
- Make-Ahead Magic: The dough can be made a day ahead and stored in the refrigerator. Bring it to room temperature before shaping and baking.
- Shiny Crust: For an extra glossy crust, brush the challah with egg wash twice – once before the final rise and again before baking.
- Doneness Test: The best way to check for doneness is to insert an instant-read thermometer into the center of the challah. It should read around 200°F (93°C).
Serving & Storage Suggestions
Challah is best served fresh, while still warm from the oven. It is delicious on its own, or served with butter, honey, or jam. It’s also perfect for making French toast or sandwiches.
To store, wrap the cooled challah tightly in plastic wrap or place it in an airtight bag. It will stay fresh at room temperature for 2-3 days. For longer storage, freeze the challah for up to 2 months. To reheat, thaw the challah at room temperature and then warm it in a low oven (around 300°F/150°C) for 10-15 minutes, or until heated through.
Nutritional Information
| Nutrient | Amount per Serving | % Daily Value |
|---|---|---|
| Calories | 676.4 kcal | N/A |
| Calories from Fat | 156 g | N/A |
| Total Fat | 17.4 g | 26% |
| Saturated Fat | 3.2 g | 16% |
| Cholesterol | 171 mg | 56% |
| Sodium | 464.7 mg | 19% |
| Total Carbohydrate | 112.9 g | 37% |
| Dietary Fiber | 3.7 g | 14% |
| Sugars | 25.4 g | N/A |
| Protein | 16 g | 32% |
Note: Nutritional information is an estimate and may vary based on specific ingredients and serving sizes.
Variations & Substitutions
- Sweet Challah: Add a tablespoon or two of honey to the dough for a richer, sweeter flavor.
- Raisin Challah: Incorporate ½ cup of raisins or dried cranberries into the dough during the dough cycle.
- Savory Challah: Omit the sugar and add herbs such as rosemary or thyme for a savory twist.
- Whole Wheat Challah: Substitute up to half of the all-purpose flour with whole wheat flour for a nuttier flavor and added fiber. Be aware that this may alter the texture slightly, so you might need to adjust the liquid accordingly.
- Gluten-Free Challah: While challenging, you can experiment with gluten-free flour blends designed for bread making. Be sure to use a blend that includes xanthan gum for structure. The bread machine may require some adjustments in cycle time.
FAQs (Frequently Asked Questions)
Q: Can I use active dry yeast instead of instant yeast?
A: Yes, but you’ll need to proof the active dry yeast in warm water with a pinch of sugar for about 5-10 minutes before adding it to the bread machine.
Q: Why is my challah dough not rising?
A: The most common reason is inactive yeast. Make sure your yeast is fresh and properly proofed. Also, ensure the room is warm enough for the dough to rise.
Q: Can I braid the challah the night before and bake it in the morning?
A: Yes, you can. After braiding, cover the challah tightly with plastic wrap and refrigerate it overnight. In the morning, let it sit at room temperature for about 30 minutes before baking.
Q: My challah is browning too quickly. What should I do?
A: Tent the challah loosely with foil during the last 10-15 minutes of baking to prevent it from burning.
Q: How do I prevent the challah from drying out?
A: Store it properly in an airtight container or plastic wrap. You can also add a small piece of bread to the container to help maintain moisture.
Final Thoughts
There’s a unique satisfaction in creating something beautiful and delicious with your own hands, even with the help of a bread machine. This challah recipe is a wonderful starting point, offering a simplified yet authentic taste of tradition. Don’t be afraid to experiment with different braiding techniques, toppings, or flavor additions to make it your own. Share your creations with loved ones, and enjoy the warmth and comfort that freshly baked challah brings to the table. Perhaps serve it alongside a hearty bowl of chicken soup or a simple egg salad sandwich for a truly memorable meal.