
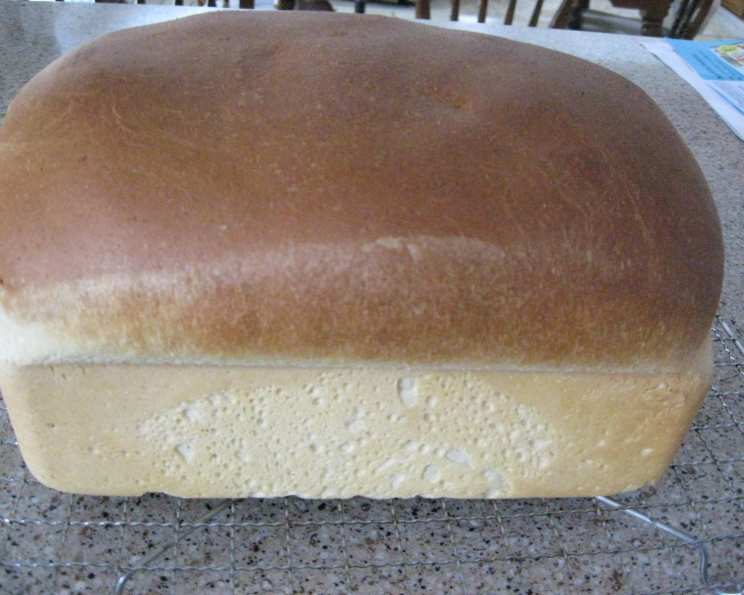
The Unexpected Delight of Bread Machine Cream of Wheat Bread
I’ll never forget the first time I tasted Cream of Wheat bread. It was at a small-town bakery during a cross-country road trip. I was initially drawn to its comforting aroma, a blend of toasted wheat and gentle sweetness that whispered promises of homemade goodness. The first bite was a revelation— a soft, slightly chewy texture, with a subtle nutty flavor that made me wonder why I hadn’t discovered this sooner. I immediately bought a loaf, savoring every slice on the rest of my journey, determined to recreate it when I got home.
Recipe Overview
- Prep Time: 15 minutes
- Cook Time: 3 hours 5 minutes
- Total Time: 3 hours 20 minutes
- Yields: 1 loaf
- Dietary Type: Vegetarian
Ingredients
- 2 ½ teaspoons yeast
- 1 ⅓ cups cream of wheat
- 2 ⅔ cups bread flour
- 2 tablespoons gluten (optional, but recommended for enhanced texture)
- 2 ½ teaspoons salt
- 2 ⅔ tablespoons sugar
- 2 medium eggs
- 5 tablespoons butter, softened
- 1 ⅓ cups water
Equipment Needed
- Bread machine
Instructions
- Consult your bread machine’s manufacturer instructions for the recommended order of adding ingredients. This is crucial for optimal bread-making results.
- Generally, begin by adding the wet ingredients to the bread machine pan. Pour in 1 ⅓ cups of water.
- Add the softened 5 tablespoons of butter to the pan. Softened butter is easier to incorporate evenly into the dough.
- Crack in the 2 medium eggs, ensuring no shell fragments enter the pan.
- Next, add the dry ingredients. Pour in 1 ⅓ cups of cream of wheat.
- Measure and add 2 ⅔ cups of bread flour. Bread flour is ideal because of its high gluten content.
- If using, add the 2 tablespoons of gluten. This will improve the structure and chewiness of the bread, especially if your flour is not particularly high in protein.
- Add 2 ½ teaspoons of salt. Salt is essential for flavor and helps to control the yeast’s activity.
- Add 2 ⅔ tablespoons of sugar. The sugar provides food for the yeast and contributes to the bread’s browning and flavor.
- Finally, create a small well in the top of the dry ingredients, away from the water. Add 2 ½ teaspoons of yeast to the well. This prevents premature activation of the yeast.
- Secure the bread machine pan into the machine, close the lid, and select the appropriate setting for a normal loaf of bread. This usually involves selecting a basic or white bread setting and choosing your desired crust color.
- Start the bread machine. The machine will automatically knead, proof, and bake the bread.
- The baking time will vary depending on your machine’s settings. Typically, a standard loaf takes around 3 hours.
- Once the baking cycle is complete, carefully remove the bread pan from the machine. Use oven mitts as the pan will be very hot.
- Let the bread cool in the pan for about 5-10 minutes before inverting it onto a wire rack to cool completely. This prevents the bread from becoming soggy.
- Allow the bread to cool completely before slicing. Slicing warm bread can result in a gummy texture.
Expert Tips & Tricks
- Gluten Power: While the gluten is optional, adding it really makes a difference in the final texture of the bread. It provides extra support for the dough, resulting in a lighter, chewier crumb.
- Ingredient Temperature: Ensure your water is lukewarm (around 105-115°F). Too hot, and it will kill the yeast; too cold, and it won’t activate properly. Room temperature eggs and softened butter also incorporate better into the dough.
- Machine Maintenance: Regularly clean your bread machine according to the manufacturer’s instructions. A clean machine ensures consistent results and prolongs its lifespan.
- Dough Watching: If your bread machine has a viewing window, keep an eye on the dough during the kneading process. If it appears too wet or sticky, add a tablespoon of flour at a time until it forms a smooth, elastic ball. If it appears too dry, add a tablespoon of water at a time.
- Crust Control: If you prefer a softer crust, remove the bread from the machine immediately after baking and wrap it in a clean kitchen towel while it cools.
Serving & Storage Suggestions
This Cream of Wheat bread is exceptionally versatile. Serve it warm with butter or jam for breakfast. Use it to make delicious sandwiches for lunch, or toast it and serve it alongside soup or salad for dinner. It pairs well with both sweet and savory flavors.
To store, allow the bread to cool completely before wrapping it tightly in plastic wrap or placing it in an airtight container. It will keep at room temperature for up to 2 days, in the refrigerator for up to 5 days, or in the freezer for up to 2 months. To reheat, wrap the bread in foil and warm it in a 350°F (175°C) oven for 10-15 minutes, or toast individual slices as needed.
Nutritional Information
Please note that these values are approximate and can vary based on specific ingredients and portion sizes.
| Nutrient | Amount per Serving | % Daily Value |
|---|---|---|
| Calories | 286 kcal | 14% |
| Total Fat | 7.4 g | 11% |
| Saturated Fat | 4.0 g | 20% |
| Cholesterol | 52.5 mg | 17% |
| Sodium | 638 mg | 27% |
| Total Carbohydrate | 46.9 g | 16% |
| Dietary Fiber | 2.0 g | 8% |
| Sugars | 3.6 g | 7% |
| Protein | 7.4 g | 15% |
Variations & Substitutions
- Dairy-Free: Substitute the butter with a vegan butter alternative or coconut oil. Be sure to check the vegan butter’s salt content and adjust the recipe’s salt accordingly.
- Sweetness Boost: For a slightly sweeter bread, increase the sugar to 3-4 tablespoons. You can also add a tablespoon of honey or maple syrup.
- Nutty Flavor: Add ½ cup of chopped nuts (walnuts, pecans, or almonds) to the dough for extra flavor and texture.
- Spice It Up: Add a teaspoon of cinnamon, nutmeg, or cardamom for a warm, spiced flavor.
- Herbaceous Twist: Incorporate a tablespoon of dried herbs such as rosemary, thyme, or oregano for a savory bread.
- Whole Wheat Variation: Substitute up to half of the bread flour with whole wheat flour for a nuttier, heartier bread. You may need to adjust the liquid slightly, as whole wheat flour absorbs more water.
FAQs (Frequently Asked Questions)
Q: Can I use all-purpose flour instead of bread flour?
A: While you can, bread flour is recommended for its higher gluten content, which results in a chewier, more structured loaf. If using all-purpose flour, consider adding an extra tablespoon of gluten.
Q: Why is the order of ingredients important?
A: The order of ingredients is crucial for proper yeast activation and gluten development. Placing the yeast away from the water and salt initially prevents premature activation and ensures even distribution of ingredients.
Q: My bread is too dense. What could be the problem?
A: Several factors can contribute to dense bread, including using old or inactive yeast, not enough liquid, or too much flour. Make sure your yeast is fresh, measure ingredients accurately, and adjust the liquid if necessary.
Q: Can I make this bread without a bread machine?
A: Yes, you can adapt this recipe for baking in a conventional oven. Combine the ingredients and knead the dough until smooth and elastic. Let it rise in a warm place until doubled, then shape it into a loaf and bake at 350°F (175°C) for 30-40 minutes, or until golden brown.
Q: How do I prevent the bread from sticking to the pan?
A: Ensure the bread machine pan is clean and lightly greased before adding the ingredients. Some machines recommend using a non-stick cooking spray.
Final Thoughts
This Cream of Wheat bread is more than just a simple recipe; it’s an invitation to experience the comforting aroma and satisfying taste of homemade goodness. Don’t be intimidated by the process – bread machines make it incredibly easy! I encourage you to try this recipe and discover the unexpected delight of Cream of Wheat bread. Share your creations and any variations you try – I’d love to hear about your baking adventures! A warm slice of this bread pairs wonderfully with a hearty soup or a simple cup of coffee, making it the perfect addition to any meal.