
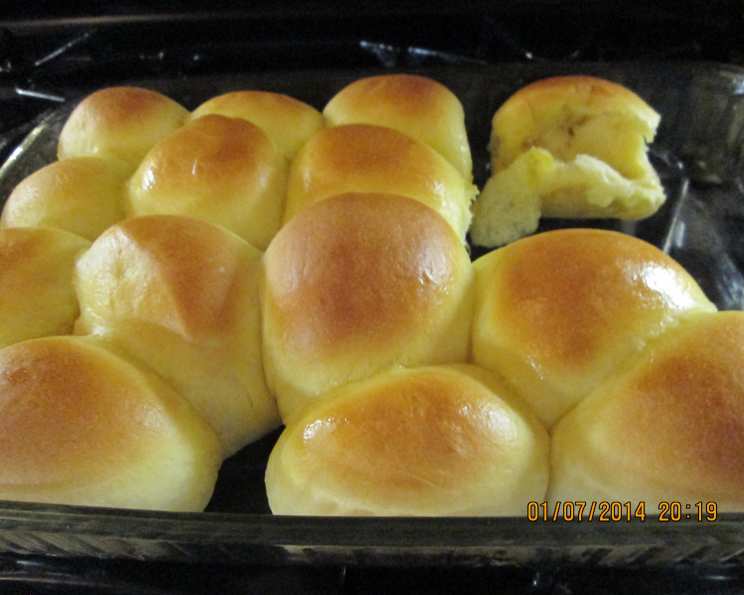
Bread Machine Dinner Rolls: Effortless Comfort Food
I can still picture my grandmother’s kitchen, the air thick with the scent of yeast and warm butter. Every Sunday, a basket overflowing with golden-brown dinner rolls graced the table. They were impossibly soft, slightly sweet, and always disappeared in a flash. While she spent hours kneading and proofing, this bread machine version lets you recreate that nostalgic flavor with minimal effort. The machine does all the hard work, leaving you free to enjoy the simple pleasure of freshly baked bread.
Recipe Overview
- Prep Time: 15 minutes
- Cook Time: 15-20 minutes
- Total Time: Approximately 3 hours (including dough cycle and rising time)
- Servings: 12 rolls
- Yields: 12 rolls
- Dietary Type: Not specified (can be modified to be dairy-free, see variations)
Ingredients
- ¾ cup milk, warmed
- 6 tablespoons soft butter
- 1 egg, beaten
- 3 cups bread flour
- ¼ cup sugar
- 1 teaspoon salt
- 1 ½ teaspoons active dry yeast
Equipment Needed
- Bread machine
- Measuring cups and spoons
- Lightly greased baking sheet
- Damp cloth
Instructions
-
Place all ingredients into the bread machine pan in the order recommended by your bread machine manufacturer. Typically, this means adding liquids first, followed by dry ingredients, with the yeast last. This prevents the yeast from activating prematurely.
-
Select the dough cycle on your bread machine. This cycle will mix, knead, and proof the dough for you. The length of the dough cycle varies between machines, but it usually takes around 1 ½ to 2 hours.
-
Once the dough cycle is complete, carefully remove the dough from the bread machine pan. At this point, you have two options: you can immediately shape and bake the rolls, or you can refrigerate the dough for baking later.
-
Refrigeration Option: Wrap the dough tightly in plastic wrap and refrigerate for up to 24 hours. This slow, cold proofing can enhance the flavor of the rolls. If refrigerating, remove the dough from the refrigerator about an hour before shaping to allow it to warm up slightly. This makes it easier to handle.
-
Shaping the Rolls: Whether you’ve refrigerated the dough or not, divide it into 12 equal parts (or 24 for smaller rolls). A kitchen scale can help ensure even sizes.
-
Roll each portion of dough into a smooth ball. Cup your hand lightly over the dough and move it in a circular motion on a clean surface to create a uniform shape.
-
Place the dough balls onto a lightly greased baking sheet, leaving a little space between each roll. This allows them to expand as they rise.
-
Cover the rolls loosely with a damp cloth. This prevents a dry crust from forming on the surface of the dough during the final rise.
-
Let the rolls rise in a warm place for approximately 20 minutes, or until they have doubled in size. The exact rising time will depend on the temperature of your kitchen. A slightly warm oven (turned off) can create a perfect environment for rising.
-
Preheat your oven to 400°F (200°C).
-
Bake the rolls in the preheated oven for 15 to 20 minutes, or until they are golden brown on top. Keep a close eye on them towards the end of the baking time to prevent burning.
-
As soon as the rolls come out of the oven, brush the tops with melted butter. This adds flavor and creates a beautiful, shiny finish.
Expert Tips & Tricks
- Warming the Milk: Slightly warming the milk (not hot!) helps activate the yeast more quickly. Aim for a temperature around 100-110°F (38-43°C).
- Butter Softening: Ensure the butter is truly soft, not melted. This helps it incorporate evenly into the dough.
- Dough Consistency: If the dough seems too dry, add a tablespoon of water at a time until it reaches a smooth, elastic consistency. If it’s too sticky, add a tablespoon of bread flour at a time.
- Even Baking: Rotate the baking sheet halfway through the baking time to ensure even browning.
- Preventing Over-Browning: If the rolls are browning too quickly, tent them loosely with foil.
- Fluffy Rolls: For extra-fluffy rolls, place a pan of hot water on the bottom rack of the oven while baking. The steam helps create a moist environment that promotes rising.
Serving & Storage Suggestions
Serve these delightful dinner rolls warm from the oven, ideally with a generous pat of butter or a drizzle of honey. They are a perfect accompaniment to soups, stews, roasted meats, or any meal where you crave a touch of comforting warmth.
- Room Temperature: Store baked rolls in an airtight container at room temperature for up to 2 days.
- Refrigerator: For longer storage, refrigerate the rolls in an airtight container for up to 5 days.
- Freezer: Freeze the rolls in a freezer-safe bag or container for up to 2 months.
- Reheating: Reheat the rolls in a preheated 350°F (175°C) oven for about 5-10 minutes, or until warmed through. You can also microwave them for a few seconds, but be careful not to overheat them, or they will become tough.
Nutritional Information
(Estimated per roll, values may vary based on ingredient brands and specific measurements)
| Nutrient | Amount per Serving | % Daily Value |
|---|---|---|
| Calories | 165 kcal | 8% |
| Total Fat | 6g | 8% |
| Saturated Fat | 4g | 20% |
| Cholesterol | 25mg | 8% |
| Sodium | 150mg | 7% |
| Carbohydrates | 24g | 8% |
| Fiber | 1g | 4% |
| Sugar | 4g | N/A |
| Protein | 4g | 8% |
Variations & Substitutions
- Dairy-Free Rolls: Substitute the milk with your favorite non-dairy milk (almond, soy, or oat milk work well) and use a dairy-free butter alternative.
- Whole Wheat Rolls: Replace up to half of the bread flour with whole wheat flour for a nuttier flavor and added fiber.
- Sweet Rolls: Add a teaspoon of vanilla extract and a sprinkle of cinnamon to the dough for sweet, cinnamon-flavored rolls.
- Herb Rolls: Mix in a tablespoon of chopped fresh herbs, such as rosemary, thyme, or oregano, for savory herb rolls.
- Garlic Rolls: Add a teaspoon of garlic powder to the dough for garlic-infused rolls. Brush with garlic butter after baking.
FAQs (Frequently Asked Questions)
Q: Can I use instant yeast instead of active dry yeast?
A: Yes, you can. Use the same amount (1 ½ teaspoons) and add it directly to the dry ingredients. No proofing is needed.
Q: My dough didn’t rise. What went wrong?
A: Check the expiration date on your yeast. Expired yeast won’t work. Also, make sure the milk wasn’t too hot, as this can kill the yeast.
Q: Can I make these rolls without a bread machine?
A: Yes, but you’ll need to knead the dough by hand or with a stand mixer for about 8-10 minutes until it’s smooth and elastic. Then, let it rise in a warm place for about an hour, or until doubled in size, before shaping and baking.
Q: Why are my rolls tough?
A: Over-baking or using too much flour can make the rolls tough. Be careful not to over-measure the flour, and keep a close eye on the rolls while they’re baking.
Q: Can I freeze the unbaked dough?
A: Yes, you can. Shape the rolls as directed, place them on a baking sheet lined with parchment paper, and freeze them until solid. Then, transfer them to a freezer-safe bag or container. When ready to bake, let them thaw completely in the refrigerator, then let them rise before baking as directed.
Final Thoughts
These bread machine dinner rolls are a testament to the fact that deliciousness doesn’t always require hours of labor. The ease of using a bread machine combined with the simple pleasure of warm, homemade bread makes this recipe a true winner. Whether you’re serving them at a holiday gathering or simply enjoying them with a weeknight meal, I hope these rolls bring a touch of warmth and comfort to your table. Don’t be afraid to experiment with variations and make them your own. And most importantly, enjoy the process!