
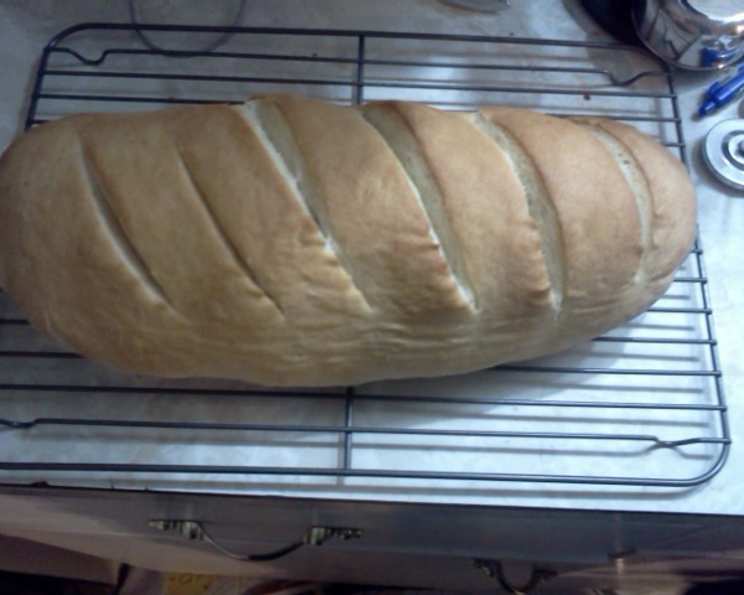
Crusty Comfort: Mastering Bread Machine French Bread
The scent of freshly baked bread has always been a powerful time machine for me. It whisks me back to my grandmother’s kitchen, a haven filled with warmth and the comforting aroma of yeast working its magic. While she always kneaded by hand, I’ve discovered the simple joy of letting a bread machine create a similarly crusty, delightful loaf, freeing me to focus on the delicious meal that will accompany it. It’s a perfect blend of tradition and modern convenience, bringing that same cherished aroma into my own home.
Recipe Overview
- Prep Time: 5 minutes
- Cook Time: 3 hours 30 minutes
- Total Time: 3 hours 35 minutes
- Servings: Variable, approximately 12 slices
- Yield: 1 loaf
- Dietary Type: Vegetarian
Ingredients
- 1 1/4 cups water
- 1 1/4 teaspoons salt
- 1 tablespoon sugar
- 3 2/3 cups all-purpose flour
- 1 1/2 teaspoons dry active yeast
Equipment Needed
- Bread Machine
Instructions
- Begin by carefully measuring the water and pouring it into the bread machine pan. It’s crucial to follow the order of ingredients to prevent the yeast from prematurely activating.
- Next, add the salt. The salt controls the yeast activity and contributes to the overall flavor of the bread.
- Now, incorporate the sugar. Sugar provides food for the yeast, allowing it to thrive and produce the gases that make the bread rise.
- Gently add the all-purpose flour on top of the wet ingredients. Ensure the flour completely covers the water, salt, and sugar.
- Finally, create a small well in the center of the flour and pour in the dry active yeast. This prevents the yeast from coming into contact with the wet ingredients too early.
- Secure the bread machine pan into the machine. Select the appropriate setting. For Black & Decker bread machines, use Setting 6, which is the Specialty-French 3H 30M cycle.
- Allow the bread machine to complete the entire cycle. Resist the temptation to open the lid during baking, as this can cause the bread to collapse.
- Once the cycle is complete, carefully remove the bread pan from the machine, using oven mitts as it will be very hot.
- Turn the pan upside down and gently shake to release the loaf. If the loaf is stuck, use a non-stick spatula to loosen the sides.
- Place the freshly baked bread on a wire rack to cool completely before slicing. This prevents the bottom from becoming soggy.
Expert Tips & Tricks
- Water Temperature: The water temperature is important for yeast activation. Aim for lukewarm water, around 80-90°F (27-32°C). Water that is too hot can kill the yeast, while water that is too cold will slow down its activity.
- Flour Power: Using bread flour instead of all-purpose flour will result in a chewier, more robust crust.
- Yeast Freshness: Ensure your yeast is fresh. Expired yeast will not rise properly. You can test the yeast by mixing a small amount with warm water and sugar. If it doesn’t bubble after 10 minutes, it’s likely dead.
- Dough Consistency: Keep an eye on the dough consistency during the initial kneading phase. If the dough seems too dry, add a tablespoon of water at a time until it forms a smooth, elastic ball. If it seems too wet, add a tablespoon of flour at a time.
- Crust Color: For a darker crust, you can brush the top of the loaf with an egg wash or milk before baking (though this will make it not vegetarian).
- Flavor Boost: Add a teaspoon of olive oil to the ingredients for a richer flavor and a softer crumb.
Serving & Storage Suggestions
This crusty French bread is wonderful served warm with a pat of butter, or alongside a hearty soup or stew. It’s also fantastic for sandwiches, bruschetta, or dipping in olive oil and balsamic vinegar.
- Room Temperature: Store the cooled bread in a bread bag or airtight container at room temperature for up to 2 days.
- Refrigerator: For longer storage, wrap the bread tightly in plastic wrap and store it in the refrigerator for up to a week.
- Freezer: To freeze, slice the bread and wrap it tightly in plastic wrap or freezer bags. It can be stored in the freezer for up to 2 months.
- Reheating: To reheat, wrap the bread in foil and bake at 350°F (175°C) for 10-15 minutes, or until warmed through. You can also toast individual slices for a quick and easy snack.
Nutritional Information
| Nutrient | Amount per Serving (approx. 1 slice) | % Daily Value |
|---|---|---|
| Calories | 145 kcal | 7% |
| Total Fat | 0.5 g | 1% |
| Saturated Fat | 0.1 g | 1% |
| Cholesterol | 0 mg | 0% |
| Sodium | 244 mg | 10% |
| Total Carbohydrate | 30 g | 10% |
| Dietary Fiber | 1.2 g | 5% |
| Sugars | 1.2 g | – |
| Protein | 4.2 g | 8% |
Note: Nutritional information is an estimate and may vary based on specific ingredients and serving sizes.
Variations & Substitutions
- Whole Wheat: Substitute up to half of the all-purpose flour with whole wheat flour for a nuttier flavor and added fiber.
- Herb Infusion: Add 1-2 tablespoons of dried herbs, such as rosemary, thyme, or oregano, to the flour for a savory bread.
- Garlic Bread: Before baking, brush the top of the loaf with garlic-infused olive oil.
- Seeded Bread: Sprinkle the top of the loaf with sesame seeds, poppy seeds, or sunflower seeds before baking for added texture and flavor.
- Sourdough Starter: If you have a sourdough starter, you can add 1/2 cup of starter and reduce the dry active yeast to 1 teaspoon. This will give the bread a tangy flavor.
FAQs (Frequently Asked Questions):
Q: Why is my bread dense and not rising properly?
A: This could be due to expired yeast, water that is too hot or too cold, or too much flour. Make sure your yeast is fresh, use lukewarm water, and measure the flour accurately.
Q: Can I use instant yeast instead of active dry yeast?
A: Yes, you can substitute instant yeast for active dry yeast. You do not need to proof instant yeast before adding it to the bread machine.
Q: How do I prevent the bread from sticking to the pan?
A: Lightly grease the bread machine pan before adding the ingredients. You can also use a non-stick cooking spray.
Q: Can I add other ingredients like cheese or olives to the bread?
A: Yes, you can add other ingredients to the bread, but add them during the last kneading cycle. This will prevent them from being crushed by the machine.
Q: What if my bread machine doesn’t have a “Specialty-French” setting?
A: Look for a setting that has a longer kneading and rising time, followed by a baking cycle. If your machine has a “basic” or “white bread” setting, you can try using that, but the crust may not be as crusty.
Final Thoughts
There’s nothing quite like the satisfaction of pulling a perfectly crusty loaf of French bread from your bread machine. It’s a simple pleasure that can elevate any meal. Don’t be afraid to experiment with different variations and flavors to create your own signature loaf. So go ahead, gather your ingredients, and let the bread machine work its magic. Your home will soon be filled with the irresistible aroma of freshly baked bread, and you’ll have a delicious, crusty loaf to enjoy with friends and family. Bon appétit!