
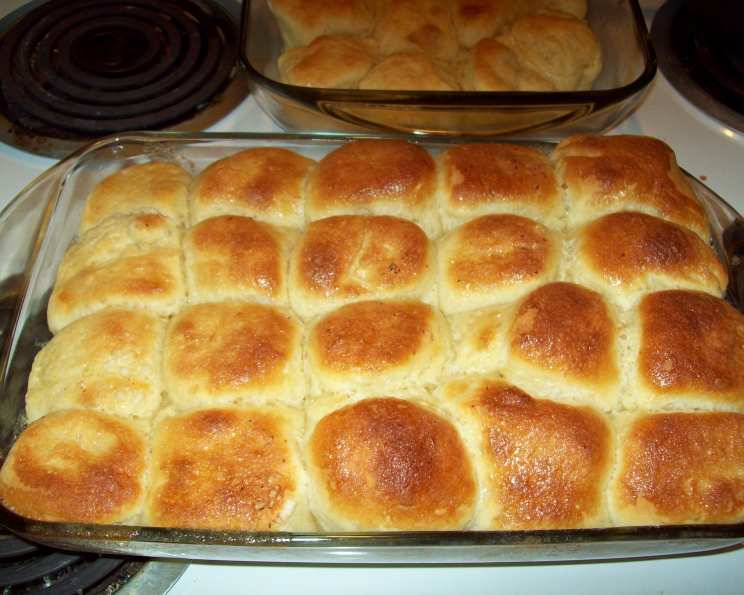
Bread Machine Honey Glazed Rolls: A Sweet Nostalgia
There’s something about the smell of baking bread that transports me straight back to my grandmother’s kitchen. I can almost feel the warmth of the oven on my face, hear the gentle hum of her old bread machine, and taste the sweet, comforting flavor of her honey-glazed rolls. Every Sunday, without fail, those golden-brown pillows of dough graced our table, slathered with butter and smiles. They were more than just rolls; they were a symbol of family, love, and the simple joys of life. This recipe attempts to capture that same magic, bringing a touch of grandma’s kitchen to your own home.
Recipe Overview
- Prep Time: 20 minutes
- Cook Time: 18-24 minutes
- Total Time: 2 hours 20 minutes (includes rise time)
- Servings: 24
- Yield: 24 rolls
- Dietary Type: Not specified
Ingredients
- 1 cup lukewarm milk
- 1 large egg
- 1 large egg yolk
- ½ cup vegetable oil
- 2 tablespoons honey
- 1 ½ teaspoons salt
- 3 ½ cups bread flour
- 2 ¼ teaspoons active dry yeast
Glaze:
- ⅓ cup sugar
- 2 tablespoons butter or margarine, melted
- 1 tablespoon honey
- 1 large egg white
- Additional honey (optional)
Equipment Needed
- Bread machine
- Measuring cups and spoons
- Lightly floured surface
- Two greased 8-inch square baking pans
- Mixing bowl
- Whisk or fork
Instructions
-
Begin by preparing your bread machine. Place the lukewarm milk, egg, egg yolk, vegetable oil, honey, salt, bread flour, and active dry yeast into the bread machine pan. It’s crucial to add the ingredients in the order recommended by your specific bread machine’s manufacturer. This often involves placing the liquids at the bottom and the dry ingredients on top, with the yeast added last, away from the liquids.
-
Select the dough setting on your bread machine. Once the cycle starts, carefully observe the dough’s consistency after about 5 minutes. If the dough appears too dry, add a little water, a tablespoon at a time, until it forms a smooth, elastic ball. Conversely, if the dough seems too wet and sticky, gradually incorporate a bit of flour, again one tablespoon at a time, until it reaches the desired consistency.
-
Allow the bread machine to complete its dough cycle. Once finished, gently turn the dough out onto a lightly floured surface.
-
Punch down the dough to release any excess air. Then, cover it with a clean kitchen towel and let it rest for 10 minutes. This allows the gluten to relax, making the dough easier to handle.
-
Divide the dough into 24 equal pieces. The easiest way to do this is to first cut the dough in half, then each half in half again, and continue dividing until you have 24 roughly equal portions.
-
Shape each piece of dough into a smooth ball. Gently roll each portion under your palm on the lightly floured surface until a round ball forms.
-
Prepare your baking pans. Lightly grease two 8-inch square glass baking pans. Arrange 12 dough balls in each pan, spacing them evenly.
-
Cover the pans with a clean kitchen towel and place them in a warm, draft-free area to rise for about 30 minutes, or until the rolls have doubled in size. This rising period is crucial for achieving light and airy rolls.
-
While the rolls are rising, prepare the glaze. In a mixing bowl, combine the sugar, melted butter (or margarine), honey, and egg white. Whisk vigorously until the glaze is smooth and well combined.
-
Once the rolls have doubled in size, gently drizzle the prepared glaze evenly over the top of the dough balls in each pan.
-
Bake the rolls in a preheated oven at 350°F (175°C) for 18-24 minutes, or until they are golden brown. Keep a close eye on the rolls during the last few minutes of baking to prevent over-browning. Remember that every oven is different, so adjust the baking time accordingly.
-
Remove the baked rolls from the oven and, if desired, brush them with additional honey for an extra touch of sweetness and shine. Let the rolls cool slightly in the pans before serving.
Expert Tips & Tricks
- For a richer flavor, use melted butter instead of margarine in the glaze.
- If you don’t have a bread machine, you can make the dough by hand or with a stand mixer. Simply combine the ingredients in a bowl, knead until smooth and elastic, and then let rise in a warm place until doubled.
- To ensure even baking, rotate the baking pans halfway through the baking time.
- If the tops of the rolls are browning too quickly, tent the pans with foil during the last few minutes of baking.
- For a softer crust, cover the rolls with a clean kitchen towel as soon as they come out of the oven.
Serving & Storage Suggestions
These honey-glazed rolls are best served warm, straight from the oven. They make a delicious addition to any meal, from breakfast and brunch to dinner and dessert. They’re also perfect for potlucks, holiday gatherings, or simply enjoying as a sweet treat.
Leftover rolls can be stored in an airtight container at room temperature for up to 2 days, or in the refrigerator for up to 5 days. To reheat, wrap the rolls in foil and warm them in a low oven (around 300°F or 150°C) for about 10 minutes, or until heated through. You can also microwave them for a few seconds, but be careful not to overheat them, as this can make them tough. For longer storage, the rolls can be frozen for up to 2 months. Thaw them overnight in the refrigerator before reheating.
Nutritional Information
| Nutrient | Amount per Serving | % Daily Value |
|---|---|---|
| Calories | 147.4 kcal | N/A |
| Calories from Fat | 58 g | 40% |
| Total Fat | 6.5 g | 9% |
| Saturated Fat | 1.6 g | 7% |
| Cholesterol | 21.5 mg | 7% |
| Sodium | 163.3 mg | 6% |
| Total Carbohydrate | 19.5 g | 6% |
| Dietary Fiber | 0.6 g | 2% |
| Sugars | 5 g | 20% |
| Protein | 2.9 g | 5% |
Note: Nutritional information is an estimate and may vary based on specific ingredients and portion sizes.
Variations & Substitutions
- Cinnamon Honey Rolls: Add 1-2 teaspoons of ground cinnamon to the dough mixture for a warm, spiced flavor.
- Orange Honey Rolls: Zest one orange and add it to the dough for a citrusy twist. You can also substitute orange juice for some of the milk.
- Whole Wheat Honey Rolls: Substitute up to half of the bread flour with whole wheat flour for a nuttier flavor and added fiber.
- Vegan Honey Rolls: Replace the milk with plant-based milk (such as almond or soy milk), the egg with a flax egg (1 tablespoon flaxseed meal mixed with 3 tablespoons water), and the butter with vegan butter. You can also use maple syrup or agave nectar instead of honey.
- Herb Infused Honey Rolls: Add 1-2 tablespoons of finely chopped fresh herbs, such as rosemary or thyme, to the dough for a savory variation.
FAQs (Frequently Asked Questions)
Q: Can I use instant yeast instead of active dry yeast?
A: Yes, you can substitute instant yeast for active dry yeast. Use the same amount (2 ¼ teaspoons) and add it directly to the flour without proofing.
Q: Why are my rolls not rising properly?
A: Several factors can affect the rise of your rolls, including the freshness of the yeast, the temperature of the milk, and the warmth of the rising environment. Ensure your yeast is not expired, the milk is lukewarm (not hot), and the rising area is warm and draft-free.
Q: Can I make the dough ahead of time and bake the rolls later?
A: Yes, you can prepare the dough up to 24 hours in advance. After the dough cycle is complete, punch it down, cover it tightly, and refrigerate it. When ready to bake, remove the dough from the refrigerator, let it come to room temperature for about 30 minutes, shape the rolls, and proceed with the rising and baking instructions.
Q: My glaze is too thick. How can I thin it out?
A: If your glaze is too thick, add a teaspoon or two of milk or water until it reaches your desired consistency.
Q: How do I prevent the bottoms of the rolls from burning?
A: If the bottoms of the rolls are browning too quickly, place a baking sheet on the rack below the rolls to deflect some of the heat.
Final Thoughts
These Bread Machine Honey Glazed Rolls are a delightful treat that’s sure to become a family favorite. Whether you’re a seasoned baker or just starting out, this recipe is simple, straightforward, and guaranteed to deliver delicious results. So, gather your ingredients, dust off your bread machine, and get ready to fill your home with the irresistible aroma of freshly baked rolls. Don’t be afraid to experiment with variations and substitutions to create your own unique version of this classic recipe. And most importantly, enjoy the process and share your creations with those you love!