
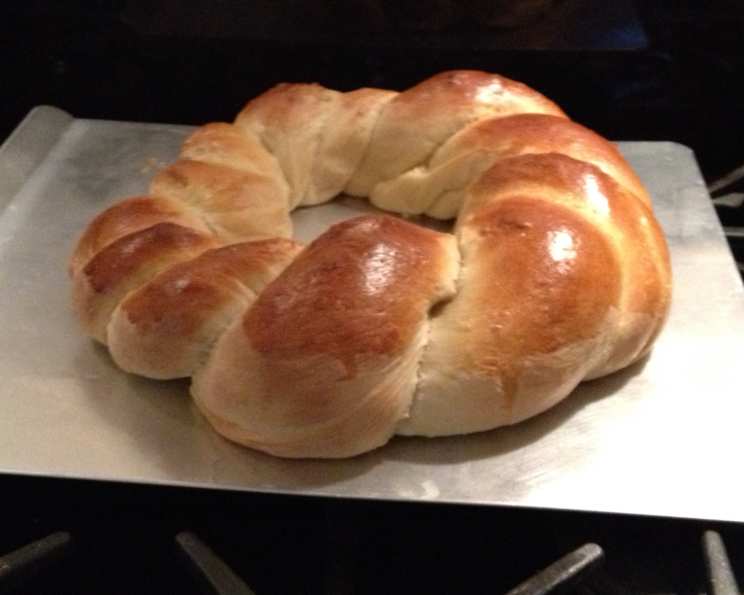
Bread Machine Italian Easter Bread: A Taste of Tradition Made Easy
My Nonna Emilia’s Easter bread was legendary. I remember, as a child, the intoxicating aroma of sweet dough and citrus that would fill her tiny kitchen. The intricate braided rings, each holding a brightly colored egg, were a symbol of springtime joy and family gathered together. Though her hands meticulously kneaded and shaped the dough, I’ve found a way to capture that same magic, with a little help from modern technology, in this bread machine version. It’s a taste of my childhood, simplified for today’s busy kitchens, but retaining all the love and flavor I remember.
Recipe Overview
- Prep Time: 20 minutes
- Cook Time: 25 minutes
- Total Time: 45 minutes (plus rising time)
- Servings: 20
- Yield: 2 rings
- Dietary Type: Vegetarian
Ingredients
- ¼ cup water, warmed to 110 degrees F
- ⅔ cup milk, warmed to 110 degrees F
- ¾ cup softened butter
- ⅔ cup granulated sugar
- ¾ teaspoon salt
- 1 teaspoon vanilla extract
- Juice of one lemon or 1 teaspoon butter flavoring, as desired
- 2 eggs, beaten
- 5 cups unbleached flour
- 2 ¼ teaspoons yeast
- Colored raw eggs
- Frosting:
- 2 cups confectioners’ sugar
- ¼ cup milk
- ½ teaspoon vanilla extract
- Non-pareils
Equipment Needed
- Bread machine
- Rolling pin
- Baking sheet
- Parchment paper (optional)
- Mixing bowl (for frosting)
Instructions
-
Add the ingredients to your bread machine in the order listed above: water, milk, softened butter, granulated sugar, salt, vanilla extract, lemon juice (or butter flavoring), beaten eggs, unbleached flour, and finally, yeast. It’s crucial to add the wet ingredients first, followed by the dry ingredients, with the yeast last and away from the wet ingredients until the mixing begins.
-
Select the dough cycle on your bread machine and start the machine. This cycle will mix and knead the dough, and then allow it to rise. The length of the dough cycle varies between machines, so refer to your bread machine’s manual.
-
Once the dough cycle is complete, remove the dough from the bread machine. Gently punch it down to release any excess air.
-
Divide the dough in half. On a lightly floured surface, roll each half into a long rope.
-
Take each rope and divide it into three equal strands. Braid the three strands together, creating a long braid. Pinch the ends together to seal. Gently form the braid into a ring, pinching the ends together securely to form a closed circle. Repeat with the second half of the dough.
-
Carefully transfer the braided rings to a baking sheet lined with parchment paper (optional, but recommended for easy cleanup).
-
Gently press colored raw eggs into the dough of each braid, spacing them evenly around the ring. The eggs should be nestled securely in the dough so they don’t roll out during baking.
-
Cover the baking sheet with a clean kitchen towel and let the braided rings rise in a warm place for about 30-45 minutes, or until they have noticeably increased in size. This second rise is essential for a light and airy bread.
-
Preheat your oven to 340 degrees F (170 degrees C).
-
Bake the bread rings in the preheated oven for approximately 20-25 minutes, or until they are golden brown and the eggs are cooked through. The eggs will be hard-boiled. To check for doneness, you can insert a toothpick into the bread; it should come out clean.
-
Remove the bread rings from the oven and let them cool completely on a wire rack before frosting.
-
While the bread is cooling, prepare the frosting. In a mixing bowl, combine the confectioners’ sugar, milk, and vanilla extract. Whisk until smooth and creamy, adding more milk if needed to reach your desired consistency.
-
Once the bread rings are completely cool, frost them generously with the prepared frosting.
-
Immediately sprinkle the frosted bread rings with non-pareils. The sprinkles will adhere best to the wet frosting.
Expert Tips & Tricks
- For a richer flavor, you can use melted butter instead of softened butter. Just make sure it’s not too hot when you add it to the bread machine.
- If you don’t have lemon juice, the butter flavoring is a great substitute. It adds a distinct sweetness that complements the bread.
- To prevent the eggs from cracking during baking, make sure they are at room temperature before placing them in the dough.
- If the bread starts to brown too quickly in the oven, you can tent it with aluminum foil to prevent burning.
- For an extra-shiny crust, brush the bread rings with an egg wash (one egg beaten with a tablespoon of water) before baking.
Serving & Storage Suggestions
This Italian Easter bread is best served at room temperature. It’s a beautiful centerpiece for your Easter brunch or dinner table. Slice and serve it with coffee, tea, or a glass of milk.
To store leftover bread, wrap it tightly in plastic wrap or store it in an airtight container. It will keep at room temperature for up to 2 days. You can also freeze it for up to 2 months. Thaw the bread completely before serving. To refresh the bread, you can warm it in a low oven (300 degrees F) for a few minutes.
Nutritional Information
| Nutrient | Amount per Serving | % Daily Value |
|---|---|---|
| Calories | 264 kcal | – |
| Calories from Fat | 73 g | 28% |
| Total Fat | 8.1 g | 12% |
| Saturated Fat | 4.8 g | 24% |
| Cholesterol | 38.5 mg | 12% |
| Sodium | 161.8 mg | 6% |
| Total Carbohydrate | 43.3 g | 14% |
| Dietary Fiber | 1 g | 3% |
| Sugars | 18.5 g | – |
| Protein | 4.5 g | – |
Note: Nutritional information is an estimate and may vary based on specific ingredients and portion sizes.
Variations & Substitutions
- Citrus Zest: Add the zest of an orange or lemon to the dough for an extra burst of citrus flavor.
- Anise Seeds: A teaspoon of anise seeds can be added to the dough for a traditional Italian flavor.
- Raisins or Candied Fruit: Incorporate ½ cup of raisins or candied fruit into the dough for a festive touch.
- Gluten-Free: While this recipe relies on gluten for its structure, experimentation with a gluten-free flour blend formulated for bread baking may yield acceptable results. Be sure to add a binder like xanthan gum.
- Egg Wash Alternative: If you prefer a vegan version, you can brush the bread with plant-based milk before baking for a similar golden color.
FAQs (Frequently Asked Questions)
Q: Can I use active dry yeast instead of instant yeast?
A: Yes, you can. You will need to proof the active dry yeast in warm water with a pinch of sugar for about 5-10 minutes before adding it to the bread machine.
Q: What if my dough is too sticky?
A: Add flour one tablespoon at a time until the dough forms a smooth ball that is slightly tacky but not sticky.
Q: Can I make the dough ahead of time?
A: Yes, you can make the dough ahead of time and store it in the refrigerator for up to 24 hours. Let it come to room temperature before shaping and baking.
Q: How do I prevent the eggs from overcooking?
A: If you find the eggs are browning too quickly, you can cover them loosely with foil during the last few minutes of baking.
Q: My bread is dry. What did I do wrong?
A: Overbaking can lead to dry bread. Make sure to bake the bread for the recommended time and check for doneness using a toothpick. Also, ensure your oven temperature is accurate.
Final Thoughts
This bread machine Italian Easter bread is a delightful way to bring a taste of tradition to your holiday celebrations. It’s easier than the traditional method, thanks to the bread machine, but still yields a beautiful and delicious result. Don’t be afraid to get creative with the decorations and make it your own. I encourage you to try this recipe, share it with your loved ones, and let me know what you think. It’s a wonderful treat to pair with a strong cup of Italian coffee or a sweet dessert wine. Buona Pasqua!