
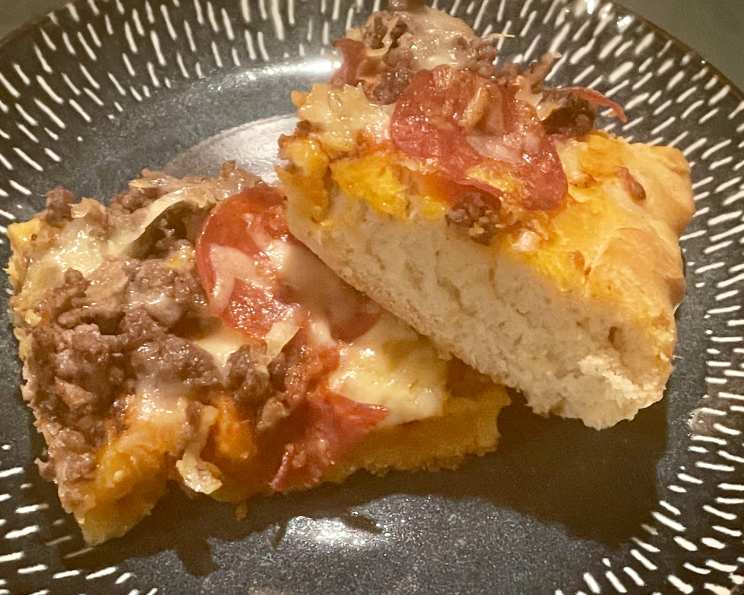
Bread Machine Pizza Perfection: A Chef’s Guide to Homemade Pizza Dough
The aroma of baking bread has always been a comforting constant in my life. One of my earliest memories is standing on a stool next to my grandmother, watching her knead dough for her famous Sunday pizzas. The rhythmic push and fold, the feel of the yielding dough beneath my small hands – it was pure magic. While I cherish those hand-kneading memories, life gets busy. That’s why I embraced the bread machine for pizza dough years ago. It brings that same homemade taste and texture with incredible ease. Now, I can consistently recreate delicious pizza crust with minimal effort, letting me focus on the fun part: experimenting with toppings!
Recipe Overview
- Prep Time: 10 minutes
- Cook Time: 20 minutes
- Total Time: 1 hour 50 minutes (including bread machine cycle)
- Servings: 6
- Yield: 1 large pizza
- Dietary Type: Vegetarian (easily made vegan)
Ingredients
- 2 teaspoons active dry yeast
- 3 cups bread flour
- 1 teaspoon salt
- 1/4 cup olive oil
- 1 cup water
Equipment Needed
- Bread Machine
- Large Pizza Pan or Baking Sheet
Instructions
-
Add the ingredients to your bread machine in the order recommended by the manufacturer’s instructions for your specific model. This order is crucial for proper gluten development and yeast activation. Typically, liquids go in first, followed by dry ingredients, with the yeast last, nestled on top away from the water and salt.
-
Select the dough cycle on your bread machine. This cycle typically includes mixing, kneading, and a rise. Allow the machine to complete the entire dough cycle. This will usually take about 1 hour to 1 hour and 30 minutes, depending on your machine.
-
Once the dough cycle is finished, gently transfer the dough to a lightly oiled pizza pan or baking sheet.
-
Now, you have a choice based on your preferred crust thickness:
- For a thicker crust: Cover the dough with a clean kitchen towel or plastic wrap and let it rest and rise for approximately 20 minutes in a warm place. This will allow the gluten to relax further, resulting in a puffier, more substantial crust.
- For a thinner crust: Proceed directly to the next step without the additional rise.
-
Preheat your oven to 450°F (232°C).
-
Shape the dough to your desired size and thickness. You can gently stretch it with your hands, use a rolling pin, or even toss it in the air like a professional pizzaiolo! If the dough is resistant to stretching, let it rest for a few more minutes to relax the gluten.
-
(Optional Pre-bake): For a crispier crust and to prevent sogginess, especially with moisture-rich toppings, consider pre-baking the crust for about 5 minutes before adding your sauce and toppings. This step helps the crust firm up and create a barrier against moisture absorption.
-
Add your favorite pizza sauce, cheese, and toppings. Don’t be afraid to get creative!
-
Bake in the preheated oven for approximately 20 minutes, or until the crust is golden brown and the cheese is melted and bubbly. Keep a close eye on it during the last few minutes to prevent burning. The baking time may vary slightly depending on your oven.
-
Remove the pizza from the oven and let it cool for a few minutes before slicing and serving.
Expert Tips & Tricks
- Water Temperature is Key: Make sure your water is lukewarm, around 105-115°F (40-46°C), to properly activate the yeast. Too hot, and you’ll kill the yeast; too cold, and it won’t activate properly.
- Olive Oil Infusion: For an even more flavorful crust, try infusing your olive oil with garlic, herbs (like rosemary or thyme), or chili flakes before adding it to the bread machine.
- Dough Storage: If you’re not using the dough immediately, you can store it in an airtight container in the refrigerator for up to 2 days. Let it come to room temperature before stretching and baking.
- Freezing for Future Pizzas: For longer storage, wrap the dough tightly in plastic wrap and then place it in a freezer bag. Freeze for up to 2 months. Thaw completely in the refrigerator before using.
- Adjusting Hydration: If your dough seems too dry, add a tablespoon of water at a time until it reaches a smooth, slightly sticky consistency. If it’s too wet, add a tablespoon of flour at a time.
- Crispier Crust Secret: Place a pizza stone in the oven while it preheats. The hot stone will help to create a crispy bottom crust.
- Preventing a Soggy Crust: As mentioned before, pre-baking the crust is key. Also, avoid overloading your pizza with too many toppings, especially those with high moisture content, like fresh tomatoes or mozzarella.
Serving & Storage Suggestions
Serve your freshly baked pizza immediately for the best flavor and texture. A simple green salad or some roasted vegetables make a perfect accompaniment. Leftover pizza can be stored in an airtight container in the refrigerator for up to 3 days. To reheat, warm it in a preheated oven at 350°F (175°C) for about 10-15 minutes, or until heated through. You can also reheat individual slices in a skillet over medium heat for a crispy crust, or in the microwave (although the crust may become softer). Freezing leftover pizza is also an option. Wrap individual slices tightly in plastic wrap and freeze for up to 2 months. Reheat directly from frozen in the oven.
Nutritional Information
| Nutrient | Amount per Serving | % Daily Value |
|---|---|---|
| Calories | 420 kcal | 21% |
| Total Fat | 15g | 23% |
| Saturated Fat | 2g | 10% |
| Cholesterol | 0mg | 0% |
| Sodium | 500mg | 21% |
| Total Carbohydrate | 65g | 22% |
| Dietary Fiber | 3g | 12% |
| Sugars | 2g | 4% |
| Protein | 10g | 20% |
Note: Nutritional information is an estimate and may vary depending on specific ingredients and toppings used.
Variations & Substitutions
- Whole Wheat Crust: Substitute up to half of the bread flour with whole wheat flour for a nuttier flavor and increased fiber.
- Gluten-Free Crust: Use a gluten-free bread flour blend specifically designed for bread machines. Be sure to follow the bread machine manufacturer’s instructions for gluten-free dough.
- Vegan Pizza Dough: This recipe is already easily vegan! Just ensure your toppings are plant-based.
- Herb-Infused Dough: Add 1-2 tablespoons of dried herbs, such as Italian seasoning, oregano, or basil, to the dough for extra flavor.
- Garlic Pizza Dough: Add 1-2 cloves of minced garlic to the dough ingredients.
- Spicy Pizza Dough: Add 1/2 teaspoon of red pepper flakes for a touch of heat.
- Sweet Pizza Dough: Add 1-2 tablespoons of sugar or honey to the dough for a slightly sweeter crust, ideal for dessert pizzas.
FAQs (Frequently Asked Questions)
Q: Can I use all-purpose flour instead of bread flour?
A: While you can use all-purpose flour, bread flour is recommended for its higher protein content, which helps develop more gluten and results in a chewier, more structured crust.
Q: My dough didn’t rise properly. What could be the reason?
A: Several factors can affect the rise of your dough, including expired yeast, water that’s too hot or too cold, or a room that’s too cold. Ensure your yeast is fresh, your water is lukewarm, and the dough is rising in a warm environment.
Q: Can I make this dough without a bread machine?
A: Yes, you can! Combine the ingredients in a bowl, knead for 8-10 minutes until smooth and elastic, and then let rise in a warm place for 1-1.5 hours, or until doubled.
Q: How do I prevent the crust from sticking to the pan?
A: Make sure to lightly oil your pizza pan or baking sheet before placing the dough on it. You can also use parchment paper for extra insurance.
Q: Can I add cheese to the crust itself?
A: Absolutely! Incorporating grated Parmesan or Romano cheese into the dough adds a delicious savory flavor. Use about 1/4 to 1/2 cup, adjusting the flour amount as needed to maintain the right dough consistency.
Final Thoughts
This bread machine pizza dough recipe is a game-changer for anyone who loves homemade pizza but doesn’t have a lot of time or energy. It’s simple, reliable, and yields a consistently delicious crust that’s perfect for any toppings you can dream up. So, go ahead, give it a try! Experiment with different flavors, toppings, and baking techniques. I’m confident that you’ll be enjoying fresh, homemade pizza in no time. Share your creations with me – I’d love to see what you come up with! And don’t forget a chilled glass of your favorite beverage to complete the pizza night experience!