
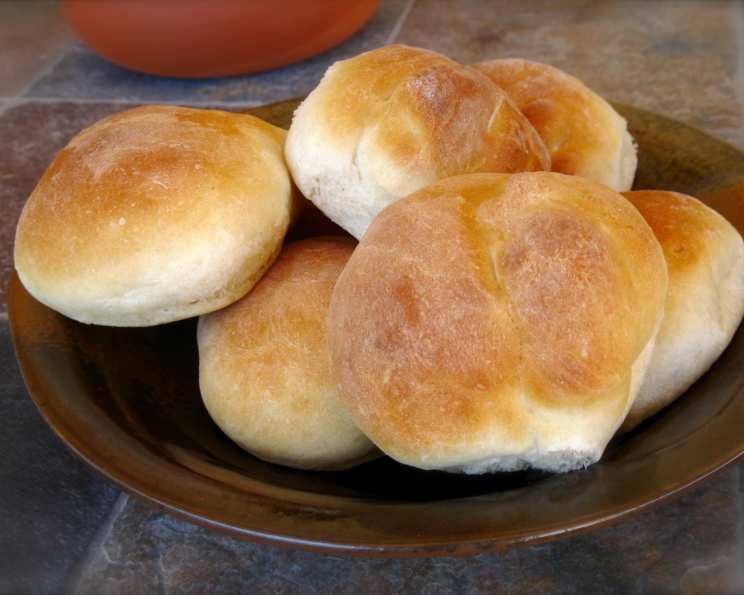
Bread Machine Rolls: Effortless Baking for Perfect Softness
The smell of warm bread is a powerful memory trigger. For me, it instantly transports me back to my grandmother’s kitchen, where baking was a daily ritual. While she favored traditional methods, I’ve embraced the convenience of modern appliances. These bread machine rolls perfectly bridge that gap, offering the same comforting taste and aroma with a fraction of the effort, a testament to how even classic recipes can find new life through innovation.
Recipe Overview
- Prep Time: 20 minutes
- Cook Time: 15 minutes
- Total Time: 1 hour 35 minutes (includes rising time)
- Servings: 12
- Yield: 12 rolls
- Dietary Type: Not Vegetarian/Vegan
Ingredients
- 3 cups bread flour
- 3 tablespoons white sugar
- 1 teaspoon salt
- ¼ cup powdered milk
- 1 cup water (heated to 110°F)
- 2 tablespoons butter, softened
- 1 (¼ ounce) package active dry yeast
- 1 egg white
- 2 tablespoons water
Equipment Needed
- Bread machine
- Lightly greased baking sheets
- Small bowl
- Pastry brush (optional)
- Lightly floured surface
Instructions
- Place the bread flour, white sugar, salt, powdered milk, water (110°F), butter, and active dry yeast in the pan of the bread machine. Be sure to add the ingredients in the order recommended by your bread machine manufacturer. This is crucial for proper dough development. Typically, liquids go in first, followed by dry ingredients, with the yeast added last, often in a small well on top of the flour.
- Set the bread machine to the dough cycle and press Start. The dough cycle typically lasts around 1 hour to 1.5 hours, depending on your machine.
- Once the dough cycle is complete, carefully remove the risen dough from the bread machine pan.
- Deflate the dough gently by pressing down on it to release any trapped air.
- Turn the dough out onto a lightly floured surface. This prevents sticking and makes it easier to work with.
- Divide the dough into 12 equal pieces. A bench scraper or a sharp knife works well for this.
- Form each piece into a round shape. Gently stretch the top surface of the dough around to the bottom, pinching the seam to create a smooth ball.
- Place the formed rounds on lightly greased baking sheets, leaving some space between each roll to allow for expansion during the second rise.
- Cover the rolls with a damp cloth. This prevents the surface from drying out and helps them rise properly.
- Let the rolls rise in a warm place until doubled in bulk, about 40 minutes. The rising time may vary depending on the temperature of your kitchen. A slightly warm oven (turned off) can provide a good environment for proofing.
- While the rolls are rising, preheat your oven to 350°F (175°C).
- In a small bowl, mix together the egg white and 2 tablespoons of water. This creates an egg wash that will give the rolls a shiny, golden-brown crust.
- Brush the egg wash lightly onto the tops of the rolls. Be careful not to let the egg wash drip down the sides, as this can cause the rolls to stick to the baking sheet.
- Bake for 15 minutes, or until the rolls are golden brown. Keep an eye on them towards the end of the baking time to prevent burning.
- Remove from oven, and let cool slightly before serving.
Expert Tips & Tricks
- Temperature is Key: The water temperature is crucial for activating the yeast. Too cold, and the yeast won’t activate; too hot, and you’ll kill it. 110°F is the sweet spot.
- Dough Consistency: If the dough seems too wet or sticky after the first kneading cycle, add a tablespoon of flour at a time until it comes together into a smooth ball. Conversely, if it seems too dry, add a teaspoon of water at a time.
- Even Baking: To ensure even baking, rotate the baking sheets halfway through the baking time.
- Shiny Crust: For an extra shiny crust, brush the rolls with melted butter immediately after they come out of the oven.
- Flavor Boost: Add a teaspoon of vanilla extract or a pinch of nutmeg to the dough for a subtle flavor enhancement.
Serving & Storage Suggestions
These bread machine rolls are best served warm, fresh from the oven. They’re delicious on their own, with butter, or as an accompaniment to soups, salads, and main courses.
- Room Temperature: Store cooled rolls in an airtight container at room temperature for up to 2 days.
- Refrigerator: For longer storage, refrigerate the rolls in an airtight container for up to 5 days.
- Freezer: To freeze, wrap the cooled rolls individually in plastic wrap and then place them in a freezer-safe bag or container. They can be frozen for up to 2 months. To reheat, thaw the rolls in the refrigerator or at room temperature, then warm them in a 350°F (175°C) oven for a few minutes until heated through. You can also microwave them for a shorter amount of time but be careful not to overcook them.
Nutritional Information
| Nutrient | Amount per Serving | % Daily Value |
|---|---|---|
| Calories | 159.5 kcal | N/A |
| Calories from Fat | 26 g | 17% |
| Total Fat | 3 g | 4% |
| Saturated Fat | 1.7 g | 8% |
| Cholesterol | 7.7 mg | 2% |
| Sodium | 226.8 mg | 9% |
| Total Carbohydrate | 28.3 g | 9% |
| Dietary Fiber | 1 g | 4% |
| Sugars | 4.3 g | 17% |
| Protein | 4.5 g | 8% |
Variations & Substitutions
- Whole Wheat Rolls: Substitute up to half of the bread flour with whole wheat flour for a nuttier flavor and added fiber.
- Herb Rolls: Add 1-2 tablespoons of chopped fresh herbs, such as rosemary, thyme, or oregano, to the dough for a savory twist.
- Sweet Rolls: Increase the sugar to ½ cup and add a teaspoon of cinnamon to the dough for sweet rolls. After baking, you can frost them with a simple glaze made from powdered sugar and milk.
- Dairy-Free Rolls: Substitute the butter with a dairy-free alternative and use a plant-based milk powder. Ensure you use a plant-based butter alternative that performs well in baking.
FAQs (Frequently Asked Questions)
Q: Can I use instant yeast instead of active dry yeast?
A: Yes, you can substitute instant yeast for active dry yeast. You can add it directly to the flour without proofing it first. Use the same amount as the recipe calls for.
Q: My rolls didn’t rise enough. What could be the problem?
A: Possible causes include using expired yeast, not having the water at the correct temperature, or not allowing enough time for the second rise. Make sure your yeast is fresh and the water is between 105-115°F (40-46°C).
Q: Can I make the dough ahead of time and refrigerate it?
A: Yes, you can refrigerate the dough after the first rise in the bread machine. Punch it down, wrap it tightly in plastic wrap, and refrigerate for up to 24 hours. Let it come to room temperature before shaping and baking.
Q: What if I don’t have a bread machine? Can I make these by hand?
A: Yes, you can! Combine the ingredients in a large bowl, knead for 8-10 minutes until smooth and elastic, let rise in a warm place until doubled, then proceed with the recipe as directed.
Q: How do I prevent the rolls from getting too brown on the bottom?
A: If the bottoms are browning too quickly, place another baking sheet underneath the one with the rolls to provide extra insulation.
Final Thoughts
These bread machine rolls offer a fantastic way to enjoy the simple pleasure of homemade bread without the fuss. The bread machine does the heavy lifting, leaving you with soft, fluffy rolls that are perfect for any occasion. Don’t be afraid to experiment with different variations and flavors to create your own signature rolls. I encourage you to try this recipe and share your creations with family and friends. Consider serving them alongside a hearty stew or a vibrant salad for a complete and satisfying meal. Happy baking!