
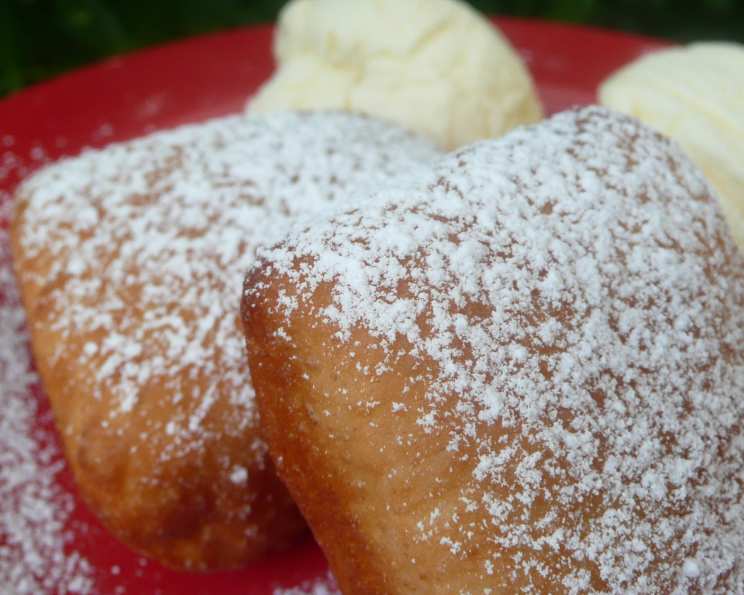
Bread Machine West African Banana Fritters: A Taste of Sweet Tradition
The scent of frying dough and ripe bananas instantly transports me back to a small market in Dakar, Senegal. Sunlight dappled through the woven awnings as I watched a woman deftly shape and fry these golden nuggets of joy. The air buzzed with the murmur of Wolof and the sizzle of oil, a symphony of flavors and experiences I’ll never forget. These Banana Fritters, or aloko as they are sometimes called, are a taste of that vibrant memory, a simple yet satisfying treat perfect for sharing.
Recipe Overview
- Prep Time: 30 minutes
- Cook Time: 20 minutes
- Total Time: 1 hour (plus bread machine time)
- Servings: 6
- Yield: Approximately 24 fritters
- Dietary Type: Vegetarian
Ingredients
Dough:
- 2 teaspoons active dry yeast
- 1 3/4 cups bread flour
- 1/2 cup whole wheat flour
- 2 tablespoons sugar
- 1/2 teaspoon salt
- 1/2 cup flaked coconut
- 1 cup ripe mashed banana (about 2 medium bananas)
- 1 egg
- 1/4 cup milk (dairy or non-dairy)
Frying and Topping:
- 2-4 cups vegetable oil, for frying
- 1/2 cup confectioners’ sugar, for dusting
Equipment Needed
- Bread machine
- Rolling pin
- Large saucepan or skillet
- Deep-frying thermometer
- Nonstick or greased baking tray
- Slotted spoon or spider
- Paper towels or brown paper bags
Instructions
-
Begin by preparing the dough. Add all the dough ingredients – the active dry yeast, bread flour, whole wheat flour, sugar, salt, flaked coconut, ripe mashed banana, egg, and milk – to your bread machine in the order recommended by the manufacturer for your specific model.
-
Select the dough cycle on your bread machine and let it run until complete. This typically takes about 1.5 to 2 hours, depending on your machine.
-
Once the dough cycle has finished, carefully remove the dough from the bread machine and place it on a lightly floured work surface. This will prevent the dough from sticking as you work with it.
-
Using a floured rolling pin, gently roll out the dough into an 8-by-12-inch rectangle. Aim for an even thickness of about ¼ inch.
-
With a sharp knife or pizza cutter, cut the rectangle into 2-inch squares. These will be your fritters.
-
Place the cut squares onto a nonstick or lightly greased baking tray. This will prevent them from sticking during the rising process. Cover the tray with a clean kitchen towel or plastic wrap and let the squares rise in a warm, draft-free area for about 30 minutes. This resting period will allow the fritters to puff up slightly, resulting in a lighter texture.
-
While the fritters are rising, prepare for frying. Pour about 1 inch of vegetable oil into a large saucepan or skillet. Heat the oil over medium heat until it reaches 365 degrees F (185 degrees C) on a deep-frying thermometer. Maintaining the correct oil temperature is crucial for achieving perfectly cooked fritters. If the oil is too cool, the fritters will absorb too much oil and become greasy. If it’s too hot, they will brown too quickly on the outside and remain undercooked on the inside.
-
Once the oil has reached the correct temperature, carefully place 3 or 4 fritters at a time into the hot oil. Do not overcrowd the pan, as this will lower the oil temperature and result in soggy fritters.
-
Fry the fritters for 10 to 15 seconds on one side, until they are golden brown. Use a slotted spoon or spider to carefully flip the fritters and fry for another 5 to 7 seconds on the other side, until lightly browned.
-
Remove the fried fritters from the oil with a slotted spoon or spider and place them on crumpled brown paper bags or several layers of newspaper covered with a sheet of paper towel. This will help to absorb any excess oil.
-
While the fritters are still warm, generously sprinkle them with confectioners’ sugar. The sugar will adhere better to the warm fritters.
-
Serve the fritters warm and enjoy!
Expert Tips & Tricks
- For a richer flavor, use browned butter in place of some of the vegetable oil for frying. The nutty aroma will complement the bananas beautifully.
- If you don’t have a deep-frying thermometer, test the oil temperature by dropping a small piece of dough into the oil. If it sizzles and browns quickly, the oil is ready.
- Don’t skip the rising time. This allows the fritters to develop a lighter, airier texture.
- To prevent the fritters from sticking to the bottom of the pan, gently agitate them with a slotted spoon during frying.
- For a more pronounced banana flavor, add a few drops of banana extract to the dough.
Serving & Storage Suggestions
Serve these West African Banana Fritters warm, ideally immediately after frying. They are delicious on their own, dusted with confectioners’ sugar, or accompanied by a scoop of vanilla ice cream or a drizzle of honey.
Leftover fritters can be stored in an airtight container at room temperature for up to 2 days. However, they are best enjoyed fresh. To reheat, you can warm them in a preheated oven at 350°F (175°C) for a few minutes, or briefly microwave them. Keep in mind that microwaving may make them slightly softer.
For longer storage, you can freeze the fried fritters. Allow them to cool completely, then place them in a single layer on a baking sheet and freeze for about an hour. Once frozen, transfer them to a freezer bag or airtight container. They can be stored in the freezer for up to 2 months. To reheat, bake them directly from frozen in a preheated oven at 375°F (190°C) until warmed through.
Nutritional Information
| Nutrient | Amount per Serving | % Daily Value |
|---|---|---|
| Calories | 250 kcal | 13% |
| Total Fat | 12g | 18% |
| Saturated Fat | 4g | 20% |
| Cholesterol | 25mg | 8% |
| Sodium | 100mg | 4% |
| Total Carbohydrate | 30g | 10% |
| Dietary Fiber | 2g | 8% |
| Sugars | 10g | – |
| Protein | 4g | 8% |
Note: Nutritional information is an estimate and may vary based on specific ingredients and portion sizes.
Variations & Substitutions
- Gluten-Free: Substitute the bread flour and whole wheat flour with a gluten-free all-purpose flour blend. You may need to add a binding agent like xanthan gum to help hold the dough together.
- Vegan: Replace the egg with a flax egg (1 tablespoon of ground flaxseed mixed with 3 tablespoons of water) and use non-dairy milk.
- Spice it up: Add a pinch of ground cinnamon, nutmeg, or cardamom to the dough for a warmer, more aromatic flavor.
- Citrus Zest: Grate the zest of a lemon or orange into the dough for a bright, citrusy twist.
- Chocolate Chips: Fold in mini chocolate chips for a decadent treat.
- Different Fruits: Experiment with other mashed fruits like plantains, mangoes, or apples.
FAQs (Frequently Asked Questions)
Q: Can I make the dough ahead of time?
A: Yes, you can prepare the dough in the bread machine and store it in the refrigerator for up to 24 hours. Allow it to come to room temperature before rolling it out.
Q: The fritters are browning too quickly. What should I do?
A: Reduce the heat of the oil slightly. If the oil is too hot, the fritters will brown on the outside before they are cooked through on the inside.
Q: Can I bake these instead of frying them?
A: While frying is traditional, you can try baking them. Bake at 375°F (190°C) for 15-20 minutes, or until golden brown. However, they will not be as crispy as fried fritters.
Q: My dough is too sticky. What should I do?
A: Add a little more flour, one tablespoon at a time, until the dough is easier to handle. Be careful not to add too much flour, as this can make the fritters tough.
Q: Can I use overripe bananas?
A: Yes, overripe bananas are ideal for this recipe as they are sweeter and easier to mash.
Final Thoughts
These Bread Machine West African Banana Fritters are a delightful way to experience a taste of African cuisine in your own home. Don’t be intimidated by the frying process – with a little practice, you’ll be turning out golden, delicious fritters in no time. Gather your family and friends, share these sweet treats, and create memories that will last a lifetime. And please, let me know how they turn out! I’d love to hear about your own unique twists on this classic recipe.