
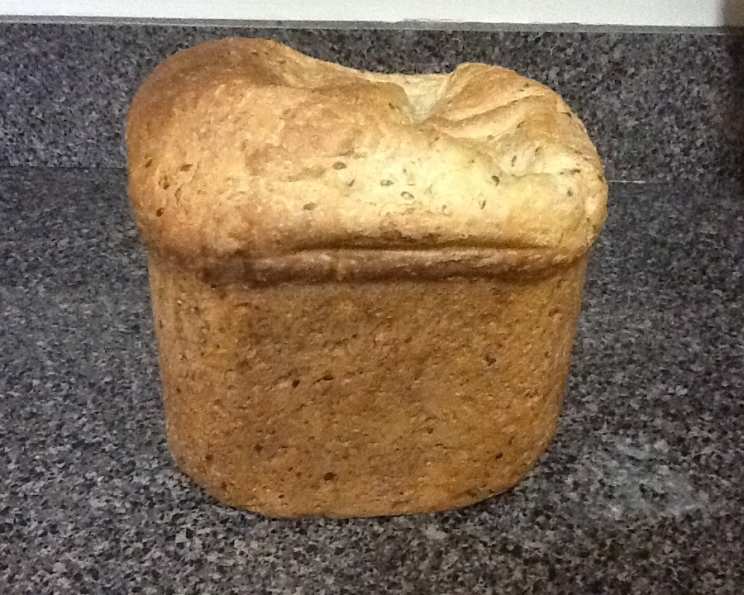
The Humble Loaf, Elevated: Bread Machine Whole Grain Bread
I can still picture my grandmother, her hands dusted with flour, pulling a warm, fragrant loaf of whole grain bread from her ancient oven. The aroma would fill her entire house, a comforting blend of nutty grains and sweet molasses. While she swore by her meticulous kneading process, I’ve embraced a modern shortcut: the bread machine. This recipe captures that same hearty, wholesome flavor but simplifies the process, bringing the joy of homemade bread to even the busiest kitchens.
Recipe Overview
- Prep Time: 10 minutes
- Cook Time: 2 hours
- Total Time: 2 hours 10 minutes
- Servings: 6
- Yield: 1 loaf
- Dietary Type: Vegetarian
Ingredients
- 1 1/2 cups water
- 2 tablespoons canola oil
- 2 1/2 cups sifted bread flour
- 1 teaspoon salt
- 1/2 cup flax seed
- 1/2 cup seven-grain cereal
- 1/2 cup cracked wheat
- 1/4 cup brown sugar
- 2 teaspoons yeast
Equipment Needed
- Bread Machine
- Measuring cups and spoons
Instructions
-
Begin by adding the water to the bread machine pan. This initial layer of liquid helps to prevent the dry ingredients from scorching during the early stages of mixing.
-
Next, pour in the canola oil. The oil contributes to a softer crumb and helps to keep the bread moist.
-
Carefully measure and add the sifted bread flour. Sifting is key to ensuring a light and airy texture. It removes any lumps and aerates the flour, resulting in a finer crumb in the finished loaf.
-
Add the salt. It’s important to measure accurately. Salt controls the yeast activity, strengthens the gluten, and enhances the overall flavor of the bread.
-
Pour in the flax seed, seven-grain cereal, and cracked wheat. These ingredients are the heart of our whole grain loaf, providing a nutty flavor, rustic texture, and a boost of fiber.
-
Add the brown sugar. The brown sugar lends a subtle sweetness and contributes to a richer, more complex flavor profile. It also helps to caramelize the crust, giving it a beautiful golden-brown color.
-
Finally, sprinkle the yeast on top of the other ingredients. Make sure the yeast doesn’t come into direct contact with the salt, as this can inhibit its activity.
-
Place the bread machine pan into the bread machine.
-
Select your desired time and crust setting on the bread machine. For a standard whole grain loaf, a medium crust setting is usually ideal. However, you can adjust the setting to your personal preference.
-
Once the baking cycle is complete, carefully remove the bread pan from the machine. Use oven mitts to protect your hands, as the pan will be hot.
-
Turn the pan upside down and gently shake or tap it to release the bread. If the bread is stuck, use a rubber spatula to loosen it from the sides of the pan.
-
Place the loaf on a wire rack to cool completely before slicing and serving. This allows the excess moisture to escape, preventing the bread from becoming soggy.
Expert Tips & Tricks
- Flour Power: Using bread flour is crucial for a chewy texture due to its higher protein content, which develops more gluten. If you only have all-purpose flour, add 1 teaspoon of vital wheat gluten per cup of flour.
- Yeast Matters: Ensure your yeast is fresh. If you’re unsure, proof it by dissolving it in a little warm water with a pinch of sugar. If it foams up within 5-10 minutes, it’s good to go.
- Moisture Control: Bread machine recipes are sensitive to humidity. On humid days, you might need to reduce the amount of water by a tablespoon or two. The dough should be slightly sticky but not overly wet.
- The Windowpane Test (sort of): Since we aren’t kneading by hand, we can’t do the windowpane test traditionally. However, watch the dough during the kneading cycle. It should form a cohesive ball that pulls away from the sides of the pan.
- Enhance the Flavor: For a deeper, nuttier flavor, lightly toast the flax seeds, seven-grain cereal, and cracked wheat in a dry skillet before adding them to the bread machine.
- Troubleshooting a dense loaf: A dense loaf can be caused by several things: using old yeast, not enough liquid, too much salt, or over-measuring the flour. Make sure your measurements are accurate and your yeast is fresh.
Serving & Storage Suggestions
This hearty whole grain bread is delicious served warm with butter, jam, or a drizzle of honey. It’s also excellent for making sandwiches, toast, or even croutons.
To store, allow the bread to cool completely before wrapping it tightly in plastic wrap or placing it in a bread bag. At room temperature, it will stay fresh for about 2-3 days. For longer storage, you can freeze the loaf for up to 2-3 months. To freeze, wrap the cooled loaf tightly in plastic wrap and then place it in a freezer bag. Thaw it completely at room temperature before slicing and serving. You can also reheat slices of frozen bread in a toaster or oven.
Nutritional Information
| Nutrient | Amount per Serving | % Daily Value |
|---|---|---|
| Calories | 361.3 kcal | N/A |
| Calories from Fat | 101g | 28% |
| Total Fat | 11.3 g | 17% |
| Saturated Fat | 1 g | 4% |
| Cholesterol | 0 mg | 0% |
| Sodium | 399.2 mg | 16% |
| Total Carbohydrate | 56.9 g | 18% |
| Dietary Fiber | 5.7 g | 22% |
| Sugars | 9.2 g | 37% |
| Protein | 9.1 g | 18% |
Variations & Substitutions
- Sweeten the Deal: Substitute maple syrup or honey for the brown sugar for a different flavor profile.
- Seed Sensations: Add sunflower seeds, pumpkin seeds, or sesame seeds for extra crunch and nutrients.
- Nutty Nuances: Incorporate chopped walnuts, pecans, or almonds into the dough for a richer flavor and texture.
- Spice it Up: Add a teaspoon of cinnamon, nutmeg, or cardamom for a warm, aromatic twist.
- Fruitful Additions: Dried cranberries, raisins, or chopped dates can add a touch of sweetness and chewiness.
- Gluten-Free Option: While this recipe relies heavily on gluten development, experimenting with a gluten-free bread flour blend designed for bread machines is possible, but results will vary. You’ll likely need to adjust the liquid and may need to add a binder like xanthan gum.
FAQs (Frequently Asked Questions)
Q: Can I use active dry yeast instead of instant yeast?
A: Yes, but you’ll need to proof the active dry yeast first. Dissolve it in a little warm water with a pinch of sugar and let it sit for 5-10 minutes until foamy before adding it to the bread machine.
Q: My bread is sinking in the middle. What did I do wrong?
A: This could be due to too much liquid, too much yeast, or not enough gluten development. Double-check your measurements and make sure your yeast is fresh.
Q: Can I make this recipe without a bread machine?
A: Yes, but it requires more effort. You’ll need to knead the dough by hand or with a stand mixer for about 8-10 minutes, then let it rise in a warm place for 1-1.5 hours before baking it in a preheated oven at 375°F (190°C) for 30-35 minutes.
Q: How can I prevent the bread from sticking to the pan?
A: Lightly grease the bread machine pan with cooking spray or oil before adding the ingredients.
Q: The crust is too dark. How can I prevent that?
A: If your bread machine doesn’t have a crust color setting, you can try tenting the loaf with aluminum foil during the last 15-20 minutes of baking.
Final Thoughts
This bread machine whole grain bread is more than just a recipe; it’s an invitation to experience the simple pleasure of homemade bread. With its hearty flavor, wholesome ingredients, and effortless preparation, it’s a loaf you’ll be proud to share with family and friends. Don’t be afraid to experiment with different variations and find your perfect loaf. So go ahead, dust off that bread machine, and fill your kitchen with the irresistible aroma of freshly baked bread. I encourage you to share your feedback and any creative twists you discover along the way. Perhaps pair your creation with a comforting bowl of homemade soup or a simple cheese board for a truly satisfying meal!