
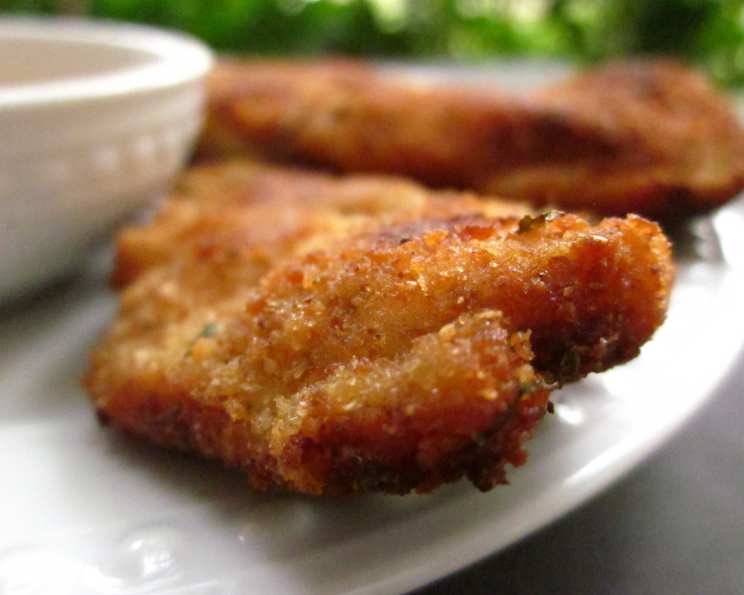
Golden-Crusted Chicken Strips: A Childhood Classic, Elevated
There’s something undeniably comforting about sinking your teeth into a perfectly cooked chicken strip. For me, it instantly transports me back to childhood afternoons spent at my grandmother’s kitchen table. I can almost smell the warm, inviting aroma of sizzling chicken mingling with her ever-present pot of simmering tomato sauce. She always made the crispiest, most flavorful chicken, and while I’ve experimented with countless variations over the years, the simple joy of a well-made, golden-brown strip remains a constant. This recipe embodies that nostalgic charm with a hint of lemon, taking a classic dish to a whole new level of deliciousness.
Recipe Overview
- Prep Time: 15 minutes
- Cook Time: 8-12 minutes
- Total Time: 23-27 minutes
- Servings: 2-4
- Yield: Varies based on size of chicken breasts
- Dietary Type: Varies depending on oil type used. Can be Dairy-Free
Ingredients
- 1 1⁄4 cups breadcrumbs (Italian or plain)
- 1 teaspoon garlic powder
- 1 tablespoon lemon zest, finely grated (increase if desired)
- 3⁄4 teaspoon kosher salt
- Fresh ground black pepper (fresh makes a difference)
- 1 cup all-purpose flour, for dredging (approximate)
- 2 large eggs, beaten
- 4 (4-6 ounce) boneless skinless chicken breasts, cut into strips (or fingers or tenders)
- 1⁄2 cup oil, for shallow frying (vegetable, canola, or peanut oil work well)
Equipment Needed
- 3 shallow dishes or pie plates
- Large skillet (12-inch diameter, cast iron preferred)
- Waxed paper or parchment paper
- Paper towels
Instructions
- Prepare your breading station. Place the flour, beaten eggs, and breadcrumbs each into separate shallow dishes.
- Add the lemon zest to the flour and mix well, distributing the zest evenly.
- Pat the chicken strips dry with paper towels. This helps the flour adhere better.
- Season both sides of the chicken strips generously with garlic powder, salt, and freshly ground black pepper. Don’t be shy with the seasoning; it’s crucial for flavor.
- Dredge each chicken strip in the flour, ensuring it’s completely coated. Shake off any excess flour.
- Dip the floured chicken strip into the beaten eggs, making sure it’s lightly and evenly coated. Hold the chicken over the egg dish to let any excess egg drip back into the bowl. This prevents the breading from becoming soggy.
- Transfer the egg-coated chicken strip to the dish with the breadcrumbs. Turn it over and press it firmly into the breading to ensure a thorough coating.
- Place the breaded chicken strip on a sheet of waxed paper or parchment paper. Repeat steps 5-7 until all the chicken strips are coated.
- Heat the oil in a large skillet (preferably cast iron) over medium heat. The oil is ready when a few stray breadcrumbs sizzle gently when dropped into the pan. Make sure the oil is hot, but not smoking.
- Carefully lay several chicken strips in the hot oil, being careful not to overcrowd the pan. Overcrowding will lower the oil temperature and result in soggy chicken.
- Cook the chicken strips without turning them until they are nicely browned on the bottom, about 3-4 minutes. Resist the urge to move them around too much; letting them sit undisturbed helps them develop a beautiful, crispy crust.
- Turn the chicken strips and cook until they are equally browned on the other side and cooked through, about 3-4 minutes more. The internal temperature of the chicken should reach 165°F (74°C).
- Transfer the cooked chicken strips to a plate lined with paper towels to drain any excess oil. Repeat with the remaining strips, adding more oil to the pan as needed.
Expert Tips & Tricks
- For extra crispy chicken: After breading the chicken, place it in the refrigerator for about 30 minutes before cooking. This helps the breading adhere better and results in a crispier crust.
- Don’t overcrowd the pan: Cook the chicken in batches to maintain the oil temperature. Overcrowding will lower the temperature and result in greasy, unevenly cooked chicken.
- Use a thermometer: Ensure the chicken is cooked through by using a meat thermometer to check the internal temperature. It should reach 165°F (74°C).
- Lemon Zest Boost: For a more pronounced lemony flavor, double the amount of lemon zest.
- Breadcrumb Variations: Experiment with different types of breadcrumbs, such as panko for a super crispy texture or seasoned breadcrumbs for added flavor.
- Spice It Up: Add a pinch of cayenne pepper or red pepper flakes to the breadcrumb mixture for a touch of heat.
Serving & Storage Suggestions
Serve these golden-crusted chicken strips immediately while they are hot and crispy. They are delicious on their own, or paired with your favorite dipping sauces. Consider creamy ranch dressing, honey mustard, tangy barbecue sauce, or a zesty sriracha mayo.
Leftover chicken strips can be stored in an airtight container in the refrigerator for up to 3-4 days.
To reheat, bake them in a preheated oven at 350°F (175°C) for about 10-15 minutes, or until heated through. You can also reheat them in an air fryer for a similar result. Microwaving is not recommended, as it can make the chicken soggy.
These chicken strips are best enjoyed fresh, but they can also be frozen for longer storage. To freeze, arrange the cooked and cooled chicken strips in a single layer on a baking sheet and freeze for about 2-3 hours, or until solid. Then, transfer them to a freezer bag or airtight container. They can be stored in the freezer for up to 2-3 months. Reheat from frozen in a preheated oven or air fryer until heated through.
Nutritional Information
| Nutrient | Amount per Serving (Approximate) | % Daily Value (Approximate) |
|---|---|---|
| Calories | 437.5 kcal | 22% |
| Total Fat | 34.65g | 53% |
| Saturated Fat | 5.4g | 27% |
| Cholesterol | 165.6mg | 55% |
| Sodium | 851.3mg | 35% |
| Total Carbohydrate | 49.1g | 16% |
| Dietary Fiber | 2.6g | 10% |
| Sugars | 2.35g | 9% |
| Protein | 35.1g | 70% |
Note: Nutritional information is an estimate and may vary based on specific ingredients and portion sizes.
Variations & Substitutions
- Gluten-Free: Use gluten-free breadcrumbs and gluten-free all-purpose flour for a gluten-free version.
- Dairy-Free: This recipe is naturally dairy-free, as long as you choose a dairy-free dipping sauce.
- Baked Chicken Strips: For a healthier option, bake the breaded chicken strips instead of frying. Preheat oven to 400°F (200°C), place chicken on a baking sheet lined with parchment paper, and bake for 15-20 minutes, or until cooked through, flipping halfway.
- Spicy Chicken Strips: Add a pinch of cayenne pepper or a dash of hot sauce to the egg mixture for a spicy kick.
- Herb-Infused: Add dried herbs like thyme, rosemary, or oregano to the breadcrumb mixture for a more complex flavor profile.
FAQs (Frequently Asked Questions)
Q: Can I use pre-seasoned breadcrumbs?
A: Yes, you can use pre-seasoned breadcrumbs, but be mindful of the salt content. You may need to adjust the amount of salt added separately.
Q: How do I know when the oil is hot enough?
A: The oil is ready when a few stray breadcrumbs sizzle gently when dropped into the pan. You can also use a thermometer to ensure the oil reaches a temperature of around 350°F (175°C).
Q: Can I use different types of oil for frying?
A: Yes, you can use any oil with a high smoke point, such as vegetable oil, canola oil, or peanut oil. Olive oil is not recommended for frying due to its lower smoke point.
Q: My breading keeps falling off. What am I doing wrong?
A: Make sure to pat the chicken dry before dredging it in flour, and shake off any excess flour before dipping it in the egg. Also, be sure to press the breadcrumbs firmly onto the chicken. Refrigerating the breaded chicken for 30 minutes before cooking can also help the breading adhere better.
Q: Can I make these ahead of time?
A: You can bread the chicken strips ahead of time and store them in the refrigerator for up to 24 hours before cooking. However, it is best to cook them fresh for the crispiest results.
Final Thoughts
This recipe is more than just instructions; it’s an invitation to create a memory, a moment of simple joy. Whether you’re recreating a childhood favorite or discovering the magic of homemade chicken strips for the first time, I encourage you to give this recipe a try. Feel free to experiment with different variations and dipping sauces to make it your own. And, most importantly, don’t forget to share your culinary creations with those you love. Enjoy!