
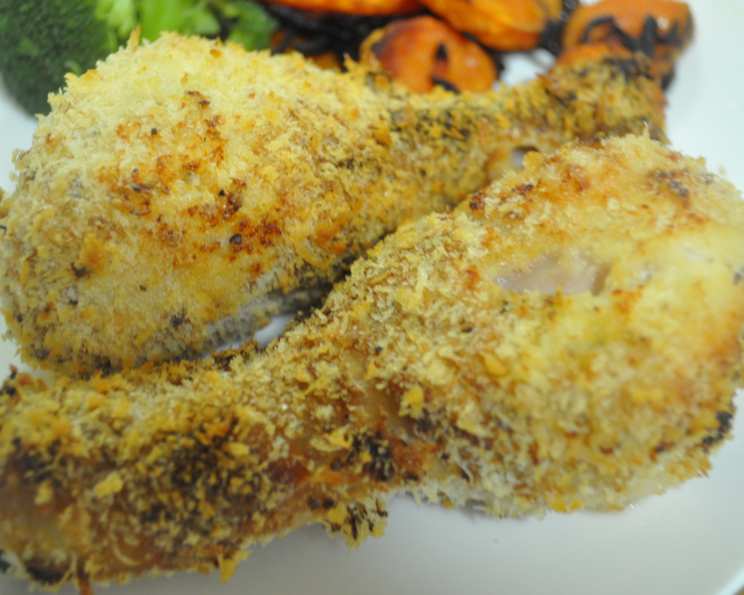
Oven-Baked Breaded Chicken Legs: A Crispy Comfort Classic
The aroma always takes me back. It’s Sunday afternoon, and my grandmother’s kitchen is filled with the warm, savory scent of seasoned breadcrumbs and roasting chicken. She never fried her chicken; instead, she perfected the art of oven-baked breading, creating a crispy, flavorful skin that sealed in all the juicy goodness. Every bite was a little taste of home, a reminder of family and simple, honest cooking. Now, I carry on that tradition, and I’m excited to share her secret with you – a method that’s both healthier and incredibly delicious.
Recipe Overview
- Prep Time: 15 minutes
- Cook Time: 40 minutes
- Total Time: 55 minutes
- Servings: 4
- Yield: 4 chicken legs
- Dietary Type: High-Protein
Ingredients
- ¼ cup Greek yogurt
- ¼ cup horseradish sauce
- 4 chicken legs, skinned
- ¼ cup olive oil
- 1 ½ cups panko breadcrumbs
- Salt and pepper to taste
Equipment Needed
- Large bowl
- Whisk
- Baking sheet
- Parchment paper
Instructions
- In a large bowl, whisk together the horseradish sauce and Greek yogurt. This creates a tangy and flavorful marinade that tenderizes the chicken and helps the breadcrumbs adhere.
- Add the skinned chicken legs to the bowl, turning to thoroughly coat each piece in the yogurt mixture. Ensure every crevice is covered for maximum flavor infusion.
- Let the chicken stand at room temperature for 30 minutes. Alternatively, cover the bowl and refrigerate for up to 12 hours to allow the flavors to meld even further. This marinating step is crucial for tender, flavorful chicken.
- Position a rack in the upper third of your oven and preheat to 400 degrees Fahrenheit (200 degrees Celsius). The upper rack position promotes even browning and crisping of the breadcrumbs.
- Line a baking sheet with parchment paper for easy cleanup and to prevent sticking. Then, grease the parchment paper with 2 tablespoons of olive oil. This ensures the chicken legs don’t stick and develop a golden-brown crust.
- In a separate large bowl, toss together the panko breadcrumbs, salt, and pepper. Adjust the amount of salt and pepper to your liking. Feel free to add other seasonings like garlic powder, onion powder, or paprika for extra flavor.
- Working with one chicken leg at a time, coat it generously in the panko mixture. Press the breadcrumbs firmly onto the chicken to ensure they adhere properly. This creates a thick, crispy coating.
- Transfer the breaded chicken legs to the prepared baking sheet, spacing them evenly to allow for proper air circulation.
- Drizzle the remaining 2 tablespoons of olive oil evenly over the breaded chicken legs. This adds richness and helps the breadcrumbs crisp up beautifully in the oven.
- Bake the chicken legs until they are golden brown and cooked through, about 40 minutes. The internal temperature of the chicken should reach 165 degrees Fahrenheit (74 degrees Celsius). Use a meat thermometer to ensure doneness.
- Remove from the oven and let rest for 5-10 minutes before serving.
Expert Tips & Tricks
- Achieving Maximum Crispiness: For an extra crispy crust, try placing the breaded chicken legs on a wire rack set inside the baking sheet. This allows for better air circulation around the chicken, resulting in even crispier breading.
- Flavor Boost: Add a pinch of smoked paprika or cayenne pepper to the panko mixture for a subtle smoky or spicy kick.
- Make-Ahead Tip: Bread the chicken legs ahead of time and store them in the refrigerator for up to 24 hours. This allows the flavors to meld even further and saves you time on the day of cooking. Just remember to let them come to room temperature for about 30 minutes before baking.
- Don’t overcrowd the pan: Overcrowding the baking sheet will steam the chicken, preventing the breadcrumbs from getting crispy. Bake in batches if necessary.
- Check for Doneness: The most reliable way to ensure the chicken is cooked through is to use a meat thermometer. Insert it into the thickest part of the thigh, avoiding the bone.
Serving & Storage Suggestions
Serve these oven-baked breaded chicken legs hot and fresh from the oven. They are delicious on their own or paired with your favorite sides, such as mashed potatoes, roasted vegetables, coleslaw, or a simple green salad. For an extra touch of flavor, serve with a dipping sauce like ranch dressing, honey mustard, or barbecue sauce.
Leftover chicken legs can be stored in an airtight container in the refrigerator for up to 3-4 days. To reheat, preheat your oven to 350 degrees Fahrenheit (175 degrees Celsius) and bake the chicken legs for about 15-20 minutes, or until heated through and the breading is crispy again. You can also reheat them in the microwave, but the breading may not be as crispy. To freeze, wrap the chicken legs individually in plastic wrap and then place them in a freezer-safe bag or container. They can be frozen for up to 2-3 months. Thaw overnight in the refrigerator before reheating.
Nutritional Information
| Nutrient | Amount per Serving | % Daily Value |
|---|---|---|
| Calories | 599 kcal | N/A |
| Calories from Fat | 323 g | 54% |
| Total Fat | 36 g | 55% |
| Saturated Fat | 8.1 g | 40% |
| Cholesterol | 138.6 mg | 46% |
| Sodium | 476.7 mg | 19% |
| Total Carbohydrate | 30.9 g | 10% |
| Dietary Fiber | 2.3 g | 9% |
| Sugars | 3.7 g | 14% |
| Protein | 35.9 g | 71% |
Note: Nutritional information is an estimate and may vary based on specific ingredients and preparation methods.
Variations & Substitutions
- Gluten-Free Option: Use gluten-free panko breadcrumbs or a mixture of almond flour and gluten-free breadcrumbs for a gluten-free version.
- Spicy Chicken Legs: Add a dash of cayenne pepper or your favorite hot sauce to the yogurt marinade or panko mixture for a spicy kick.
- Herb-Crusted Chicken: Mix fresh herbs like rosemary, thyme, or parsley into the panko mixture for an aromatic and flavorful crust.
- Parmesan Chicken: Add grated Parmesan cheese to the panko mixture for a cheesy and savory twist.
- Lemon-Herb Chicken: Add lemon zest and your favorite herbs to the yogurt mixture for a zesty and flavorful chicken.
FAQs (Frequently Asked Questions)
Q: Can I use boneless, skinless chicken thighs instead of chicken legs?
A: Yes, you can substitute boneless, skinless chicken thighs. Adjust the cooking time accordingly, as thighs may require slightly less time to cook through.
Q: Can I use regular breadcrumbs instead of panko breadcrumbs?
A: While you can use regular breadcrumbs, panko breadcrumbs provide a lighter and crispier texture. If using regular breadcrumbs, consider toasting them slightly before coating the chicken to enhance their crispiness.
Q: How do I prevent the breadcrumbs from falling off the chicken?
A: Ensure the chicken is well coated in the yogurt marinade before breading. Press the breadcrumbs firmly onto the chicken to help them adhere properly.
Q: Can I fry these chicken legs instead of baking them?
A: While this recipe is specifically designed for oven-baking, you can certainly fry the chicken legs if desired. Heat about an inch of oil in a large skillet over medium-high heat. Fry the chicken legs for about 8-10 minutes per side, or until golden brown and cooked through.
Q: How can I make sure the chicken is cooked all the way through?
A: The best way to ensure the chicken is cooked through is to use a meat thermometer. Insert it into the thickest part of the thigh, avoiding the bone. The internal temperature should reach 165 degrees Fahrenheit (74 degrees Celsius).
Final Thoughts
I hope this recipe inspires you to create your own oven-baked breaded chicken leg masterpiece. It’s a simple yet satisfying dish that’s perfect for a weeknight dinner or a weekend gathering. Feel free to experiment with different seasonings and flavor combinations to create your signature version. And don’t forget to share your creations with me! I’d love to see your take on this classic comfort food. Consider pairing this with a crisp green salad and a chilled glass of lemonade for the perfect meal. Happy cooking!