
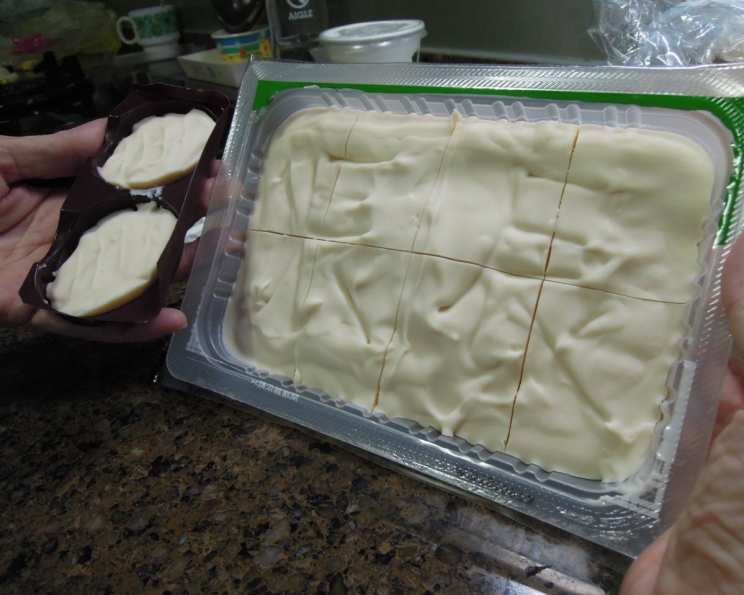
Breast Milk Olive Oil Soap: A Nourishing Recipe
I still remember the day my sister announced she was pregnant. The excitement was palpable, and as her due date approached, the conversations shifted to all things baby – the nursery, the clothes, and, of course, feeding. Like many new mothers, she chose to breastfeed, a decision I wholeheartedly supported. But what struck me was the sheer dedication and, frankly, the abundance of breast milk she produced. It was then she stumbled upon the idea of making soap, a gentle and practical way to harness its nourishing properties. The first batch we made together smelled faintly of her baby’s sweet skin, and using it felt like a little hug. This recipe is a tribute to that resourceful spirit and the incredible benefits of breast milk.
Recipe Overview
- Prep Time: 30 minutes
- Cure Time: 3-8 weeks
- Total Time: 1440 hours 30 minutes (approx. 60 days)
- Yield: Approx. 800ml of soap (about 10 bars)
- Dietary Type: Suitable for sensitive skin
Ingredients
- 200g breast milk
- ½ tablespoon salt
- ½ tablespoon sugar
- 76g lye (sodium hydroxide) (water to lye ratio 0.145)
- 526g olive oil
- Ice
- Water (for cooling)
Note: Lye is a caustic substance. Handle with extreme care. Always wear gloves and eye protection. Ensure adequate ventilation.
Equipment Needed
- 800 ml mold (silicone or lined box)
- Glass containers (for lye solution and oil)
- Stainless steel spoon
- Hand blender
- Thermometer (optional, but recommended)
- Gloves
- Eye protection
- Ice bath
- Scale
Instructions
-
Prepare the Mold: Begin by preparing your 800 ml mold. This could be a silicone mold or a box lined with parchment paper. Make sure it is clean and ready to receive the soap mixture.
-
Dissolve Additives: In a separate container, dissolve ½ tablespoon of salt and ½ tablespoon of sugar into the 200g of breast milk. These additives help to create a harder bar of soap and improve lather.
-
Freeze the Breast Milk: Freeze the breast milk mixture into a slush. This is a crucial step to prevent the lye from scorching the milk and turning it brown. The colder the milk, the better the color will be preserved.
-
Prepare the Lye Solution: Place the slushy breast milk in a glass container and nestle it into a bowl filled with ice and water. This ice bath will help maintain a low temperature. Gradually add the 76g of lye to the breast milk slush very slowly and with constant stirring. Always add lye to liquid, never the other way around. Use a stainless steel spoon for stirring. The mixture will heat up considerably. Continue stirring until the lye is completely dissolved and the solution has cooled down to about lukewarm to the touch. This step requires patience and careful monitoring of the temperature.
-
Heat the Olive Oil: In another glass container, heat the 526g of olive oil in the microwave until it is also lukewarm to the touch. Avoid overheating; you want it to be roughly the same temperature as the lye solution.
-
Combine Oil and Lye Solution: Once both the lye solution and the olive oil are at the desired temperature (lukewarm), carefully and slowly add the lye solution to the oil. Do not add the oil to the lye solution. Stir continuously until the two are fully incorporated.
-
Achieve Trace: Using a hand blender, blend the mixture for 1-3 minutes, pausing occasionally to observe the consistency. You’re looking for “trace,” which is when the mixture thickens enough that a drizzle of the batter on the surface leaves a faint, temporary “trace” before sinking back in. This indicates that saponification is occurring.
-
Pour into Mold: Once trace is achieved, immediately pour the soap mixture into your prepared mold.
-
Cut: Allow the soap to sit in the mold for 8-24 hours. The exact time will depend on the ambient temperature and humidity. Once the soap has hardened enough to hold its shape but is still pliable, carefully remove it from the mold and cut it into bars.
-
Cure: Place the cut bars of soap on a wire rack in a well-ventilated area. Allow them to cure for 3-8 weeks. This curing process allows excess water to evaporate and the saponification process to complete, resulting in a milder, longer-lasting bar of soap.
Expert Tips & Tricks
- Temperature Control is Key: Maintaining a consistent temperature throughout the process is crucial. Overheating can cause discoloration or even a volcanic eruption of the soap batter. A thermometer is your best friend here.
- Lye Safety First: Always prioritize safety when working with lye. Wear gloves and eye protection, and work in a well-ventilated area. Have vinegar on hand to neutralize any lye spills.
- Fragrance and Color: While this recipe is designed for a simple, unscented soap, you can add essential oils or natural colorants at trace. Be sure to research safe usage rates for soap making.
- Superfatting: Some soap makers choose to “superfat” their soap by adding a small amount of extra oil (usually 5-8% of the total oil weight) at trace. This ensures that there is more unsaponified oil in the finished soap, resulting in a more moisturizing bar. However, for breast milk soap, it’s often best to keep it simple.
- Gel Phase (Optional): Some soap makers encourage the gel phase, where the soap heats up and becomes translucent. This can result in a shinier bar. You can encourage gel phase by insulating the mold with a blanket. However, for breast milk soap, it’s often best to avoid gel phase to prevent overheating and discoloration.
Serving & Storage Suggestions
Breast milk soap is best used as a gentle cleanser for sensitive skin. Store unused bars in a cool, dry, and well-ventilated place. Properly cured soap will last for years. Avoid storing soap in humid environments, as this can cause it to become soft and mushy.
Nutritional Information
Note: Since soap is not ingested, traditional nutritional information is not applicable. However, this table describes the approximate chemical composition based on the ingredients.
| Component | Approximate Amount |
|---|---|
| Saponified Oils | Varies |
| Glycerin | Varies (naturally produced during saponification) |
| Unsaponified Oils (from Olive Oil) | Varies |
| Water | Varies (decreases during curing) |
| Sodium Salts (from Lye) | Present |
Variations & Substitutions
- Other Oils: While olive oil is the primary oil in this recipe, you can experiment with substituting a small percentage (up to 20%) with other oils like coconut oil (for lather) or shea butter (for moisturizing). Be sure to adjust the lye amount accordingly using a soap calculator.
- Goat Milk Soap: If you don’t have breast milk available, goat milk is a popular alternative with similar nourishing properties. Follow the same instructions, substituting goat milk for breast milk.
- Vegan Option: While breast milk itself is not vegan, you can create a similarly gentle soap using plant-based milks like oat milk or almond milk. Be aware that these milks may behave differently than breast milk, so experimentation may be necessary.
FAQs (Frequently Asked Questions)
Q: Why is the breast milk frozen into a slush?
A: Freezing the breast milk into a slush prevents the lye from overheating and scorching the milk, which can cause discoloration and an unpleasant odor. Keeping the milk cold helps preserve its beneficial properties.
Q: Is it safe to use lye in soap making?
A: Yes, when handled properly. Lye is a necessary ingredient for saponification, the chemical reaction that turns oils into soap. Always wear protective gear and follow safety precautions. Once the saponification process is complete (after curing), there is no lye remaining in the finished soap.
Q: How long does the soap need to cure?
A: A minimum of 3 weeks is recommended for curing, but longer is better. Curing allows excess water to evaporate, making the soap harder and milder. The longer the cure, the gentler the soap will be on the skin.
Q: Can I add essential oils to this recipe?
A: Yes, you can add essential oils at trace. However, be sure to research safe usage rates for soap making, as some essential oils can be irritating to the skin. Start with a small amount and adjust to your preference.
Q: What if my soap cracks after cutting?
A: Cracking can be caused by a variety of factors, including overheating, rapid temperature changes, or a high percentage of hard oils. If your soap cracks, don’t worry! It’s still usable. To prevent cracking in the future, try insulating the mold more carefully or reducing the amount of hard oils in your recipe.
Final Thoughts
Creating your own breast milk olive oil soap is a rewarding experience. It’s a beautiful way to utilize this precious resource and create a gentle, nourishing cleanser for yourself or your loved ones. Don’t be intimidated by the process; with careful attention to detail and a commitment to safety, you’ll be crafting luxurious bars in no time. I encourage you to try this recipe and experiment with variations to create a soap that perfectly suits your skin’s needs. Share your creations and experiences with others, and let’s spread the word about the incredible benefits of homemade soap!