
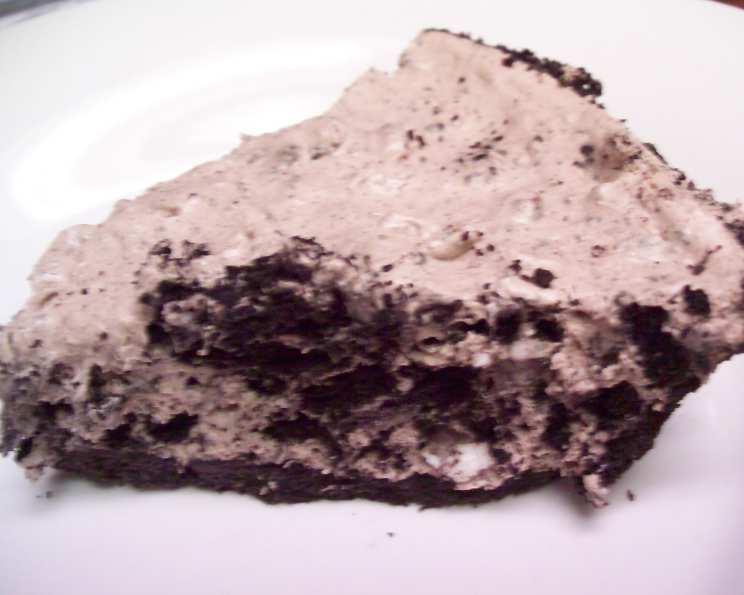
Bria’s No-Bake Oreo Mousse Pie: A Decadent Dream
There’s something magical about a dessert that requires absolutely no baking. As a kid, my summers were filled with adventures to my grandmother’s house. She always had something sweet waiting for me, and while her apple pie was legendary, the real star in my young eyes was her no-bake chocolate creations. The sheer simplicity of it, combined with the explosion of flavors, felt like pure wizardry. Bria’s No-Bake Oreo Mousse Pie evokes that same sense of childhood wonder, bringing me right back to those carefree summer days. It’s a delightful paradox – incredibly rich and indulgent, yet ridiculously easy to make.
Recipe Overview
- Prep Time: 15 minutes
- Cook Time: 0 minutes
- Total Time: 6+ hours (includes chilling)
- Servings: 12
- Yield: 2 pies
- Dietary Type: Vegetarian
Ingredients
- 1/2 lb crushed Oreo cookies
- 8 ounces whipped cream cheese, softened
- 3/4 cup milk
- 2 tablespoons Hershey’s syrup, and more to drizzle
- 1/4 cup powdered sugar
- 1/2 cup instant chocolate pudding mix, dry
- 9 ounces whipped topping
- 2 Oreo cookie pie crusts (Store bought)
Equipment Needed
- Large mixing bowl
- Electric mixer or whisk
- Measuring cups and spoons
- Rubber spatula
- Two 9-inch pie plates
Instructions
-
Begin by preparing the mousse filling. In a large bowl, combine the softened whipped cream cheese and dry instant chocolate pudding mix. Use an electric mixer or a sturdy whisk to beat these together until the mixture is completely smooth and free of any lumps. Ensuring the cream cheese is properly softened is crucial for achieving a velvety texture.
-
Next, add the powdered sugar, Hershey’s syrup, and milk to the cream cheese mixture. Continue to mix until everything is well incorporated and the mixture has a uniform color and consistency. Be careful not to overmix at this stage, as it can cause the cream cheese to become too thin.
-
Now, gently fold in the whipped topping using a rubber spatula. Be sure to fold, not stir, to prevent deflating the whipped topping and losing that light, airy texture we want in our mousse. This step is all about preserving the mousse’s delicate volume.
-
Incorporate the crushed Oreo cookie crumbs into the mousse. Gently mix until the cookie crumbs are evenly distributed throughout the filling. Don’t overmix here either; you want to maintain some distinct cookie pieces for added texture.
-
Pour the finished Oreo mousse filling evenly into the two store-bought Oreo cookie pie crusts. Spread the filling to ensure it reaches all edges of the crust for a visually appealing presentation.
-
Refrigerate the pies for at least 6 hours, but preferably overnight. This chilling period is essential to allow the mousse to set properly, resulting in a firm, sliceable pie. The longer the pies chill, the better the texture will be.
-
Before serving, decorate the top of each pie with an extra drizzle of Hershey’s syrup. Create a crosswise pattern for an elegant touch.
Expert Tips & Tricks
- Using whipped cream cheese is key to the smooth, light texture of the mousse. Regular cream cheese can be used, but it must be softened thoroughly and beaten until completely smooth to avoid lumps.
- For an even richer flavor, use double-stuffed Oreos in the crust, or as a garnish.
- If you’re short on time, you can speed up the chilling process by placing the pies in the freezer for about 2 hours. However, be careful not to freeze them solid.
- For a more intense chocolate flavor, add a tablespoon of unsweetened cocoa powder to the mousse filling.
- To prevent the pie crust from becoming soggy, you can brush the inside of the crust with a thin layer of melted chocolate before adding the filling.
Serving & Storage Suggestions
Serve Bria’s No-Bake Oreo Mousse Pie chilled, straight from the refrigerator. A dollop of extra whipped topping or a sprinkle of Oreo crumbs adds a delightful finishing touch. The pie is best enjoyed within 2-3 days of making it.
Store any leftover pie in the refrigerator, covered tightly with plastic wrap or in an airtight container. It will keep for up to 3 days. Freezing the pie is not recommended, as it can affect the texture of the mousse.
Nutritional Information
| Nutrient | Amount per Serving | % Daily Value |
|---|---|---|
| Calories | 428 kcal | – |
| Calories from Fat | 246 g | 57% |
| Total Fat | 27.4 g | 42% |
| Saturated Fat | 10.8 g | 54% |
| Cholesterol | 40.4 mg | 13% |
| Sodium | 436.1 mg | 18% |
| Total Carbohydrate | 42.3 g | 14% |
| Dietary Fiber | 1.2 g | 4% |
| Sugars | 21.7 g | – |
| Protein | 5.6 g | 11% |
Note: Nutritional information is an estimate and may vary based on specific ingredients used.
Variations & Substitutions
- Gluten-Free: Use gluten-free Oreo cookies and a gluten-free pie crust for a gluten-free version.
- Vegan: Substitute the whipped cream cheese with a vegan cream cheese alternative, use a dairy-free milk, and opt for a vegan whipped topping. Ensure the Oreos themselves are vegan-friendly (some varieties may contain traces of dairy).
- Different Flavors: Experiment with different flavors of instant pudding, such as vanilla or cheesecake, for a unique twist.
- Chocolate Lover’s Dream: Add chocolate chips to the mousse filling for an extra dose of chocolate.
FAQs (Frequently Asked Questions)
Q: Can I use regular cream cheese instead of whipped cream cheese?
A: Yes, you can. However, make sure to soften it completely and beat it until it’s very smooth to avoid lumps in the mousse.
Q: Can I make this pie ahead of time?
A: Absolutely! In fact, it’s recommended to make it at least 6 hours in advance to allow the mousse to set properly.
Q: Can I freeze this pie?
A: Freezing is not recommended, as it can change the texture of the mousse and make it watery when thawed.
Q: What can I use instead of Hershey’s syrup?
A: You can use any chocolate syrup or even melted chocolate for drizzling on top.
Q: My mousse is too runny. What did I do wrong?
A: Make sure your cream cheese is softened, but not melted. Also, avoid overmixing the mousse, as this can cause the whipped topping to deflate and the mixture to become too thin.
Final Thoughts
Bria’s No-Bake Oreo Mousse Pie is a guaranteed crowd-pleaser. Its simplicity belies its incredible flavor and texture, making it the perfect dessert for any occasion, whether it’s a casual family gathering or a special celebration. Don’t be afraid to experiment with variations to make it your own, and most importantly, have fun creating this delightful treat! I encourage you to try this recipe, share it with your loved ones, and let me know what you think. Pair it with a glass of cold milk or a scoop of vanilla ice cream for an extra indulgent experience. Happy baking (well, no-baking!)!