
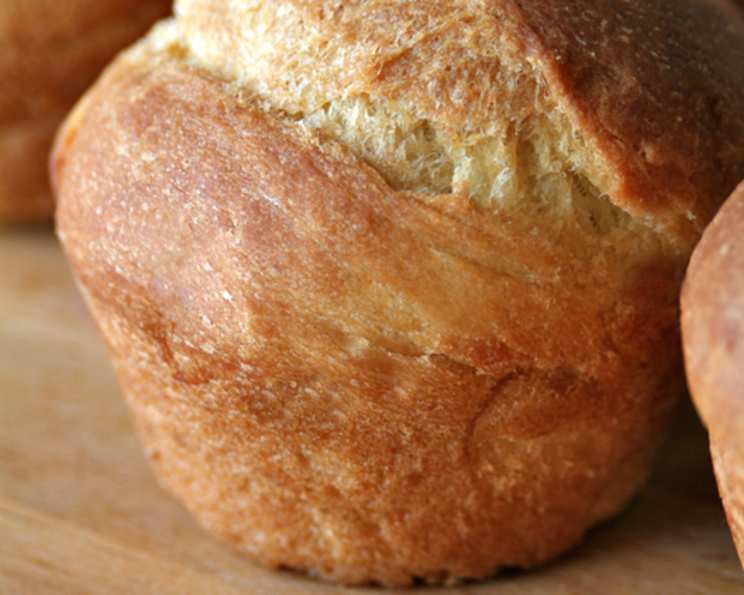
The Ultimate Brioche: From Muffin to Loaf
There’s something truly magical about the aroma of freshly baked brioche filling the kitchen. My earliest memory of brioche wasn’t in a fancy French bakery, but rather a small, family-owned cafe near my grandmother’s house. Every Sunday, she would treat me to a warm, golden brioche bun, its buttery sweetness a comforting prelude to our afternoon walks. The pillowy texture and delicate crumb were unlike anything I’d ever tasted, and it sparked a lifelong passion for mastering this delightful bread. Recreating that memory at home, and sharing it with my family, is a joy I hope to pass on for generations.
Recipe Overview
- Prep Time: 45 minutes (plus overnight refrigeration)
- Cook Time: 25-35 minutes
- Total Time: Approximately 14 hours (including proofing and refrigeration)
- Servings: 12 muffins or 2 loaves
- Yield: 12 muffins or 2 loaves
- Dietary Type: Not Gluten-Free, Not Dairy-Free
Ingredients
- 1/2 cup warm water
- 1 (1/4 ounce) package active dry yeast
- 3 tablespoons sugar
- 6 large eggs, at room temperature
- 4 1/4 cups unbleached flour
- 2 teaspoons salt
- 1 cup butter, very soft
- 1 egg, for egg wash
- 1 tablespoon milk, for egg wash
- 1 cup golden raisins (optional) or 1 cup dried cherries (optional)
Equipment Needed
- Stand mixer with paddle and dough hook attachments
- Large bowl
- Plastic wrap
- 12-muffin tin or two loaf pans
- Pastry scraper or sharp knife
- Baking sheets
- Wire rack
Instructions
-
Begin by warming the bowl of your stand mixer with hot water, then dump it out. This creates a slightly warmer environment for the yeast to thrive.
-
In the warmed bowl, mix together the yeast, warm water, and sugar using a rubber spatula. Let this mixture sit for 5 minutes, or until it becomes foamy, indicating that the yeast is active and the sugar has dissolved. This step is crucial for ensuring your brioche rises properly.
-
Add the eggs one at a time to the yeast mixture. Using the paddle attachment on your stand mixer, beat on medium speed for 1 minute after each addition, until each egg is fully incorporated. Room temperature eggs emulsify better, contributing to a smoother dough.
-
With the mixer on low speed, gradually add 2 cups of the flour and the salt. Mix for 5 minutes, allowing the gluten to develop and begin forming the structure of the dough.
-
Add 2 more cups of flour and mix for another 5 minutes on low speed. Patience is key here; don’t rush the gluten development.
-
Still on low speed, add the very soft butter in chunks. Mix, occasionally scraping the paddle, for 2 minutes longer. Ensure the butter is properly softened to incorporate evenly.
-
Switch to the dough hook attachment. Set the mixer on low speed again.
-
While the mixer is running, sprinkle in the last quarter cup of flour. Mix on low speed for 3-4 minutes, until the dough is well combined and elastic, but still sticky. Don’t be tempted to add more flour; a slightly sticky dough is essential for a moist, tender brioche.
-
This is a soft, sticky dough. Scrape the dough into a large buttered bowl and cover tightly with plastic wrap. Refrigerate overnight. This slow, cold fermentation develops the complex flavors characteristic of brioche.
-
The next day, allow the dough to sit at room temperature for an hour. It should have risen substantially in the fridge.
-
Grease a 12-muffin tin, if you are making muffins, or two loaf pans.
-
Turn the dough onto a floured surface and cut it in half.
-
For muffins: Pat each half into a rectangle with the dough about a half inch thick.
-
Spread the raisins and dried cherries evenly over the rectangle, using more if desired. These additions provide a delightful burst of sweetness and chewy texture.
-
Starting on one of the rectangle’s wide ends, roll up into a tight cylinder. The dough may stick; use a pastry scraper or a sharp knife to help loosen it. Pinch the seam closed.
-
Cut each cylinder into 6 equal portions. Stick each dough portion seam side down into the muffin tin.
-
Cover and let the muffins rise in a warm spot for 2 hours, until doubled in size. Proper proofing is essential for a light and airy final product.
-
For loaves: Pat each half into a 6×8 rectangle, and roll on the wider side, as instructed above. Place each cylinder, seam side down, in a loaf pan.
-
Cover and let the loaves rise in a warm spot for 2 hours, until doubled in size.
-
Preheat the oven to 375 degrees Fahrenheit.
-
Beat the egg with the milk to create an egg wash. Brush the tops of the risen muffins (or loaves) with the egg wash. This gives them a beautiful golden-brown sheen.
-
Bake the muffins for 25-30 minutes, until they are a deep golden brown. Bake loaves for 30-35 minutes. Keep a close eye on them; ovens can vary.
-
Let the muffins or loaves cool briefly in their pans before transferring them to a wire rack to cool completely. Cooling them on a wire rack prevents condensation and soggy bottoms.
Expert Tips & Tricks
- For an even richer flavor, try using browned butter instead of regular softened butter. Brown the butter slowly in a saucepan until it smells nutty and turns a golden-brown color. Let it cool slightly before adding it to the dough.
- If your kitchen is cold, create a warm proofing environment by placing the covered dough in a turned-off oven with a pan of hot water underneath.
- To prevent the tops of the muffins or loaves from browning too quickly, tent them with foil during the last 10 minutes of baking.
Serving & Storage Suggestions
Serve your warm brioche muffins or loaves as part of a brunch spread, alongside coffee or tea, or as a delightful addition to any meal. They’re delicious on their own or with a smear of jam or butter.
Store cooled brioche at room temperature in an airtight container for up to 2 days. For longer storage, wrap well and freeze for up to 2 months. To reheat, thaw completely and warm in a 350°F oven for 5-10 minutes, or until heated through.
Nutritional Information
| Nutrient | Amount per Serving | % Daily Value |
|---|---|---|
| Calories | 354.4 kcal | N/A |
| Calories from Fat | 168 g | 48% |
| Total Fat | 18.8 g | 28% |
| Saturated Fat | 10.7 g | 53% |
| Cholesterol | 164.2 mg | 54% |
| Sodium | 539.4 mg | 22% |
| Total Carbohydrate | 37.5 g | 12% |
| Dietary Fiber | 1.3 g | 5% |
| Sugars | 3.5 g | 14% |
| Protein | 8.7 g | 17% |
Variations & Substitutions
- Chocolate Chip Brioche: Substitute the raisins or cherries with 1 cup of chocolate chips.
- Savory Brioche: Omit the sugar and add 1/2 cup of grated cheese and 1/4 cup of chopped herbs (such as rosemary or thyme) to the dough.
- Citrus Brioche: Add the zest of one lemon or orange to the dough for a bright, citrusy flavor.
FAQs (Frequently Asked Questions)
Q: Why do I need to refrigerate the dough overnight?
A: Refrigerating the dough slows down the yeast activity, allowing the gluten to relax and develop a more complex flavor. It also makes the dough easier to handle.
Q: Can I use a different type of flour?
A: While unbleached flour is recommended for its protein content, you can use bread flour for a chewier texture or all-purpose flour if that’s all you have on hand.
Q: What if my dough doesn’t rise?
A: Ensure your yeast is fresh and active. The water should be warm, not hot, to avoid killing the yeast. Also, make sure the proofing environment is warm enough.
Q: Can I freeze the baked brioche?
A: Yes, brioche freezes very well. Wrap it tightly in plastic wrap and then in foil or place it in a freezer-safe bag.
Q: How can I tell if the brioche is done baking?
A: The brioche is done when it is a deep golden brown and a toothpick inserted into the center comes out clean.
Final Thoughts
Brioche, whether enjoyed as individual muffins or a sumptuous loaf, is a testament to the simple pleasure of baking. This recipe, inspired by Ina Garten’s effortless approach, offers a path to creating bakery-quality bread right in your own kitchen. Don’t be intimidated by the multi-step process – the results are well worth the effort. So, go ahead, embrace the buttery goodness, and share the joy of homemade brioche with your loved ones. I encourage you to try your hand at this recipe, experiment with variations, and let me know what delectable creations you come up with!