
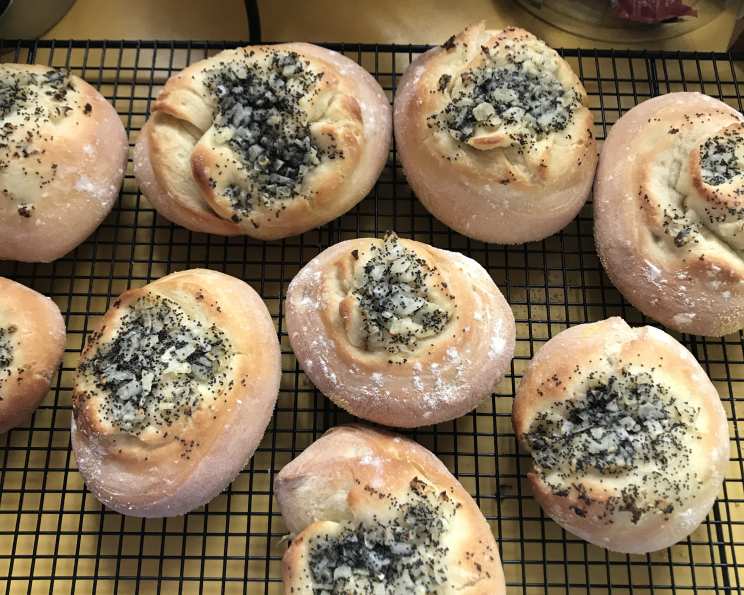
Brooklyn Bialy (Bialystok Kucken): A Taste of Nostalgia
The scent of yeast and onions always brings me back to my grandmother’s tiny kitchen. She had this uncanny ability to transform simple ingredients into the most soul-satisfying food, and her bialys were legendary. I remember watching, mesmerized, as she coaxed the dough to life, creating those characteristic depressions with her thumb, filling them with the savory onion mixture. That aroma, that warmth, that taste of home – it’s a culinary memory I cherish, and one I’m thrilled to share with you.
Recipe Overview
- Prep Time: 2 hours 30 minutes
- Cook Time: 12-13 minutes
- Total Time: 2 hours 42-43 minutes
- Servings: 8
- Yield: 8 bialys
- Dietary Type: Vegetarian
Ingredients
For the Onion Topping:
- 1 teaspoon olive oil or vegetable oil
- 1 ½ teaspoons poppy seeds
- ⅓ cup onion, minced
- ½ teaspoon kosher salt, coarse
For the Dough:
- 2 cups water, warm (110 to 115 degrees F), divided
- 7 grams active dry yeast
- 2 teaspoons sugar
- 2 ¼ teaspoons salt
- 1 ¾ cups bread flour
- 3 ½ cups all-purpose flour
- Cornmeal, for dusting baking sheets
Equipment Needed
- Large bowl
- Stand mixer with dough hook (optional, but recommended)
- Plastic wrap
- Baking sheets
- Parchment paper
- Small bowl
- Wire racks
Instructions
-
First, prepare your baking sheets. Cover two baking sheets with parchment paper and sprinkle them lightly with cornmeal. The cornmeal will prevent the bialys from sticking.
-
Next, make the Onion Topping. In a small bowl, combine the olive oil (or vegetable oil), poppy seeds, minced onions, and coarse kosher salt. Mix well and set aside. This topping is what gives the bialy its distinctive flavor, so don’t skimp on the ingredients!
-
Now, let’s start with the dough. In a large bowl, combine ½ cup of the warm water, the active dry yeast, and the sugar. Let this mixture stand for 10 minutes, or until the yeast is foamy. This step ensures that your yeast is active and will leaven the dough properly.
-
Add the remaining 1 ½ cups warm water, the salt, bread flour, and all-purpose flour to the yeast mixture.
-
Knead the dough by hand or with the dough hook of a stand mixer for 8 minutes, until it becomes smooth. The dough will be soft and slightly sticky.
-
If you find the dough is too moist, add flour one tablespoon at a time, until it reaches a manageable consistency. Conversely, if the dough seems too dry, add warm water one tablespoon at a time. The key is to achieve a dough that is smooth and elastic but not overly sticky.
-
Form the dough into a ball and place it in a lightly oiled bowl, turning to coat all sides. Cover the bowl tightly with plastic wrap and let the dough rise in a warm place for 1 ½ hours, or until it has tripled in bulk. This first rise is crucial for developing the flavor and texture of the bialys.
-
Punch the dough down in the bowl to release the air. Turn the dough over, cover it again with plastic wrap, and let it rise for another 45 minutes, or until it has doubled in bulk. This second rise helps to further develop the dough’s gluten structure, resulting in a lighter and more airy bialy.
-
On a floured board or counter, punch the dough down again to release any remaining air. Roll the dough into a log shape.
-
With a sharp knife, cut the log into 8 equal rounds.
-
Lay the dough rounds flat on a lightly floured board, cover them with a clean kitchen towel, and let them rest for 10 minutes. This allows the gluten to relax, making the dough easier to shape.
-
Gently pat each dough round into circles, making them a little higher in the middle than at the edge. Aim for circles about 3 to 4 inches in diameter.
-
Place the shaped bialys on the prepared baking sheets, cover them loosely with plastic wrap, and let them rise for an additional 30 minutes, or until they have increased by about half in bulk. Be careful not to let them over-rise, as this can lead to a collapse in the oven.
-
Preheat the oven to 425 degrees F (220 degrees C).
-
Make an indentation in the center of each bialy with two fingers of each hand, pressing from the center outward, leaving a 1-inch rim. This creates the characteristic depression that holds the onion topping.
-
Place approximately 1 teaspoon of the prepared Onion Topping in the center hole of each bialy.
-
Dust the bialys lightly with flour, cover them again with plastic wrap, and let them rise for a final 15 minutes.
-
Bake the bialys on the upper and lower shelves of the preheated oven for 6 to 7 minutes. Then, switch the pans and reverse their positions (front to back) to ensure even baking. Bake for another 5 to 6 minutes, or until the bialys are lightly browned.
-
NOTE: These are soft rolls, so it is important not to bake them too long, or they will become dry.
-
Remove the bialys from the oven and let them cool completely on wire racks.
-
After cooling, immediately place the bialys in a plastic bag. This will allow the exterior to soften slightly, giving them a pleasantly chewy texture.
-
NOTE: These rolls are best eaten fresh, preferably lightly toasted and smeared with cream cheese. For longer storage, keep them in the freezer.
Expert Tips & Tricks
- Warmth is Key: Ensuring your water is within the 110-115°F range is crucial for yeast activation. Too hot, and you’ll kill the yeast; too cold, and it won’t activate properly.
- Don’t Overknead: Overkneading can result in tough bialys. Aim for a smooth and elastic dough, but stop kneading as soon as it reaches that stage.
- Proofing Environment: Create a warm, draft-free environment for proofing the dough. A slightly warmed oven (turned off) works well.
- Shaping Matters: When creating the indentation, be gentle but firm. You want to create a well that will hold the onion topping without tearing the dough.
- Baking Stone Boost: If you have a baking stone, preheat it in the oven for at least 30 minutes before baking. This will provide a hot surface for the bialys to bake on, resulting in a crispier bottom.
Serving & Storage Suggestions
These bialys are best enjoyed fresh, within a day or two of baking. Lightly toasting them brings out their flavors beautifully. Smear them with cream cheese, or top with smoked salmon, tomatoes, or avocado for a more substantial meal.
- Room Temperature: Store in an airtight container for up to 2 days.
- Refrigerator: Store in an airtight container for up to 4 days.
- Freezer: For longer storage, freeze bialys in a freezer-safe bag for up to 2 months. Thaw completely before toasting or reheating.
To reheat, toast in a toaster or under the broiler until warmed through. You can also wrap them in foil and warm them in a low oven (300°F/150°C) for about 10 minutes.
Nutritional Information
(Estimated values per bialy)
| Nutrient | Amount per Serving | % Daily Value |
|---|---|---|
| Calories | 315.8 kcal | N/A |
| Calories from Fat | N/A | N/A |
| Total Fat | 1.6 g | 2% |
| Saturated Fat | 0.2 g | 1% |
| Cholesterol | 0 mg | 0% |
| Sodium | 766.6 mg | 31% |
| Total Carbohydrate | 64.8 g | 21% |
| Dietary Fiber | 2.5 g | 10% |
| Sugars | 1.6 g | N/A |
| Protein | 9 g | 17% |
Note: Nutritional information is an estimate and can vary based on specific ingredients and portion sizes.
Variations & Substitutions
- Gluten-Free Bialys: Substitute the bread and all-purpose flours with a gluten-free all-purpose blend, adding xanthan gum for improved texture.
- Whole Wheat Bialys: Replace half of the all-purpose flour with whole wheat flour for a nuttier flavor and added fiber.
- Garlic Bialys: Add minced garlic to the onion topping for an extra layer of flavor. You can also infuse the olive oil with garlic before adding it to the topping.
- Sesame Seed Bialys: Sprinkle sesame seeds over the bialys before baking for added texture and visual appeal.
- Everything Bialys: Combine poppy seeds, sesame seeds, dried garlic flakes, dried onion flakes, and salt for an “everything” topping.
FAQs (Frequently Asked Questions)
Q: Why is my dough so sticky?
A: Bialy dough is naturally soft and slightly sticky. Avoid adding too much extra flour, as this can result in dry, tough bialys. If the dough is unmanageable, lightly flour your hands and the work surface.
Q: Can I make the dough ahead of time?
A: Yes! You can prepare the dough, let it rise once, and then refrigerate it overnight. Let it come to room temperature for about an hour before proceeding with the shaping and baking.
Q: My bialys are browning too quickly. What should I do?
A: If your bialys are browning too quickly, reduce the oven temperature by 25 degrees F (15 degrees C) and/or tent them loosely with foil.
Q: Can I freeze the baked bialys?
A: Yes, bialys freeze well. Allow them to cool completely, then wrap them individually in plastic wrap and place them in a freezer-safe bag. Thaw completely before reheating.
Q: What’s the best way to reheat a bialy?
A: Toasting is the best way to reheat a bialy, as it restores the crispness of the exterior. You can also warm it in a low oven (300°F/150°C) for about 10 minutes.
Final Thoughts
Making bialys at home might seem a bit ambitious, but trust me, it’s incredibly rewarding. The process is a journey, and the aroma that fills your kitchen is pure magic. Don’t be intimidated by the steps – each one is a building block towards creating a truly special treat. So, preheat that oven, gather your ingredients, and embark on this delicious adventure. Share your creations with friends and family, and let the warmth of these homemade bialys bring you closer together. And if you have any questions or tips of your own, please share them – I’d love to hear about your bialy-baking experience!