
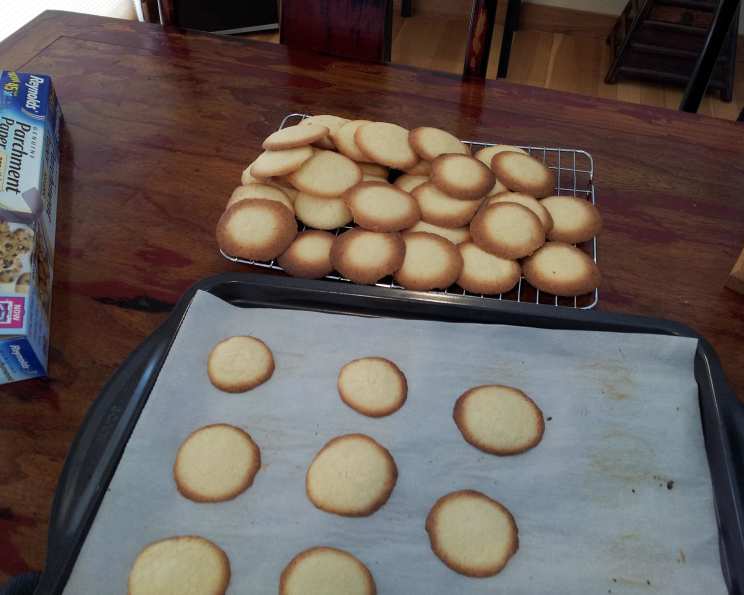
Brown Edge Wafers: A Nostalgic Journey to Cookie Perfection
The scent of butter and sugar, mingling in the oven’s warmth, instantly transports me back to childhood visits at my grandmother’s house. She always had a tin of store-bought cookies on hand for us grandkids, and amidst the Oreos and Chips Ahoy!, there was always a package of Nabisco Brown Edge Wafers. Their delicate, slightly salty-sweet flavor and satisfying crispness were a sophisticated treat for a young palate. Though those beloved wafers disappeared from shelves years ago, the memory of their simple elegance lives on, inspiring me to recreate them in my own kitchen.
Recipe Overview
- Prep Time: 20 minutes
- Cook Time: 14 minutes
- Total Time: 1 hour 34 minutes (includes chilling time)
- Yields: 50-60 cookies
- Dietary Type: Vegetarian
Ingredients
- 1 cup salted butter, softened
- 1 cup sugar
- 1 egg
- 1 1/2 teaspoons vanilla extract
- 1 cup all-purpose flour
- 1 cup potato flour (also called potato starch)
Equipment Needed
- Mixing bowl
- Electric mixer (handheld or stand mixer)
- Measuring cups and spoons
- Sifter
- Baking sheet
- Parchment paper (optional)
Instructions
- In a large mixing bowl, cream together the softened butter and sugar until light and fluffy. This step is crucial for achieving the right texture, so don’t rush it. The mixture should be pale and airy.
- Mix in the egg and vanilla extract, ensuring they are fully incorporated. Beat until the mixture is smooth and homogenous.
- In a separate bowl, sift together the all-purpose flour and potato flour. Sifting ensures that there are no lumps and that the flours are evenly distributed. The potato flour adds a delicate crispness to the final cookie.
- Gradually add the sifted flour mixture to the butter mixture, stirring until just combined. Be careful not to overmix, as this can result in tough cookies. The dough should be smooth and slightly sticky.
- Cover the dough and refrigerate for at least one hour. This chilling period is essential for preventing the cookies from spreading too much during baking and for developing a better flavor.
- Preheat your oven to 375°F (190°C).
- Remove the dough from the refrigerator. Roll the dough into small balls, about 3/4 inch in diameter.
- Place the balls at least 2 inches apart on an ungreased baking sheet. These cookies will spread during baking, so sufficient spacing is important.
- Using your fingers, flatten the balls slightly. You want them to be about 1/4 inch thick.
- Bake for 14 minutes. Check the cookies after 10 minutes. They are done when the edges are nicely browned, but the centers are still pale. Keep a close eye on them to prevent burning.
- Remove the baking sheet from the oven and let the cookies cool on the sheet for a few minutes before transferring them to a wire rack to cool completely. This allows them to firm up and prevents them from breaking.
Expert Tips & Tricks
- For thinner, crisper brown edges, bake the cookies directly on the baking sheet instead of using parchment paper. Parchment paper will create a slightly softer edge.
- If your dough is too soft to handle after chilling, add a tablespoon or two of all-purpose flour.
- Don’t skip the chilling step! It’s crucial for preventing excessive spreading and for developing the cookie’s flavor.
- To ensure even baking, rotate the baking sheet halfway through the baking time.
- If the cookies are browning too quickly, reduce the oven temperature by 25 degrees.
- For a more intense vanilla flavor, use vanilla bean paste instead of extract.
- These cookies are delicate and can break easily. Handle them with care, especially when they are warm.
Serving & Storage Suggestions
These Brown Edge Wafers are perfect on their own as a simple, elegant treat. They also pair beautifully with coffee, tea, or a glass of cold milk. Serve them on a pretty plate or in a glass jar for a touch of vintage charm.
To store the cookies, place them in an airtight container at room temperature. They will stay fresh for up to a week. For longer storage, you can freeze them in a freezer-safe container for up to two months. Thaw them at room temperature before serving. They are not recommended for refrigeration, as this can make them stale.
Nutritional Information
| Nutrient | Amount per Serving | % Daily Value |
|---|---|---|
| Calories | 70 kcal | 4% |
| Total Fat | 4g | 5% |
| Saturated Fat | 2g | 10% |
| Cholesterol | 14mg | 5% |
| Sodium | 36mg | 2% |
| Total Carbohydrate | 9g | 3% |
| Dietary Fiber | 0g | 0% |
| Sugars | 4g | 8% |
| Protein | 1g | 2% |
Note: Nutritional information is an estimate and may vary based on specific ingredients and serving sizes.
Variations & Substitutions
- Gluten-Free: Substitute the all-purpose flour with a gluten-free all-purpose flour blend. Be sure to choose a blend that contains xanthan gum for best results.
- Citrus Zest: Add 1 teaspoon of lemon, orange, or lime zest to the dough for a bright, refreshing flavor.
- Spices: Incorporate 1/2 teaspoon of ground cinnamon, nutmeg, or cardamom for a warm, comforting twist.
- Chocolate Chip: Add 1/2 cup of mini chocolate chips to the dough for a chocolatey treat.
- Nutty: Add 1/2 cup of finely chopped nuts, such as almonds, walnuts, or pecans, to the dough for added texture and flavor.
FAQs (Frequently Asked Questions)
Q: Why is potato flour used in this recipe?
A: Potato flour (or potato starch) adds a unique lightness and crispness to the cookies that you won’t get with just all-purpose flour. It helps create that signature delicate texture.
Q: Can I use unsalted butter instead of salted butter?
A: Yes, you can. If you use unsalted butter, add 1/4 teaspoon of salt to the flour mixture to compensate.
Q: The cookies spread too much when baking. What did I do wrong?
A: Overmixing the dough, not chilling it long enough, or using too much butter can cause excessive spreading. Make sure to follow the recipe carefully and chill the dough for the recommended time.
Q: How can I make the edges browner?
A: Baking the cookies directly on the ungreased baking sheet (without parchment paper) and baking them for a minute or two longer can help achieve browner edges. Keep a close eye on them to prevent burning.
Q: Can I double the recipe?
A: Yes, you can easily double the recipe to make a larger batch of cookies. Make sure to use a large enough mixing bowl to accommodate the ingredients.
Final Thoughts
These Brown Edge Wafers are more than just cookies; they’re a connection to simpler times, a reminder of cherished memories, and a testament to the enduring power of simple, delicious flavors. I encourage you to try this recipe and experience the joy of creating these elegant treats in your own kitchen. Feel free to experiment with variations and make them your own. And please, share your feedback and creations with me – I’d love to hear how they turn out! Perhaps enjoy these wafers with a cup of Earl Grey tea for an extra touch of sophistication. Happy baking!