
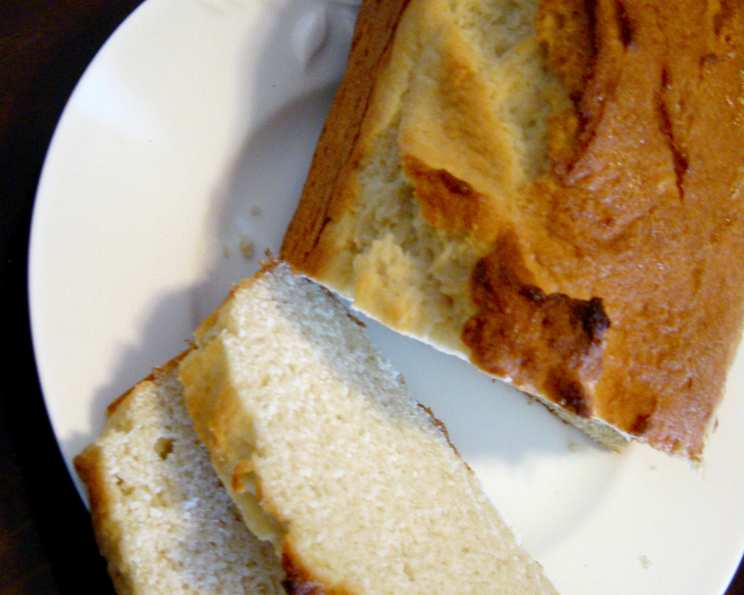
The Unexpected Joy of Gluten-Free Brown Rice Bread
I remember the first time I attempted gluten-free bread. It was a dense, crumbly brick that tasted vaguely of sadness. Determined to create something better, I embarked on a quest, experimenting with countless flours and techniques. Then, I stumbled upon this brown rice bread recipe, adapted from a fellow celiac, Barbara Emchs, and it changed everything. It wasn’t the pillowy soft sandwich bread I remembered from childhood, but it was something even more versatile: a nutty, subtly sweet loaf that toasted beautifully, crisped up perfectly in a pan, and served as the foundation for so many delicious meals. This bread became more than just a substitute; it became a culinary adventure.
Recipe Overview
- Prep Time: 20 minutes
- Cook Time: 40 minutes
- Total Time: 1 hour
- Servings: 12
- Yield: 1 loaf
- Dietary Type: Gluten-Free
Ingredients
- 3 large eggs, brought to room temperature
- 1/4 cup vegetable oil
- 1 teaspoon lemon juice
- 1 1/4 cups warm water (105°F)
- 4 tablespoons sugar, divided
- 1 1/2 tablespoons active dry yeast
- 2 cups tapioca flour
- 2 cups brown rice flour
- 2/3 cup nonfat dry milk powder (instant)
- 2 teaspoons xanthan gum
- 1 teaspoon salt
- 2 tablespoons ground flax seeds (optional)
Equipment Needed
- 5 x 9-inch loaf pan
- Stand mixer
- Measuring cups and spoons
- Medium bowl
- Large measuring cup
- Cooling rack
Instructions
- Begin by ensuring all refrigerated ingredients, especially the eggs, are at room temperature. This will help the ingredients emulsify properly, resulting in a better texture.
- Grease a 5 x 9-inch loaf pan thoroughly. I prefer using vegetable shortening for gluten-free breads as it provides a good release, but oil or cooking spray will also work.
- In the bowl of a stand mixer, combine the eggs, oil, and lemon juice. The lemon juice helps to brighten the flavor and balance the sweetness.
- In a large measuring cup, combine the warm water (105°F – use a thermometer for accuracy!), 1 tablespoon of the sugar, and the active dry yeast. Let this mixture stand for 5 minutes, or until it becomes foamy. This step is crucial to ensure your yeast is active and will leaven the bread properly. If it doesn’t foam, your yeast may be old, and you’ll need to start over with fresh yeast.
- In a medium bowl, whisk together the tapioca flour, brown rice flour, dry milk powder, xanthan gum, salt, flax seed (if using), and the remaining 3 tablespoons of sugar. Whisking ensures even distribution of ingredients.
- Add the yeast mixture to the egg mixture in the stand mixer.
- Slowly add the dry ingredients to the wet ingredients, a little at a time, while the mixer is running on low speed. Continue adding until all the dry ingredients are completely incorporated.
- Once all ingredients are combined, increase the mixer speed to high and mix the batter for 3 1/2 minutes. This extended mixing time is essential for developing structure in gluten-free breads.
- Pour the batter into the prepared loaf pan, spreading it evenly.
- Cover the bread with foil and place the pan in a cold oven.
- Place a pan of hot water on a lower shelf underneath the bread. This creates a humid environment that encourages the bread to rise.
- Leave the bread in the cold oven with the pan of hot water for 10 minutes with the oven door closed. This “cold oven rise” is a unique technique that gives the bread a boost in leavening.
- Remove the bread from the oven (without uncovering it!) and place it in a warm place in the kitchen. This allows the bread to continue rising while the oven preheats.
- Preheat the oven to 400°F (200°C). The bread will continue to rise as the oven preheats.
- Uncover the bread and bake for 10 minutes to brown the top.
- Cover the bread with foil again to prevent the top from burning and continue to bake for 30 minutes.
- After the 30 minutes, remove the loaf from the oven and turn it out onto a cooling rack. Allow it to cool completely before slicing.
- Once completely cooled, wrap the bread tightly to maintain freshness for as long as possible. Gluten-free breads tend to dry out quickly, so proper storage is essential.
Expert Tips & Tricks
- Humidity Adjustment: Gluten-free baking can be sensitive to humidity. If you live in a humid climate, reduce the amount of water in the recipe by 1-2 tablespoons to prevent the bread from over-rising and collapsing.
- The Deflation Dilemma: Many gluten-free bakers face the frustration of a loaf deflating upon removal from the oven. Experiment with the amount of water to find the perfect balance for your environment. Less water is often better than too much.
- Yeast Options: You can use rapid rise yeast instead of active dry yeast. If using rapid rise yeast, skip the cold oven rise with a pan of hot water. Follow the package directions for rise time instead.
- Doneness Check: A toothpick inserted into the center of the bread should come out clean, but a truly accurate way to determine doneness is to use a digital thermometer. The internal temperature should be around 200-210°F (93-99°C).
Serving & Storage Suggestions
This brown rice bread is exceptionally versatile. It’s not quite the texture of traditional sandwich bread, but it shines when toasted. Use it for:
- Toast: Topped with avocado, eggs, or your favorite spread.
- Stuffing: Cubed and dried, it makes a wonderful gluten-free stuffing for holidays.
- Pizza Crust: Pressed thinly, it creates a crispy and flavorful gluten-free pizza crust.
- Hamburger Buns: (See variations below).
Store the cooled bread tightly wrapped at room temperature for up to 3 days, in the refrigerator for up to a week, or in the freezer for longer storage (up to 2 months). To reheat, toast slices or warm the entire loaf in a low oven (300°F) for about 10-15 minutes.
Nutritional Information
Nutritional information is an estimate and may vary based on specific ingredients and serving size.
| Nutrient | Amount per Serving | % Daily Value |
|---|---|---|
| Calories | 199 kcal | N/A |
| Fat | 6.6g | 10% |
| Saturated Fat | 1.2g | 5% |
| Cholesterol | 47.8mg | 15% |
| Sodium | 250.9mg | 10% |
| Carbohydrate | 28.5g | 9% |
| Fiber | 1.6g | 6% |
| Sugars | 7.9g | N/A |
| Protein | 6.5g | 12% |
Variations & Substitutions
- Hamburger Buns: For hamburger buns, pour the batter into English muffin rings. Follow the baking directions, but bake for just 15 minutes. Once completely cooled, these buns freeze well. Always serve the buns warmed, otherwise they may be crumbly.
- Dairy-Free: Substitute the nonfat dry milk powder with a dairy-free alternative like coconut milk powder or rice milk powder. Note that this may affect the texture slightly.
- Sweetness Level: Adjust the amount of sugar to your preference. You can reduce it slightly if you prefer a less sweet bread.
- Seed Additions: Add other seeds like sunflower seeds or pumpkin seeds for added flavor and texture.
FAQs (Frequently Asked Questions)
Q: Why do I need to mix the batter for so long (3.5 minutes) at high speed?
A: This extended mixing time helps to develop the structure of the gluten-free bread, as there’s no gluten to provide elasticity.
Q: Can I use a different type of flour instead of tapioca and brown rice flour?
A: While you can experiment with other gluten-free flours, this recipe is specifically formulated for tapioca and brown rice flour. Substituting may affect the texture and rise.
Q: My bread keeps collapsing after baking. What can I do?
A: This is a common problem with gluten-free baking. Try reducing the amount of water in the recipe slightly and ensure your oven temperature is accurate.
Q: Is it necessary to use a cold oven for the initial rise?
A: The cold oven rise is a unique technique that gives the bread a boost in leavening. While you can skip it, the bread may not rise as high.
Q: How can I prevent my bread from drying out quickly?
A: Gluten-free breads tend to dry out faster than traditional breads. Wrap the cooled bread tightly and store it in an airtight container.
Final Thoughts
This gluten-free brown rice bread may not be your average sandwich loaf, but its unique flavor and versatility make it a worthwhile addition to any kitchen. Don’t be afraid to experiment with variations and find what works best for you. Whether you’re toasting it for breakfast, using it for stuffing during the holidays, or creating your own gluten-free pizza, I hope this recipe brings you as much joy as it has brought me. I encourage you to try it, adapt it, and most importantly, share your creations with friends and family. Happy baking!