
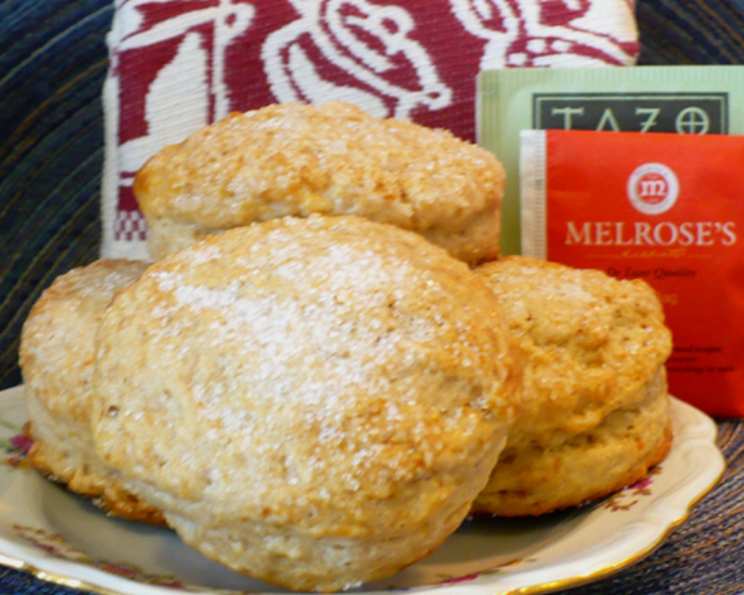
Brown Sugar Scones: A Taste of Cozy Mornings
The scent of warm scones always transports me back to my grandmother’s kitchen. She wasn’t a fancy baker, but her scones were legendary – simple, honest, and utterly comforting. I remember standing on a stool, barely tall enough to reach the counter, watching her deftly cut the dough into perfect circles. The gentle hum of the oven and the sweet aroma filling the air created a sense of warmth and love that I cherish to this day. These Brown Sugar Scones, with their subtle sweetness and tender crumb, are my way of keeping that memory alive, one delicious bite at a time.
Recipe Overview
- Prep Time: 20 minutes
- Cook Time: 22 minutes
- Total Time: 42 minutes
- Yields: 15-18 (2-inch) scones
- Serves: 15-18
- Dietary Type: Vegetarian
Ingredients
- 1 1⁄2 cups flour
- 1 cup cake flour
- 1 1⁄2 teaspoons baking powder
- 1⁄2 teaspoon baking soda
- 1⁄2 teaspoon salt
- 1⁄4 cup dark brown sugar
- 1 tablespoon cinnamon
- 1⁄2 cup cold unsalted butter, cut into 1/2″ cubes
- 1⁄2 cup chopped walnuts (optional)
- 3⁄4 cup golden raisins (optional)
- 3⁄4 cup cold buttermilk
- Half-and-half or heavy cream, for brushing
- Sparkling white sugar, for sprinkling on top
Equipment Needed
- Large mixing bowl
- Pastry blender or food processor
- Measuring cups and spoons
- 2-inch round biscuit cutter (optional)
- Parchment paper
- Baking sheet
- Cooling rack
Instructions
-
Begin by preheating your oven to 400°F (200°C). This ensures that the scones will rise properly and bake evenly.
-
In a large mixing bowl, combine the flours, baking powder, baking soda, salt, brown sugar, and cinnamon. Whisk these dry ingredients together thoroughly to ensure even distribution of the leavening agents and spices.
-
Next, it’s time to incorporate the cold butter. Using a pastry blender or your fingertips, cut the butter into the flour mixture until it resembles coarse crumbs. You can also use a food processor for this step, pulsing until the mixture reaches the desired consistency. It’s crucial to keep the butter cold to create flaky scones.
-
If using, add the walnuts and raisins to the bowl and toss gently to incorporate them evenly into the flour mixture.
-
Pour the cold buttermilk into the center of the bowl. Using a spatula or wooden spoon, stir the mixture until the dough just comes together. Be careful not to overmix, as this will result in tough scones. The dough should be slightly shaggy and cohesive.
-
Turn the dough out onto a lightly floured surface and gently bring it together into a ball. Avoid kneading the dough.
-
Roll or pat the dough to a 1-inch thickness.
-
Using a 2-inch round biscuit cutter, cut out rounds of dough. Alternatively, you can pat the dough into a square and cut it into square scones.
-
Transfer the cut scones to a baking sheet lined with parchment paper. This will prevent them from sticking and ensure easy cleanup.
-
Place the baking sheet with the scones in the freezer for 15 minutes. This step helps to firm up the butter and prevent the scones from spreading too much during baking.
-
After chilling, brush the tops of the scones with half-and-half or heavy cream to promote browning.
-
Sprinkle the tops generously with sparkling white sugar for a touch of sweetness and a beautiful finish.
-
Bake in the preheated oven for 20 to 22 minutes, or until the scones are golden brown and cooked through. A toothpick inserted into the center should come out clean.
-
Remove the scones from the oven and transfer them to a cooling rack to cool slightly before serving.
Expert Tips & Tricks
- Cold is Key: Keeping all the ingredients, especially the butter and buttermilk, as cold as possible is crucial for achieving light and flaky scones.
- Don’t Overmix: Overmixing the dough develops the gluten, resulting in tough scones. Mix just until the dough comes together.
- Freezing for Flakiness: The brief freezing period before baking helps to chill the butter, creating steam when it hits the hot oven, which results in a flakier texture.
- Customize Your Scones: Feel free to experiment with different additions, such as dried cranberries, chocolate chips, or citrus zest.
- Make-Ahead Option: You can prepare the scone dough ahead of time, cut it into shapes, and freeze them on a baking sheet. When ready to bake, simply transfer them to the oven and add a few extra minutes to the baking time.
- Even Baking: Ensure your oven is properly preheated and that the baking sheet is placed in the center rack for even baking.
Serving & Storage Suggestions
These Brown Sugar Scones are best served warm, straight from the oven. They are delicious on their own or accompanied by a dollop of clotted cream, butter, or your favorite jam.
To store leftovers, place the scones in an airtight container at room temperature. They will stay fresh for 1-2 days. For longer storage, you can freeze the scones for up to 2 months. To reheat, simply warm them in a preheated oven at 350°F (175°C) for a few minutes until heated through.
Nutritional Information
| Nutrient | Amount per Serving | % Daily Value |
|---|---|---|
| Calories | 153.2 kcal | N/A |
| Calories from Fat | 58 g | 38% |
| Total Fat | 6.5 g | 9% |
| Saturated Fat | 4 g | 19% |
| Cholesterol | 16.8 mg | 5% |
| Sodium | 171 mg | 7% |
| Total Carbohydrate | 21.4 g | 7% |
| Dietary Fiber | 0.8 g | 3% |
| Sugars | 4.2 g | 16% |
| Protein | 2.5 g | 5% |
Note: Nutritional information is an estimate and may vary based on specific ingredients and portion sizes.
Variations & Substitutions
- Gluten-Free Scones: Substitute the all-purpose flour and cake flour with a gluten-free flour blend. Be sure to add a binding agent like xanthan gum to help with the texture.
- Dairy-Free Scones: Replace the buttermilk with a mixture of non-dairy milk (such as almond or soy milk) and a tablespoon of lemon juice or vinegar. Use a dairy-free butter alternative.
- Spice Variations: Experiment with different spices, such as nutmeg, cardamom, or ginger, to create unique flavor profiles.
- Fruit Variations: Substitute the raisins with other dried fruits, such as cranberries, apricots, or cherries.
- Nut Variations: Use different nuts, such as pecans, almonds, or macadamia nuts, in place of the walnuts.
- Citrus Zest: Add lemon, orange, or lime zest to the dough for a bright and zesty flavor.
FAQs (Frequently Asked Questions)
Q: Why are my scones tough?
A: Overmixing the dough is the most common cause of tough scones. Mix just until the ingredients are combined.
Q: Can I use self-rising flour instead of all-purpose flour?
A: No, this recipe is formulated for all-purpose and cake flour with added baking powder and baking soda. Using self-rising flour will throw off the ratios of ingredients and affect the texture.
Q: Can I make these scones without nuts and raisins?
A: Absolutely! Simply omit the walnuts and raisins from the recipe.
Q: How do I get my scones to rise higher?
A: Make sure your baking powder and baking soda are fresh. Also, chilling the dough before baking helps to create steam, which aids in rising.
Q: Can I freeze the baked scones?
A: Yes, you can freeze baked scones. Allow them to cool completely before wrapping them tightly in plastic wrap and placing them in a freezer-safe bag.
Final Thoughts
These Brown Sugar Scones are more than just a recipe; they’re a connection to cherished memories and a celebration of simple pleasures. Don’t be intimidated by baking – scones are wonderfully forgiving, and even a slightly imperfect batch will be devoured with delight. Gather your ingredients, preheat your oven, and embrace the joy of creating something delicious. I encourage you to try this recipe and make it your own. Experiment with different flavors, share them with loved ones, and most importantly, savor every warm, comforting bite. Let me know how they turn out! Pair them with a steaming cup of coffee or tea for the perfect start to your day.