
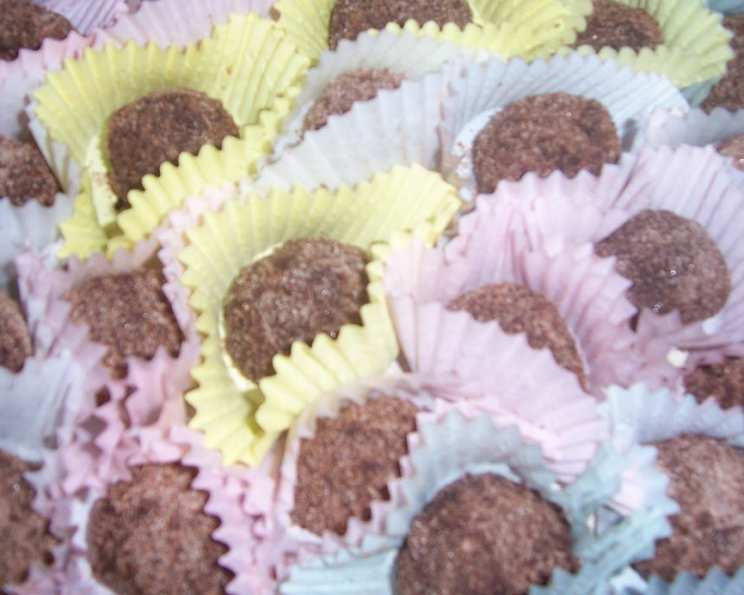
Decadent Brownie Truffles: A Chef’s Secret Indulgence
There’s a certain magic to transforming something already delicious into an even more irresistible treat. Brownies, warm and fudgy, straight from the oven, hold a special place in my heart, a reminder of cozy afternoons spent baking with my grandmother. But transforming those brownies into silky, melt-in-your-mouth truffles? That’s pure alchemy. Each bite is a concentrated burst of chocolate bliss, a perfect ending to any meal, or a delightful indulgence any time of day.
Recipe Overview
- Prep Time: 30 minutes
- Cook Time: 25 minutes
- Total Time: 55 minutes
- Yields: 120 truffles
- Serves: 20
- Dietary Type: Not Gluten-Free
Ingredients
- 1 cup sugar
- 2 tablespoons instant coffee granules, processed in a food processor
- 2 tablespoons unsweetened cocoa powder
- 4 ounces unsweetened chocolate
- ½ lb (8 ounces) unsalted butter
- 4 large eggs
- 2 cups sugar
- 1 cup unbleached all-purpose flour
- ⅛ teaspoon salt
- 2 teaspoons pure vanilla extract
Equipment Needed
- 8×16-inch pan
- Heavy saucepan or microwave-safe bowl
- Mixer (hand or stand mixer)
- Wax paper
- Tins or plastic containers
Instructions
-
Preheat your oven to 350°F (175°C). Thoroughly butter an 8×16-inch pan. This will ensure the brownies release easily once cooled. A light dusting of cocoa powder after buttering will also help prevent sticking.
-
Prepare the truffle coating. In a medium bowl, combine the 1 cup of sugar, the powdered coffee granules, and the cocoa powder. Whisk together until evenly distributed. Set this aside; it’s your final touch of magic. Ensure the coffee granules are finely processed; this will prevent any gritty texture in the coating.
-
Now, for the brownie base. In a heavy saucepan over low heat, or in a microwave-safe bowl in 30-second intervals, melt the 4 ounces of unsweetened chocolate and ½ lb (8 ounces) of unsalted butter together, stirring frequently until smooth. Be careful not to overheat the chocolate, as it can seize. If using a microwave, stir well between intervals.
-
In a separate bowl, beat the 4 large eggs until they are light and slightly frothy. Gradually beat in the 2 cups of sugar, continuing to beat until the mixture is well combined.
-
Stir the melted chocolate and butter mixture into the egg and sugar mixture. Ensure the chocolate mixture isn’t too hot when adding it to the eggs, as this can cook the eggs and result in a grainy texture.
-
Gently add the 1 cup of unbleached all-purpose flour, ⅛ teaspoon of salt, and 2 teaspoons of pure vanilla extract to the chocolate mixture. Stir until just combined. It’s crucial not to overmix at this stage, as it can develop the gluten in the flour and lead to tough brownies. The mixture should be fully incorporated but not light and fluffy.
-
Pour the brownie batter into the prepared 8×16-inch pan and spread evenly.
-
Bake for 25 minutes. The brownies will be slightly underdone and very moist. This is key to achieving the desired truffle consistency. A toothpick inserted into the center should come out with moist crumbs attached.
-
Allow the brownies to cool completely in the pan. This is essential for easier handling and prevents the truffles from melting. You can even chill them in the refrigerator for a quicker cooling process.
-
Once cool enough to handle, cut the brownies into 1×1-inch squares.
-
Roll each square in the palms of your hands into balls about 1 inch in diameter. Work quickly to prevent the brownies from becoming too soft. If the brownies are too soft, you can chill them again for a few minutes.
-
Roll each brownie ball in the prepared coating mixture, ensuring it’s fully covered. Gently press the coating onto the truffle to help it adhere.
-
Pack the coated truffles in tins or plastic containers with wax paper between the layers to prevent sticking.
-
Store in the refrigerator for up to a week, or place them in a single layer on a cookie sheet in the freezer until frozen. Once frozen, pack them in containers and store in the freezer for up to 4 months.
Expert Tips & Tricks
- For an even richer flavor, use high-quality dark chocolate with a cocoa content of 70% or higher.
- If you prefer a smoother coating, you can sift the sugar, coffee granules, and cocoa powder before combining them.
- To prevent the brownies from sticking to the pan, line the pan with parchment paper, leaving an overhang on the sides for easy removal.
- If you find the brownie mixture is too thick, add a tablespoon or two of milk to thin it out.
- For a boozy twist, add a tablespoon of your favorite liqueur, such as rum or Kahlua, to the brownie batter.
Serving & Storage Suggestions
These brownie truffles are perfect served chilled, straight from the refrigerator. They make an elegant addition to dessert platters, a thoughtful homemade gift, or a delightful treat to enjoy with a cup of coffee or tea. Store them in an airtight container in the refrigerator for up to a week. They can also be frozen for longer storage (up to 4 months). To thaw, simply transfer them to the refrigerator for a few hours before serving. There’s no need to reheat them.
Nutritional Information
| Nutrient | Amount per Serving | % Daily Value |
|---|---|---|
| Calories | 267.1 kcal | N/A |
| Calories from Fat | 119 g | 45% |
| Total Fat | 13.3 g | 20% |
| Saturated Fat | 8 g | 40% |
| Cholesterol | 66.7 mg | 22% |
| Sodium | 31.6 mg | 1% |
| Total Carbohydrate | 37.1 g | 12% |
| Dietary Fiber | 1.3 g | 5% |
| Sugars | 30.2 g | N/A |
| Protein | 2.9 g | 5% |
Variations & Substitutions
- Gluten-Free: Substitute the all-purpose flour with a gluten-free flour blend, ensuring it contains xanthan gum for binding.
- Nutty Delight: Add ½ cup of chopped nuts, such as walnuts or pecans, to the brownie batter for added texture and flavor.
- Espresso Boost: Increase the amount of instant coffee granules in the coating for a stronger coffee flavor.
- Chocolate Chips: Fold in ½ cup of chocolate chips to the brownie batter for an extra layer of chocolate goodness.
- Mint Chocolate: Add a teaspoon of peppermint extract to the brownie batter and garnish the truffles with crushed peppermint candies.
FAQs (Frequently Asked Questions)
Q: Can I use a different type of chocolate?
A: Absolutely! While unsweetened chocolate provides a deep, rich flavor, you can experiment with semi-sweet or even milk chocolate, adjusting the amount of sugar accordingly.
Q: Why are my truffles too soft?
A: This usually means the brownies were slightly underbaked or not cooled completely. Try chilling the brownies in the refrigerator for a longer period before rolling them into balls.
Q: Can I make these truffles ahead of time?
A: Yes, these truffles are perfect for making ahead of time. Store them in the refrigerator for up to a week, or freeze them for longer storage.
Q: The coating is not sticking to the truffles. What can I do?
A: Make sure the brownie balls are slightly sticky when rolling them in the coating. If they are too dry, lightly moisten your hands with water before rolling.
Q: Can I use a different type of sweetener?
A: While granulated sugar is recommended for the best texture and flavor, you can experiment with other sweeteners like coconut sugar or brown sugar, but the results may vary slightly.
Final Thoughts
These brownie truffles are more than just a dessert; they’re a tiny burst of joy, a decadent reward, and a perfect way to share a little love. Don’t be intimidated by the process – it’s simpler than it seems, and the results are truly worth the effort. So, gather your ingredients, preheat your oven, and prepare to indulge in a chocolatey masterpiece that will impress your friends, delight your family, and, most importantly, satisfy your sweet tooth. I encourage you to try out this recipe, and I’d love to hear how it turns out for you! Perhaps pair these truffles with a glass of rich port wine or a steaming cup of freshly brewed coffee for the ultimate experience.