
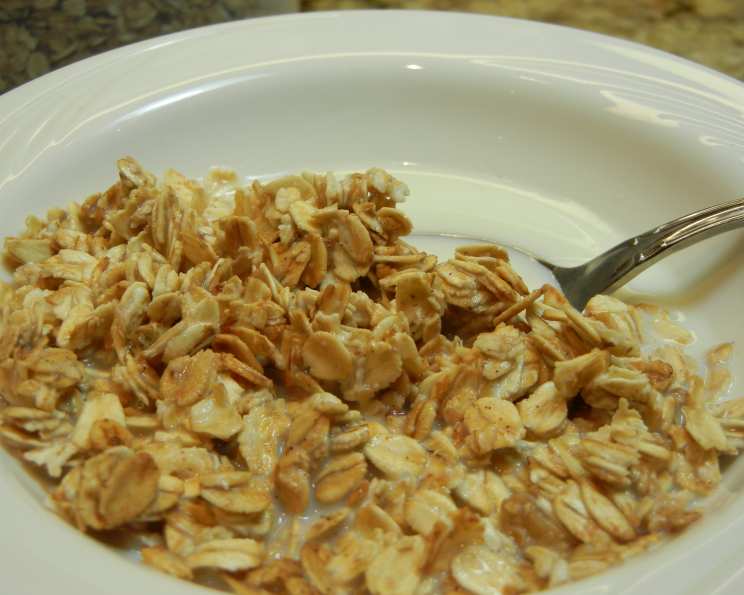
Budget-Friendly Homemade Cereal: A Delicious Start to Your Day
There’s something about the sound of cereal hitting the bowl in the morning that instantly transports me back to my childhood. Weekends were a sacred time for cartoons and sugary cereals, a ritual I eagerly anticipated all week. While my adult palate now craves something a little less processed (and a lot less expensive!), I still love the satisfying crunch and comforting familiarity of a good bowl of cereal. This homemade version captures that nostalgic joy without breaking the bank.
Recipe Overview
- Prep Time: 5 minutes
- Cook Time: 19 minutes
- Total Time: 24 minutes
- Servings: 8
- Yield: About 8 cups
- Dietary Type: Vegetarian
Ingredients
- 4 cups old fashioned oats, uncooked
- 1 tablespoon canola oil
- 2 tablespoons maple syrup
- 1/4 cup honey
- 2 teaspoons vanilla
- 1/4 teaspoon cinnamon
- 3/8 teaspoon kosher salt (less if using regular salt)
- Butter-flavor Pam cooking spray
Equipment Needed
- 10×15 inch jelly roll pan
- Large mixing bowl
- Small mixing bowl
- Spatula
Instructions
- Preheat your oven to 350 degrees Fahrenheit (175 degrees Celsius). Prepare your 10×15 inch jelly roll pan by generously spraying it with butter-flavor Pam cooking spray. This will prevent sticking and ensure easy cleanup. I also like to lightly spray the mixing bowls and spatula – it makes the process even smoother.
- In a small bowl, whisk together the wet ingredients: canola oil, maple syrup, honey, vanilla, cinnamon, and salt. Make sure the salt is fully dissolved to ensure even distribution of flavor.
- In a large bowl, pour the wet ingredients over the old fashioned oats. Using a spatula, thoroughly mix until every oat is evenly coated. This is crucial for achieving a consistent texture and flavor throughout the cereal.
- Spread the oat mixture evenly in the prepared jelly roll pan. Try to create a single, even layer for uniform baking.
- Bake for 10 minutes. Remove the pan from the oven and stir the cereal to prevent clumping and ensure even browning.
- Return the pan to the oven and bake for an additional 9 minutes. Keep a close eye on the cereal during this second baking period, as it can quickly burn. If you’re using a dark non-stick pan, you may need to reduce the cooking time by 1-2 minutes to prevent over-browning.
- Remove the pan from the oven and let the cereal cool completely in the pan before breaking it up into clusters. Once cooled, it will crisp up beautifully.
Expert Tips & Tricks
- Spice it up: Experiment with different spices! A pinch of nutmeg, ginger, or cardamom can add a warm, complex flavor.
- Sweetener Swap: If you don’t have maple syrup or honey, brown sugar or agave nectar can be used as substitutes. Adjust the quantities to your preferred level of sweetness.
- Dark Pan Adjustment: Dark pans tend to bake faster, so keep a close watch and reduce baking time by 1-2 minutes to avoid burning.
- Crispy vs. Chewy: For a crispier cereal, spread the mixture thinly in the pan. For a slightly chewier texture, spread it a bit thicker.
- Stirring is Key: Don’t skip the stirring step! This ensures even browning and prevents large clumps from forming.
Serving & Storage Suggestions
Serve your homemade cereal with your favorite milk (dairy or non-dairy), yogurt, or even as a topping for ice cream. Fresh fruit, such as berries or sliced bananas, adds a burst of freshness and flavor.
Store the cooled cereal in an airtight container at room temperature to maintain its crispness. It will stay fresh for up to 2 weeks. I often reuse the original cardboard oats canister, placing the cereal inside a zip-tied bag within the canister to keep it extra fresh.
Nutritional Information
| Nutrient | Amount per Serving | % Daily Value |
|---|---|---|
| Calories | 217 kcal | 11% |
| Total Fat | 4.4 g | 6% |
| Saturated Fat | 0.6 g | 3% |
| Cholesterol | 0 mg | 0% |
| Sodium | 113 mg | 5% |
| Total Carbohydrate | 40 g | 15% |
| Dietary Fiber | 4 g | 16% |
| Sugars | 12 g | – |
| Protein | 5 g | 10% |
Note: Nutritional information is an estimate and may vary based on specific ingredients and serving sizes.
Variations & Substitutions
- Nutty Delight: Add 1/2 cup of chopped nuts (almonds, walnuts, pecans) to the oat mixture before baking for added crunch and flavor.
- Fruity Fun: Stir in 1/2 cup of dried fruits (raisins, cranberries, chopped apricots) after baking and cooling.
- Chocolate Cravings: Add 2 tablespoons of cocoa powder to the dry ingredients and increase the maple syrup or honey by 1 tablespoon for a chocolatey twist.
- Gluten-Free: Ensure that you are using certified gluten-free oats if you have a gluten intolerance.
- Vegan Upgrade: This recipe is already easily made vegan by ensuring the honey is substituted with agave.
FAQs (Frequently Asked Questions)
Q: Can I use quick-cooking oats instead of old fashioned oats?
A: While you can, I don’t recommend it. Old fashioned oats provide a better texture and hold their shape better during baking. Quick-cooking oats tend to become mushy.
Q: My cereal burned in the oven. What did I do wrong?
A: Ovens vary, so the baking time may need adjusting. Also, using a dark-colored pan can cause the cereal to burn more easily. Reduce the baking time by 1-2 minutes and keep a close eye on it.
Q: Can I make a larger batch of this cereal?
A: Absolutely! Simply double or triple the ingredients, but be sure to use a larger pan or divide the mixture between multiple pans to ensure even baking.
Q: How do I know when the cereal is done?
A: The cereal should be golden brown and slightly firm to the touch. It will continue to crisp up as it cools.
Q: Is this cereal suitable for toddlers?
A: Yes, but be sure to break it into small pieces to avoid choking hazards. Also, consider reducing the amount of salt or honey for younger children.
Final Thoughts
This homemade cereal recipe is not only a budget-friendly alternative to store-bought options, but it’s also a delicious and customizable way to start your day. The warm spices, satisfying crunch, and wholesome ingredients make it a breakfast you can feel good about. Don’t hesitate to experiment with different variations and share your feedback. I encourage you to try it and make a batch for yourself, and maybe even involve your family in the process. After all, breakfast is best shared.