
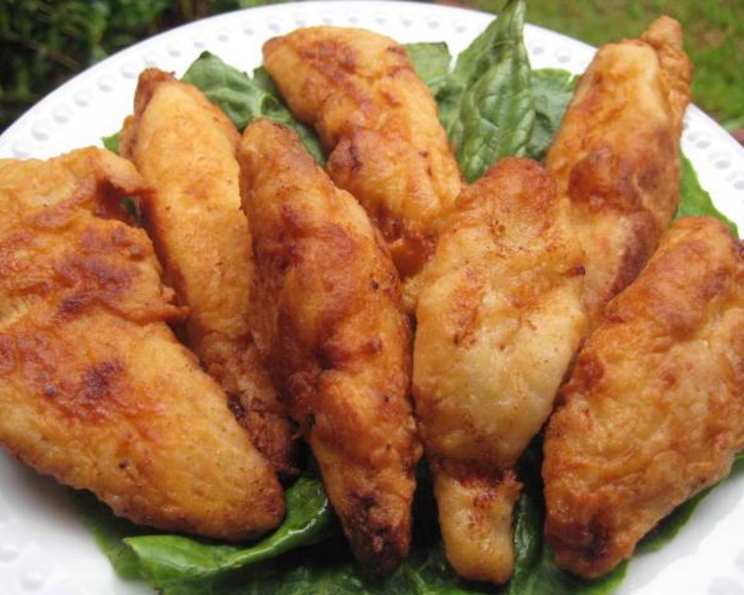
Buffalo Chicken Tenders: A Fiery Bite of Homemade Heaven
I’ll never forget my first taste of truly great Buffalo chicken. It wasn’t at some fancy restaurant, but a hole-in-the-wall sports bar down the street from my college. The air was thick with anticipation for the game, the scent of hops and fryer oil hung heavy, and then bam – these golden-brown beauties arrived, glistening with that unmistakable orange-red hue. The perfect balance of heat, tang, and crispy goodness was an instant revelation, and I’ve been chasing that dragon ever since. These Buffalo Chicken Tenders are my personal attempt to bottle that lightning.
Recipe Overview
- Prep Time: 15 minutes
- Cook Time: 4-6 minutes
- Total Time: Approximately 35-50 minutes (including marinating)
- Servings: 4
- Dietary Type: Not Gluten-Free
Ingredients
- 12 ounces chicken tenders (approximately 12)
- 1/2 cup hot sauce (such as Frank’s RedHot)
- 1/2 cup buttermilk
- 1 cup all-purpose flour
- 2 teaspoons kosher salt
- 2 tablespoons Cajun seasoning
- Vegetable oil or canola oil, for frying
Equipment Needed
- Deep fryer or large, heavy-bottomed pot
- Plastic bag
- Three shallow dishes or plates
- Wire rack
- Tongs or slotted spoon
Instructions
-
Begin by preheating your deep fryer to 360 degrees Fahrenheit (182 degrees Celsius). If you don’t have a deep fryer, fill a large, heavy-bottomed pot with at least 3 inches of vegetable or canola oil and heat it over medium-high heat. Use a thermometer to ensure the oil reaches the correct temperature. Safety first – never leave hot oil unattended!
-
In a plastic bag, combine the chicken tenders and hot sauce. Seal the bag tightly, removing as much air as possible, and gently massage the chicken to ensure it’s fully coated in the hot sauce. Place the bag in the refrigerator and let it marinate for at least 30 minutes, or up to an hour. This allows the chicken to absorb the flavor and helps tenderize it.
-
While the chicken is marinating, prepare your dredging station. In a shallow dish or plate, combine the flour, Cajun seasoning, and kosher salt. Mix well to ensure even distribution of the seasonings. In a second shallow dish, pour the buttermilk.
-
Remove the chicken tenders from the refrigerator. Take a chicken tender and place it in the flour mixture. Dredge it thoroughly, pressing gently to ensure the flour adheres to the chicken on all sides.
-
Transfer the floured chicken tender to the buttermilk dish. Dip it completely in the buttermilk, making sure it’s fully coated.
-
Return the buttermilk-coated chicken tender to the flour mixture for a second dredging. This double dredging is key to achieving a thick, crispy crust.
-
Repeat steps 4-6 with the remaining chicken tenders.
-
Place the breaded chicken tenders on a wire rack and let them rest for about 5 minutes. This step allows the crust to set, which helps prevent it from falling off during frying. Don’t skip this!
-
Optional Step: For an extra crispy result, dredge the chicken tenders in the flour mixture one final time just before frying. This is not strictly necessary, but I find it adds an extra layer of crunch.
-
Carefully lower the breaded chicken tenders into the preheated oil, being careful not to overcrowd the fryer. Fry them for 4-6 minutes, or until they are golden brown and cooked through. Use tongs or a slotted spoon to carefully turn the tenders occasionally to ensure even cooking.
-
Remove the fried chicken tenders from the oil and place them back on the wire rack to drain any excess oil.
-
Serve immediately and enjoy!
Expert Tips & Tricks
- Spice Level Control: Adjust the amount of hot sauce to control the level of heat. For a milder flavor, use a less spicy hot sauce or cut the amount in half. For extra heat, add a pinch of cayenne pepper to the flour mixture.
- Crust Perfection: Don’t overwork the flour mixture. Overmixing can develop the gluten, resulting in a tougher crust. Also, make sure the oil is hot enough before adding the chicken; otherwise, the crust will absorb too much oil and become soggy.
- Temperature is Key: Use a meat thermometer to ensure the chicken reaches an internal temperature of 165 degrees Fahrenheit (74 degrees Celsius). Undercooked chicken is a no-go!
- Make-Ahead Tip: You can bread the chicken tenders ahead of time and store them in the refrigerator for up to 2 hours before frying. This is great for party prep!
Serving & Storage Suggestions
Serve your Buffalo Chicken Tenders immediately while they are hot and crispy. They are fantastic on their own with a side of blue cheese or ranch dressing for dipping. Alternatively, you can serve them as part of a buffalo chicken salad, in a wrap, or on a bun for a delicious sandwich.
Storage: Leftover Buffalo Chicken Tenders can be stored in an airtight container in the refrigerator for up to 3 days.
Reheating: For the best results, reheat the tenders in a preheated oven at 350 degrees Fahrenheit (175 degrees Celsius) for about 10-15 minutes, or until heated through and crispy. You can also reheat them in an air fryer for a similar result. Avoid microwaving, as this will make them soggy.
Nutritional Information
| Nutrient | Amount per Serving | % Daily Value* |
|---|---|---|
| Calories | 310 kcal | 16% |
| Total Fat | 18g | 28% |
| Saturated Fat | 4g | 20% |
| Cholesterol | 90mg | 30% |
| Sodium | 1200mg | 50% |
| Total Carbohydrate | 20g | 7% |
| Dietary Fiber | 1g | 4% |
| Sugars | 3g | – |
| Protein | 20g | 40% |
*Percent Daily Values are based on a 2,000 calorie diet.
Variations & Substitutions
- Gluten-Free Option: Substitute the all-purpose flour with a gluten-free flour blend. A blend that contains rice flour, tapioca starch, and potato starch works well.
- Spicy Buffalo Ranch: Mix equal parts of your favorite Buffalo hot sauce with ranch dressing for an extra creamy and spicy dipping sauce.
- Baked Buffalo Tenders: For a healthier option, bake the breaded chicken tenders instead of frying. Preheat your oven to 400 degrees Fahrenheit (200 degrees Celsius), place the tenders on a baking sheet lined with parchment paper, and bake for about 20-25 minutes, or until cooked through and golden brown.
- Buffalo Chicken Bites: Cut the chicken tenders into smaller pieces before breading and frying for bite-sized appetizers.
- Vegan Buffalo “Chicken”: Substitute the chicken tenders with firm tofu, pressed to remove excess water and cut into strips. Use plant-based buttermilk (almond milk mixed with lemon juice) and a vegan-friendly hot sauce.
FAQs (Frequently Asked Questions)
Q: Can I use chicken breasts instead of chicken tenders?
A: Yes, you can. Cut the chicken breasts into strips that resemble tenders. Be sure to pound them slightly to ensure they cook evenly.
Q: What is the best oil for deep frying?
A: Vegetable oil, canola oil, and peanut oil are all good options for deep frying because they have high smoke points.
Q: How do I keep the chicken tenders warm while frying the rest?
A: Place the cooked chicken tenders on a wire rack in a preheated oven at 200 degrees Fahrenheit (95 degrees Celsius). This will keep them warm and crispy without overcooking.
Q: My breading keeps falling off. What am I doing wrong?
A: Make sure you are using the double dredging method and allowing the breaded chicken to rest on a wire rack for a few minutes before frying. This helps the breading adhere better. Also, ensure your oil is hot enough.
Q: Can I make these in an air fryer?
A: Yes, you can! Preheat your air fryer to 400°F (200°C). Lightly spray the breaded chicken tenders with cooking oil and air fry for 12-15 minutes, flipping halfway through, until golden brown and cooked through.
Final Thoughts
So there you have it – my take on the iconic Buffalo Chicken Tender. This recipe is more than just a set of instructions; it’s an invitation to bring that fiery, unforgettable flavor into your own kitchen. Whether you’re hosting a game day party, craving a satisfying snack, or simply looking for a new way to enjoy chicken, these tenders are guaranteed to be a crowd-pleaser. Don’t be afraid to experiment with different hot sauces and spice levels to create your perfect Buffalo bite. And most importantly, have fun with it! I can’t wait to hear what you think, and how you make this recipe your own. Pair them with an ice-cold beer and some celery sticks for the ultimate Buffalo experience!