
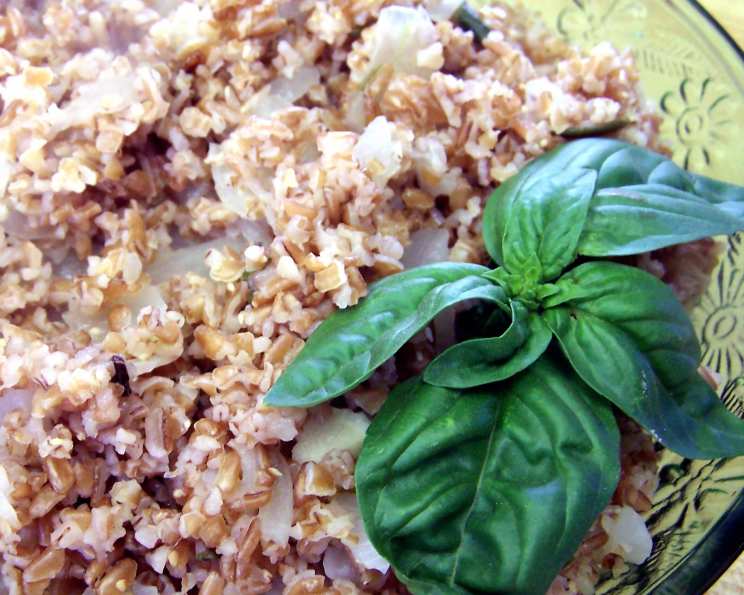
A Humble Bowl of Comfort: Mastering Bulghur Pilav
My earliest memory of bulghur pilav isn’t from a fancy restaurant or a meticulously styled food photo. It’s from my grandmother’s small, sun-drenched kitchen. I can still picture her, a whirlwind of gentle movements, stirring the fragrant onions in olive oil, the scent of basil and something earthy – the bulghur – filling the air. It wasn’t just a meal; it was a hug in a bowl, a simple expression of love and nourishment that I’ve carried with me ever since. This recipe attempts to recreate that feeling, bringing a touch of humble warmth to your own table.
Recipe Overview
- Prep Time: 5 minutes
- Cook Time: 35 minutes
- Total Time: 40 minutes
- Servings: 4
- Dietary Type: Vegan
Ingredients
- 1 medium onion, chopped
- 2 tablespoons olive oil
- 1 pinch salt & freshly ground black pepper
- 1-2 teaspoons dried basil
- 1 bay leaf
- 1 pinch rosemary (optional) or 1 pinch marjoram (optional)
- 1 1⁄2 cups raw bulgur
- 2 cups warm water
Equipment Needed
- Covered saucepan
Instructions
-
In a covered saucepan, sauté the onions in the olive oil for a few minutes, stirring occasionally. The goal here is to soften the onions and start developing their sweetness without browning them too quickly. A medium-low heat will prevent burning.
-
Add the salt, pepper, basil, bay leaf, and rosemary (or marjoram if using). Stir to combine the spices and coat the onions evenly.
-
Cover and cook for about 10 minutes, until the onions are translucent and beginning to brown. This slow, gentle cooking is key to releasing their full flavor. Keep the lid on to trap the moisture and steam the onions.
-
Stir in the bulgur. Toast for about 2 minutes, until the bulgur begins to darken slightly. Toasting the grains enhances their nutty flavor and prevents them from becoming mushy later on. Keep stirring to prevent burning.
-
Add the warm water, cover tightly, and bring to a boil. The warm water helps to speed up the cooking process. Make sure the lid fits snugly to trap the steam, which is essential for cooking the bulghur properly.
-
Reduce the heat to very low. This is crucial for ensuring that the bulgur steams gently and evenly without scorching on the bottom.
-
Let the bulgur steam for about 15 minutes. Resist the urge to lift the lid during this time, as this will release the steam and affect the cooking process.
-
Each grain should be separate and tender, but not chewy. Taste the bulgur to check for doneness. If the bulgur seems underdone, add a little more water, but be sparing, or it will become mushy. Start with a tablespoon at a time.
-
Remove the bay leaf and serve hot. The bay leaf has imparted its flavor, and it’s best to remove it before serving.
Expert Tips & Tricks
- Spice it up: For a spicier pilav, add a pinch of red pepper flakes along with the other spices.
- Nutty boost: Toast the bulghur in a dry pan for a few minutes before adding it to the onions. This will intensify its nutty flavor.
- Broth is better: Substitute vegetable broth for the water for a richer, more savory flavor.
- Don’t overcook: Overcooked bulghur becomes mushy and unappetizing. Keep a close eye on it during the steaming process and check for doneness frequently.
- Fluff it up: Once the pilav is cooked, fluff it with a fork to separate the grains and prevent them from clumping together.
- Make ahead: You can prepare the pilav ahead of time and reheat it when ready to serve. Simply store it in an airtight container in the refrigerator.
Serving & Storage Suggestions
Serve bulghur pilav hot as a side dish with grilled vegetables, roasted meats, or as a base for a hearty stew. Garnish with fresh herbs like parsley or mint for a pop of color and freshness. Leftovers can be stored in an airtight container in the refrigerator for up to 3 days. Reheat gently in a saucepan with a splash of water or broth to prevent it from drying out. It is not recommended to freeze cooked bulghur as it tends to become mushy upon thawing.
Nutritional Information
| Nutrient | Amount per Serving | % Daily Value |
|---|---|---|
| Calories | 251.3 kcal | N/A |
| Calories from Fat | 67 g | 27% |
| Total Fat | 7.5 g | 11% |
| Saturated Fat | 1.1 g | 5% |
| Cholesterol | 0 mg | 0% |
| Sodium | 12.3 mg | 0% |
| Total Carbohydrate | 42.7 g | 14% |
| Dietary Fiber | 10.1 g | 40% |
| Sugars | 1.4 g | N/A |
| Protein | 6.7 g | 13% |
Variations & Substitutions
- Gluten-Free: While bulghur itself isn’t gluten-free, you can substitute quinoa or brown rice for a similar texture and flavor.
- Vegetable Medley: Add diced vegetables like carrots, zucchini, or bell peppers to the onions for a more substantial dish.
- Herby Delight: Experiment with different herbs like thyme, oregano, or dill to create unique flavor profiles.
- Mushroom Magic: Sauté sliced mushrooms with the onions for an earthy and savory twist.
- Citrus Zest: Add a pinch of lemon or orange zest to the pilav for a bright and refreshing flavor.
FAQs (Frequently Asked Questions)
Q: Can I use a different type of oil instead of olive oil?
A: Yes, you can use any neutral-flavored oil like canola oil or vegetable oil. However, olive oil adds a distinctive flavor that complements the other ingredients.
Q: How do I prevent the bulghur from becoming mushy?
A: Avoid overcooking the bulghur and use the correct amount of water. Also, toasting the grains before adding the water helps to prevent mushiness.
Q: Can I add other vegetables to this pilav?
A: Absolutely! Diced carrots, zucchini, bell peppers, or mushrooms would be great additions. Add them to the onions during the sautéing process.
Q: What if I don’t have rosemary or marjoram?
A: These herbs are optional, so you can simply omit them. You can also substitute them with other herbs like thyme or oregano.
Q: Can I use chicken broth instead of water?
A: Yes, chicken broth would add a richer flavor to the pilav. Just be mindful of the salt content and adjust accordingly.
Final Thoughts
Bulghur pilav is more than just a simple side dish; it’s a versatile and nourishing meal that can be adapted to suit your taste preferences. Don’t be afraid to experiment with different herbs, spices, and vegetables to create your own signature version. I encourage you to try this recipe and share your feedback. Perhaps serve it alongside a grilled chicken or a hearty lentil soup for a complete and satisfying meal. Most importantly, savor each bite and enjoy the simple pleasure of homemade goodness.