
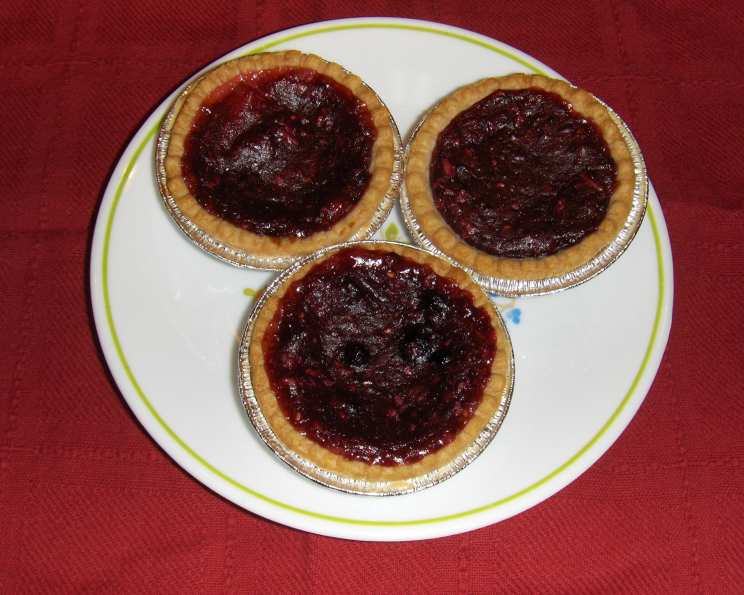
Bumbleberry Bliss: A Homemade Pie Recipe
My grandmother’s hands, gnarled with age and stained with berry juice, were the most magical hands I knew. I can still picture her standing at her well-worn kitchen table, a cloud of flour dusting the air as she expertly crimped the edges of a bumbleberry pie. The sweet-tart aroma, a symphony of mixed berries and warm pastry, always filled her home, promising comfort and joy with every slice. It’s a scent I try to recapture with every pie I bake.
Recipe Overview
- Prep Time: 45 minutes
- Cook Time: 1 hour
- Total Time: 1 hour 45 minutes
- Servings: 6-8
- Yield: 1 9-inch pie, plus tarts
- Dietary Type: Vegetarian
Ingredients
For the Bumbleberry Filling:
- 2 cups apples, peeled and chopped
- 1 cup rhubarb, chopped
- 1 cup strawberries, sliced
- 1 cup blueberries
- 1 cup raspberries
- 1 – 1 1/2 cups sugar (adjust to taste)
- 1/2 cup all-purpose flour
- 1 tablespoon tapioca
For the Pie Crust:
- 2 1/2 cups flour
- 1 teaspoon salt
- 1 cup shortening
- 1 egg, lightly beaten
- Milk
Equipment Needed
- 9-inch pie dish
- Mixing bowls
- Measuring cups and spoons
- Pastry blender or fork
- Rolling pin
- Wire rack
Instructions
-
Prepare the Fruit Filling: In a large bowl, gently combine the chopped apples, rhubarb, sliced strawberries, blueberries, and raspberries.
-
Combine Dry Ingredients: In a separate bowl, whisk together the sugar, all-purpose flour, and tapioca.
-
Mix Filling: Pour the sugar mixture over the fruit and gently toss until all the fruit is evenly coated. Set aside while you prepare the crust.
-
Make the Pie Crust: In a large mixing bowl, whisk together the flour and salt.
-
Cut in the Shortening: Using a pastry blender or two forks, cut the shortening into the flour mixture until it resembles coarse crumbs. This step is crucial for a flaky crust.
-
Combine Wet Ingredients: In a measuring cup, lightly beat the egg. Add enough milk to the egg to measure a total of 2/3 cup.
-
Add Wet to Dry: Gradually add the egg and milk mixture to the flour mixture, stirring just until combined. Be careful not to overmix, as this will result in a tough crust. You may need to add a bit more flour if the dough is too sticky.
-
Divide the Dough: Divide the dough into three equal portions. Wrap one portion tightly in plastic wrap and freeze it for future use. This is a great way to save time on future pies.
-
Roll Out the Crust: On a lightly floured surface, roll out one of the remaining portions of dough into a circle large enough to fit the bottom of your 9-inch pie dish. Gently transfer the dough to the pie dish and press it into the bottom and up the sides.
-
Add Filling: Pour the fruit filling into the prepared pie crust, spreading it evenly.
-
Top Crust: Roll out the second portion of dough into a circle large enough to cover the pie. Carefully place the dough over the fruit filling.
-
Seal and Crimp: Trim any excess dough from the edges of the pie. Seal the top and bottom crusts together by crimping the edges with your fingers or a fork. For a decorative touch, you can use the back of a spoon to create a fluted edge.
-
Vent the Crust: Cut several slits in the top crust to allow steam to escape during baking. This will prevent the crust from becoming soggy.
-
Brush and Sprinkle: Brush the top crust with cream or milk for a golden finish, and sprinkle with sugar for added sweetness and sparkle.
-
Bake: Bake in a preheated oven at 350°F (175°C) for about 1 hour, or until the crust is golden brown and the filling is bubbling. If the crust starts to brown too quickly, you can tent the pie with aluminum foil for the last 15-20 minutes of baking.
-
Cool: Remove the pie from the oven and let it cool completely on a wire rack before slicing and serving. This allows the filling to set properly.
Expert Tips & Tricks
- Adjust Sweetness: The original recipe calls for 1 1/2 cups of sugar, but I find that 1 cup is plenty sweet, especially if your berries are very ripe. Taste the filling before adding it to the crust and adjust the sugar accordingly.
- Frozen Fruit is Fine: Don’t be afraid to use frozen fruit! In fact, it’s a great way to enjoy bumbleberry pie year-round. Just make sure to thaw the fruit completely and drain off any excess liquid before adding it to the filling.
- Blind Baking for a Crisper Bottom: If you prefer a crisper bottom crust, you can blind bake the bottom crust for 15 minutes before adding the filling. To blind bake, prick the bottom of the crust with a fork, line it with parchment paper, and fill it with pie weights or dried beans. Bake at 350°F (175°C) for 15 minutes, then remove the parchment paper and weights and continue baking for another 5-10 minutes, or until the crust is lightly golden.
- Thickening Power: If your filling seems too liquidy, you can add an extra tablespoon of tapioca or cornstarch to help thicken it.
- Preventing Soggy Crust: A trick to prevent a soggy bottom crust is to brush the bottom crust with a thin layer of melted chocolate before adding the filling. The chocolate acts as a barrier between the crust and the fruit juices.
Serving & Storage Suggestions
This bumbleberry pie is best served warm, either on its own or with a scoop of vanilla ice cream or a dollop of whipped cream. Leftovers can be stored in the refrigerator for up to 3 days. To reheat, simply warm individual slices in the microwave or oven until heated through.
For longer storage, you can freeze the baked pie for up to 3 months. Wrap the pie tightly in plastic wrap and then in foil to prevent freezer burn. To thaw, place the frozen pie in the refrigerator overnight. You can also freeze unbaked pies. Just wrap them well and thaw completely before baking as directed.
Nutritional Information
| Nutrient | Amount per Serving | % Daily Value |
|---|---|---|
| Calories | 734 kcal | N/A |
| Total Fat | 36g | 55% |
| Saturated Fat | 8.9g | 44% |
| Cholesterol | 35.2mg | 11% |
| Sodium | 402.4mg | 16% |
| Total Carbohydrate | 97g | 32% |
| Dietary Fiber | 5.5g | 21% |
| Sugars | 42.6g | N/A |
| Protein | 8.4g | 16% |
Variations & Substitutions
- Gluten-Free Crust: Substitute the all-purpose flour in the crust recipe with a gluten-free flour blend. You may need to add a binder like xanthan gum to help hold the crust together.
- Different Berries: Feel free to experiment with different types of berries in the filling. Blackberries, huckleberries, or even cranberries would be delicious additions.
- Spice it Up: Add a pinch of cinnamon, nutmeg, or ginger to the filling for a warm, spiced flavor.
- Citrus Zest: Grate the zest of an orange or lemon into the filling for a bright, citrusy note.
- Maple Syrup: Replace some of the sugar with maple syrup for a richer, more complex flavor.
FAQs (Frequently Asked Questions)
Q: Can I use store-bought pie crust?
A: Yes, you can definitely use store-bought pie crust to save time. Just make sure to thaw it completely before using.
Q: How do I prevent the pie crust from burning?
A: If the crust starts to brown too quickly, you can tent the pie with aluminum foil for the last 15-20 minutes of baking.
Q: Can I make this pie ahead of time?
A: Yes, you can make the pie a day or two in advance and store it in the refrigerator. You can also freeze the baked pie for longer storage.
Q: What if my filling is too runny?
A: You can add an extra tablespoon of tapioca or cornstarch to the filling to help thicken it.
Q: Can I use a different type of fruit in this pie?
A: Absolutely! Feel free to experiment with different types of fruit in the filling, depending on what’s in season or what you have on hand.
Final Thoughts
This bumbleberry pie recipe is a delightful celebration of summer’s bounty. Whether you use fresh or frozen berries, this pie is sure to be a crowd-pleaser. Don’t be afraid to experiment with different variations and substitutions to create your own signature bumbleberry masterpiece. And most importantly, have fun and enjoy the process of baking! Share your creations with friends and family, and let the sweet-tart flavor of bumbleberries bring a little joy to your day. A slice of this pie, a warm drink, and good company—that’s what life is all about.