
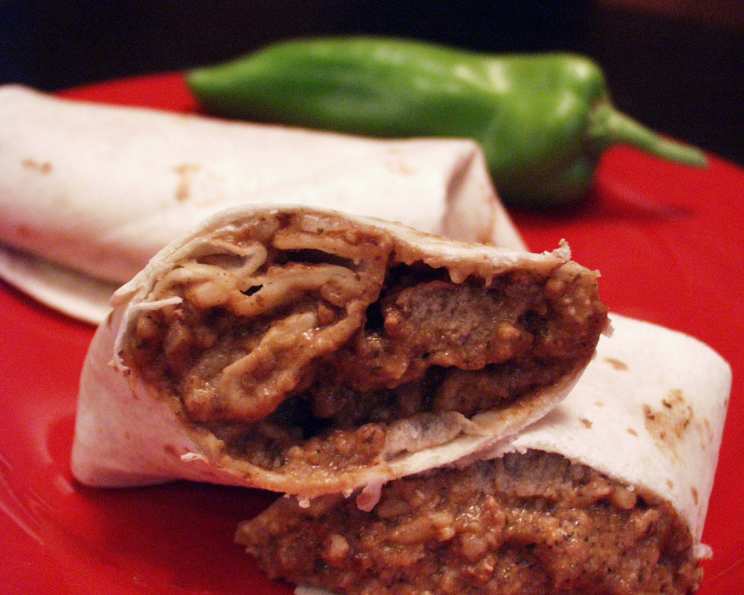
Burriquitas: Little Burros of Flavor
The scent of cumin and chili powder always takes me back to my grandmother’s kitchen. She wasn’t a fancy chef, but her simple, hearty Mexican dishes were legendary in our family. One of my fondest memories is helping her roll dozens of tiny burritos – she called them burriquitas – for our annual family fiesta. The sheer volume of them was a sight, the smell intoxicating, and the taste? Pure comfort. These little flavor bombs were always the first to disappear.
Recipe Overview
- Prep Time: 30 minutes
- Cook Time: 25 minutes
- Total Time: 55 minutes
- Yields: 25 mini burritos
- Dietary Type: Varies (can be made dairy-free)
Ingredients
- 1 lb ground beef or ground turkey
- 1 (15 ounce) can black beans, drained and rinsed
- 3 ounces tequila
- 4 tablespoons epazote (a Mexican spice)
- 2 ancho chilies, chopped finely (Anaheim preferred)
- 1/2 cup taco seasoning, plus 1 tablespoon taco seasoning
- 3 tablespoons cocoa powder
- 1 tablespoon black pepper, freshly ground
- 1 ounce hot sauce
- 20 ounces water
- 8 ounces sour cream
- 1 (14 ounce) can salsa verde (green salsa)
- 3 cups sharp cheddar cheese, finely shredded
- 2 cups Minute Rice
- 25 (8 inch) flour tortillas (thick and fresh so they won’t break when rolled)
Equipment Needed
- Saucepan
- Bowl
- Large four-quart pot
- Blender
- Cookie sheets
- Aluminum foil
Instructions
-
In a saucepan, combine the drained black beans, tequila, and epazote. Begin simmering over low heat, stirring occasionally. This allows the flavors to meld beautifully.
-
In a separate bowl, mix together the 1/2 cup taco seasoning, cocoa powder, and black pepper. The cocoa may seem unusual, but it adds a depth of flavor that really enhances the overall taste.
-
In a large four-quart pot, brown the ground beef or turkey over medium-high heat. Drain any excess grease. Once the meat is browned, add the water and the taco seasoning mixture from the bowl. Bring the mixture to a boil.
-
Once boiling, reduce the heat to simmer, and add the chopped ancho chilies and hot sauce. Stir everything together well and let it simmer for 15 minutes. This simmering time allows the flavors to fully develop.
-
While the meat mixture is simmering, prepare the bean puree. Place the simmering beans, sour cream, and salsa verde into a blender. Puree the mixture until it is smooth. If you prefer a dairy-free option, substitute the sour cream with a plant-based alternative like cashew cream or a thick coconut cream.
-
Pour the blended bean mixture into the pot with the meat. Heat on medium-low, stirring frequently to prevent sticking.
-
Add the shredded cheddar cheese to the pot and let it melt completely, stirring constantly. This creates a creamy, cheesy base for the burriquitas. Simmer and stir for about 10 minutes to ensure everything is well combined and heated through.
-
Remove the pot from the heat and mix in the Minute Rice. Make sure the rice is evenly distributed throughout the mixture.
-
Let the mixture stand for about 5 minutes. This allows the rice to absorb the excess moisture and plump up.
-
Preheat oven to 350°F (175°C).
-
Prepare the burriquitas. Scoop about 2 ounces of the filling right down the middle of each tortilla.
-
Gently fold the tortilla over the filling, then fold the right edge in, and roll again to form a small burrito.
-
Place the rolled burriquitas onto cookie sheets covered with aluminum foil. Make sure the burriquitas are not layered on top of each other to ensure even baking.
-
Bake in the preheated oven for 15 minutes, or until the tortillas are lightly browned and heated through.
-
Remove from the oven and let cool slightly before serving.
Expert Tips & Tricks
- For a spicier kick, add a pinch of cayenne pepper or use a hotter variety of hot sauce.
- If you want to make these ahead of time, prepare the filling and store it in the refrigerator for up to 2 days. Assemble and bake just before serving.
- To prevent the tortillas from breaking, warm them slightly in a dry skillet or microwave before filling. This will make them more pliable.
- If the filling seems too watery after adding the rice, simmer it for a few more minutes, uncovered, to allow some of the excess moisture to evaporate.
- Experiment with different types of cheese, such as Monterey Jack or Pepper Jack, to customize the flavor.
- For a vegetarian version, substitute the ground beef or turkey with crumbled tofu or cooked lentils.
Serving & Storage Suggestions
Serve the burriquitas warm with your favorite toppings, such as guacamole, sour cream, extra salsa verde, or a sprinkle of chopped cilantro. These are perfect for parties, game nights, or quick snacks.
Leftover burriquitas can be stored in an airtight container in the refrigerator for up to 3 days. To reheat, bake in a preheated oven at 350°F (175°C) for about 10 minutes, or microwave until heated through. You can also freeze the burriquitas for longer storage. Wrap them individually in plastic wrap and then place them in a freezer bag. They can be stored in the freezer for up to 2 months. To reheat frozen burriquitas, thaw them in the refrigerator overnight and then bake or microwave as described above.
Nutritional Information
| Nutrient | Amount per Serving | % Daily Value |
|---|---|---|
| Calories | 349.1 kcal | N/A |
| Calories from Fat | N/A | N/A |
| Total Fat | 14 g | 21% |
| Saturated Fat | 6.3 g | 31% |
| Cholesterol | 30.8 mg | 10% |
| Sodium | 588.5 mg | 24% |
| Total Carbohydrate | 41.6 g | 13% |
| Dietary Fiber | 4.2 g | 16% |
| Sugars | 1.4 g | N/A |
| Protein | 14 g | 27% |
Note: Nutritional information is an estimate and may vary based on specific ingredients and portion sizes.
Variations & Substitutions
- Spicy Burriquitas: Add a pinch of cayenne pepper to the meat mixture or use a spicier variety of salsa.
- Vegetarian Burriquitas: Replace the ground beef or turkey with cooked lentils, crumbled tofu, or black beans.
- Dairy-Free Burriquitas: Substitute the sour cream with a plant-based alternative like cashew cream or coconut cream. Use dairy-free cheese or omit the cheese altogether.
- Gluten-Free Burriquitas: Use gluten-free tortillas.
- Chicken Burriquitas: Use shredded cooked chicken instead of ground beef or turkey.
- Breakfast Burriquitas: Add scrambled eggs and cooked bacon or sausage to the filling for a breakfast twist.
FAQs (Frequently Asked Questions)
Q: Can I make these ahead of time?
A: Yes, you can prepare the filling up to 2 days in advance and store it in the refrigerator. Assemble and bake just before serving.
Q: How do I prevent the tortillas from breaking when rolling?
A: Warm the tortillas slightly in a dry skillet or microwave before filling to make them more pliable.
Q: Can I freeze these burriquitas?
A: Yes, you can freeze them for up to 2 months. Wrap them individually in plastic wrap and then place them in a freezer bag. Thaw in the refrigerator overnight before reheating.
Q: What can I use instead of epazote?
A: While epazote adds a unique flavor, you can substitute it with a combination of oregano and cilantro if needed.
Q: Can I use different types of cheese?
A: Absolutely! Monterey Jack, Pepper Jack, or even a Mexican cheese blend would work well in this recipe.
Final Thoughts
These little burriquitas are more than just a snack; they’re a taste of home and a celebration of simple, delicious flavors. I encourage you to gather your friends or family, roll up a batch of these delightful treats, and share the joy of good food and good company. Don’t be afraid to experiment with different fillings and toppings to create your own unique version. And, as always, I’d love to hear your feedback and see your creations! Consider pairing these with a refreshing agua fresca or a crisp Mexican beer for the perfect fiesta.