
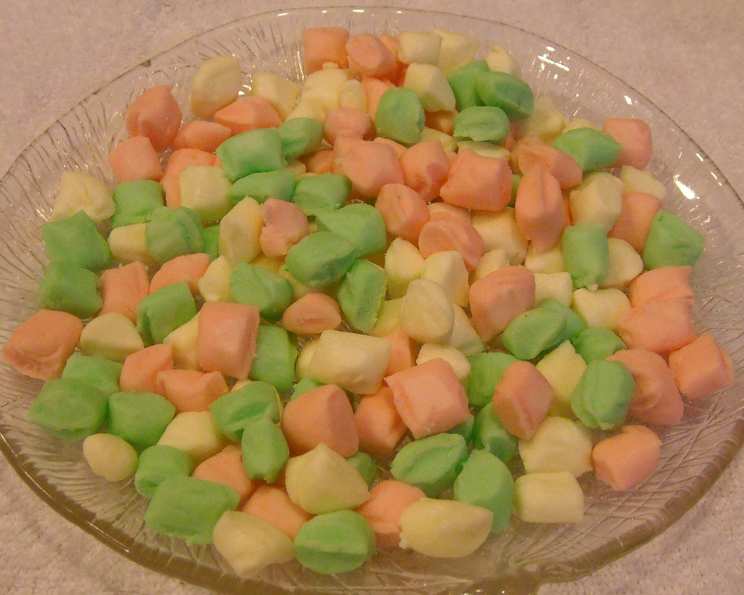
Butter Mint Candies: A Sweet Nostalgic Treat
The memory is etched in my mind like a perfect fingerprint on a frosted pane. Every Christmas, our family would gather at my grandmother’s house, a haven of warmth and holiday cheer. Amidst the aroma of roasted chestnuts and pine needles, I’d always find myself drawn to a delicate glass dish filled with pastel-colored candies. Those were her homemade butter mints – melt-in-your-mouth squares of sugary bliss that tasted of winter and love. The soft, buttery texture and refreshing mint flavor were utterly irresistible, and I knew I had to learn the secrets of making them myself.
Recipe Overview
- Prep Time: 20 minutes
- Cook Time: None
- Total Time: 24 hours 20 minutes
- Yields: Approximately 200 mints
- Dietary Type: Vegetarian
Ingredients
- ½ cup salted butter, softened
- 1 (1 lb) box confectioners’ sugar, plus extra for dusting
- 2 tablespoons heavy cream or 2 tablespoons milk
- 1 teaspoon mint extract
- Red and green liquid food coloring
Equipment Needed
- Large bowl
- Electric mixer
- Work surface
- Plastic wrap
- 2 baking sheets
- Nonstick foil
- Spatula
- Covered containers
Instructions
-
In a large bowl, use an electric mixer to beat the softened butter until it is light and creamy. This step is crucial for achieving the right texture, so don’t rush it. Ensure the butter is genuinely soft but not melted.
-
With the mixer on low speed, gradually beat in the confectioners’ sugar, heavy cream (or milk), and mint extract until the mixture is creamy and smooth. Start with small amounts of the confectioners’ sugar to avoid a powdery mess. If the mixture seems too dry, add a tiny bit more cream or milk, a teaspoon at a time, until it comes together.
-
Turn the sugar mixture out onto a work surface lightly dusted with confectioners’ sugar. This prevents the mixture from sticking and makes it easier to handle.
-
Knead the mixture until it is smooth and satiny. This step develops the texture and ensures the mints have that characteristic melt-in-your-mouth quality.
-
Divide the mixture into thirds. You’ll be creating three different colors, so an even division is important for a visually appealing final product.
-
Tint one portion pastel pink by adding 2 drops of red liquid food coloring. Tint another portion pastel green by adding 2 drops of green liquid food coloring. Leave the remaining portion white. Remember, less is more when it comes to food coloring. You can always add more, but you can’t take it away.
-
Cover each portion with plastic wrap to prevent it from drying out. This is essential, as the mixture can become stiff and difficult to work with if exposed to air.
-
Line 2 baking sheets with nonstick foil. This will prevent the mints from sticking and make them easy to remove once they’ve dried.
-
Lightly dust your work surface with confectioners’ sugar again.
-
Working with one color at a time, roll out ¼ cupfuls of the mint mixture using your fingers into a ½-inch-thick rope. A gentle touch is key here.
-
Cut the rope into ½- to ¾-inch pillows. This is where you’ll start to see the familiar shape of butter mints emerge.
-
Transfer the mints to the prepared baking sheet using a spatula. Be careful—the mints are soft and will squish easily, especially when they are freshly made.
-
Repeat steps 10-12 with the remaining mint mixture.
-
Let the mints air-dry at room temperature for 1 to 2 days, or until they are firm enough to handle. This is a crucial step for achieving the right texture. The mints will harden as they dry, becoming less sticky and more stable.
-
Transfer the mints to covered containers once they are sufficiently firm.
Expert Tips & Tricks
- For a richer flavor, use European-style butter, which has a higher butterfat content.
- If you don’t have heavy cream, whole milk works perfectly fine.
- Don’t overmix the dough after adding the confectioners’ sugar, as this can develop the gluten and make the mints tough.
- If the dough is too sticky, add a tablespoon of confectioners’ sugar at a time until it reaches a workable consistency.
- Experiment with different extracts. Vanilla, almond, or lemon extract can add a unique twist.
- For a festive touch, sprinkle the mints with edible glitter before they dry.
Serving & Storage Suggestions
These butter mints are delightful served as an after-dinner treat, a sweet addition to a dessert buffet, or a thoughtful homemade gift. Arrange them artfully in a candy dish or small gift bags tied with ribbon.
Store the mints in an airtight container at cool room temperature for up to 2 weeks. For longer storage, keep them in the refrigerator for up to 1 month. These candies do not freeze well due to their high sugar content.
Nutritional Information
| Nutrient | Amount per Serving | % Daily Value |
|---|---|---|
| Calories | 13.5 kcal | N/A |
| Calories from Fat | 4 g | 35% |
| Total Fat | 0.5 g | 0% |
| Saturated Fat | 0.3 g | 1% |
| Cholesterol | 1.4 mg | 0% |
| Sodium | 3.4 mg | 0% |
| Total Carbohydrate | 2.3 g | 0% |
| Dietary Fiber | 0 g | 0% |
| Sugars | 2.2 g | 8% |
| Protein | 0 g | 0% |
Nutritional information is an estimate and may vary based on specific ingredients and portion sizes.
Variations & Substitutions
- Dairy-Free: Use a high-quality vegan butter substitute and non-dairy milk or cream.
- Flavor Variations: Experiment with different extracts like peppermint, spearmint, or even a hint of citrus.
- Color Variations: Use natural food colorings derived from fruits and vegetables for a healthier option. Beet juice can create a vibrant pink, while spinach powder can produce a subtle green.
- Shape Variations: Instead of ropes, use small cookie cutters to create fun shapes for holidays or special occasions.
FAQs (Frequently Asked Questions)
Q: Why are my mints sticky even after drying?
A: This could be due to high humidity or not enough confectioners’ sugar in the dough. Try dusting them with more confectioners’ sugar and allowing them to dry for an additional day.
Q: Can I use powdered sugar instead of confectioners’ sugar?
A: Confectioners’ sugar is the best choice due to the added cornstarch, which aids in creating the right texture. Powdered sugar without cornstarch will result in a slightly different consistency.
Q: How can I make the colors more vibrant?
A: Use gel food coloring instead of liquid. Gel colors are more concentrated and won’t affect the consistency of the dough as much.
Q: Can I speed up the drying process?
A: While air-drying is recommended for the best texture, you can try placing the mints in a dehydrator on a very low setting for a few hours. Be careful not to overheat them, as they can melt.
Q: What if my butter is too melted?
A: If your butter is too melted, chill it in the refrigerator for about 15-20 minutes until it solidifies slightly but is still pliable.
Final Thoughts
Making these butter mint candies is more than just following a recipe; it’s about creating a connection to cherished memories and sharing a piece of homemade happiness. I urge you to gather your ingredients, embrace the simple pleasure of kneading the sweet dough, and create your own batch of these delightful confections. The satisfaction of watching them transform into delicate, flavorful squares is a reward in itself. Share them with loved ones, and let the taste of nostalgia bring smiles to their faces. And don’t forget to leave a comment – I’d love to hear about your experience and any creative twists you might add to this classic recipe!