
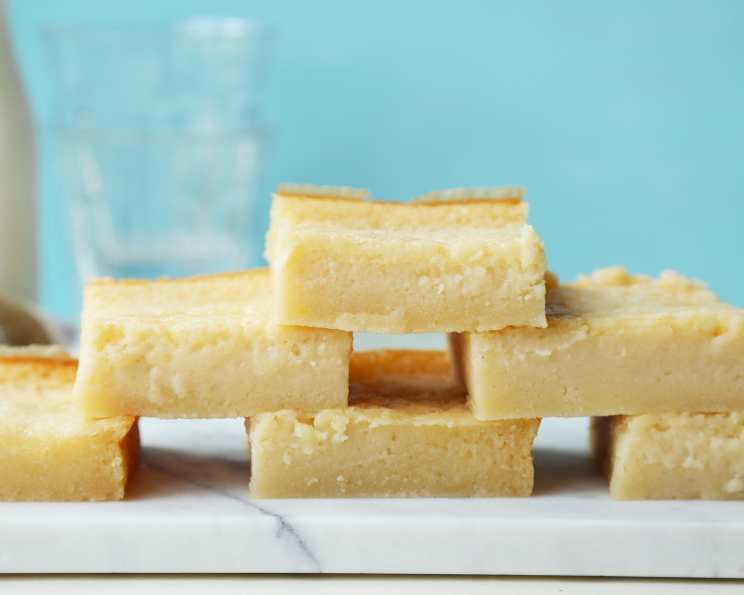
Butter Mochi: A Taste of Aloha
The scent of butter mochi always takes me back to my childhood summers in Hawaii. My Tutu (grandmother) would make a huge pan for every family gathering, its golden-brown top promising a sweet, chewy delight. I remember sneaking pieces straight from the cooling rack, the slightly sticky texture clinging to my fingers. It wasn’t just a dessert; it was a symbol of family, warmth, and the spirit of Aloha. Now, I carry on that tradition, hoping to share a piece of that island magic with everyone I bake for.
Recipe Overview
- Prep Time: 15 minutes
- Cook Time: 45-60 minutes
- Total Time: 1 hour – 1 hour 15 minutes
- Servings: 32-48
- Dietary Type: Not Gluten-Free
Ingredients
- 1 (16 ounce) box mochiko sweet rice flour
- 2 – 2 ½ cups sugar
- 2 teaspoons baking powder
- ¼ teaspoon ground cinnamon (optional)
- 1 (12 ounce) can evaporated milk
- 1 (14 ounce) can coconut milk
- 3 eggs
- 2 teaspoons vanilla
- ½ cup butter, melted
Equipment Needed
- 13x9x2 inch baking pan
- Large mixing bowl
- Medium mixing bowl
- Whisk
- Sifter
Instructions
- Begin by preheating your oven to 350 degrees F (175 degrees C). This is crucial for even baking and achieving that perfect golden-brown crust.
- While the oven is preheating, thoroughly grease a 13x9x2 inch baking pan. This prevents the butter mochi from sticking and ensures easy removal after baking. You can use butter, shortening, or a non-stick cooking spray.
- In a large bowl, sift together the mochiko sweet rice flour, sugar, baking powder, and cinnamon (if using). Sifting ensures that the dry ingredients are evenly distributed and prevents lumps, resulting in a smoother batter. Mix well to combine.
- In a medium bowl, combine the evaporated milk, coconut milk, eggs, and vanilla. Whisk the ingredients together until they are well blended and smooth. This mixture provides the liquid base for the batter.
- Make a well in the center of the dry ingredient mixture. Gradually incorporate the liquid ingredients into the well, stirring continuously until just combined. Be careful not to overmix, as this can lead to a tough butter mochi.
- Stir in the melted butter until it is fully incorporated into the batter. The melted butter adds richness and contributes to the moist, tender texture of the butter mochi.
- Pour the batter into the prepared pan. Gently tap the pan on the counter to settle the batter and release any trapped air bubbles. This will help create an even surface.
- Bake for 45-60 minutes, or until the butter mochi is golden brown and a toothpick inserted into the center comes out clean. The baking time may vary depending on your oven, so it’s important to check for doneness regularly. A slightly longer baking time will result in a chewier texture.
- Cool the butter mochi in the pan for at least 2 hours before cutting and serving. This allows the mochi to set properly and develop its characteristic chewy texture.
Expert Tips & Tricks
- Sugar Adjustment: While the recipe calls for 2 to 2 ½ cups of sugar, start with the lower amount and taste the batter before baking. Adjust to your preference, remembering that the mochi will be less sweet when cooled.
- Baking Time Variance: Keep a close eye on the butter mochi during the last 15 minutes of baking. Ovens vary, and you want a beautiful golden-brown top without burning.
- Mochiko Flour: Make sure you are using mochiko sweet rice flour and not regular rice flour. Mochiko is glutinous and provides the signature chewy texture.
- Toasted Coconut: For extra flavor and texture, sprinkle toasted coconut flakes on top of the batter before baking.
- Oven Temperature: Some recipes suggest baking at a slightly higher temperature (375°F) for a shorter time. This can work, but watch carefully to prevent burning.
- Doneness Test: Look for a slightly puffed-up, golden-brown surface. The center should be set, but still slightly jiggly. The toothpick test should come out clean, but a few moist crumbs are okay.
Serving & Storage Suggestions
Butter mochi is best served at room temperature or slightly chilled. Cut it into squares or rectangles and arrange them on a platter. It’s delicious on its own or paired with a scoop of vanilla ice cream or a dollop of whipped cream.
To store leftovers, wrap them tightly in plastic wrap or place them in an airtight container. Butter mochi can be stored at room temperature for up to 2 days, in the refrigerator for up to a week, or in the freezer for up to 2 months. To reheat frozen butter mochi, thaw it in the refrigerator overnight and then warm it in the microwave or oven.
Nutritional Information
| Nutrient | Amount per Serving | % Daily Value |
|---|---|---|
| Calories | 172 kcal | N/A |
| Calories from Fat | 62 g | 36% |
| Total Fat | 7 g | 10% |
| Saturated Fat | 4.9 g | 24% |
| Cholesterol | 28.1 mg | 9% |
| Sodium | 67.7 mg | 2% |
| Total Carbohydrate | 25.4 g | 8% |
| Dietary Fiber | 0.3 g | 1% |
| Sugars | 12.5 g | 50% |
| Protein | 2.4 g | 4% |
Note: Nutritional information is an estimate and can vary based on specific ingredients and portion sizes.
Variations & Substitutions
- Chocolate Butter Mochi: Add ¼ cup of cocoa powder to the dry ingredients for a chocolatey twist.
- Matcha Butter Mochi: Stir in 1-2 tablespoons of matcha powder into the dry ingredients for a vibrant green hue and earthy flavor.
- Ube Butter Mochi: Incorporate 1-2 teaspoons of ube extract or powder for a beautiful purple color and a unique flavor.
- Coconut Extract: Enhance the coconut flavor by adding ½ teaspoon of coconut extract to the wet ingredients.
- Nut-Free: If you have a nut allergy, you can substitute the coconut milk with another type of milk, such as oat milk or soy milk.
- Less Sweet: Reduce the sugar to 1 ½ cups for a less sweet version, but be aware that it will affect the texture slightly.
- Different Pan Size: If you don’t have a 13×9 inch pan, you can use a different size pan, but you may need to adjust the baking time accordingly. Thicker mochi will require longer baking times.
FAQs (Frequently Asked Questions)
Q: Why is my butter mochi tough?
A: Overmixing the batter or overbaking can lead to a tough butter mochi. Be gentle when mixing and keep a close eye on the baking time.
Q: Can I use a different type of milk?
A: While coconut milk adds a unique flavor, you can substitute it with another type of milk, such as evaporated milk, oat milk, or soy milk. The flavor will be slightly different.
Q: How do I know when the butter mochi is done?
A: The butter mochi is done when it’s golden brown and a toothpick inserted into the center comes out clean or with a few moist crumbs. The center should be set, but still slightly jiggly.
Q: Can I make butter mochi ahead of time?
A: Yes, butter mochi can be made ahead of time. Store it at room temperature for up to 2 days, in the refrigerator for up to a week, or in the freezer for up to 2 months.
Q: Why did my butter mochi sink in the middle?
A: This can happen if the butter mochi is underbaked. Make sure to bake it until it is fully set and golden brown.
Final Thoughts
Butter mochi is more than just a dessert; it’s a slice of Hawaiian culture and a taste of pure comfort. With its chewy texture, sweet flavor, and endless variations, it’s a crowd-pleaser that’s sure to bring a smile to anyone’s face. I encourage you to try this recipe and experience the magic of butter mochi for yourself. Don’t be afraid to experiment with different flavors and ingredients to create your own unique version. And please, share your creations and feedback – I’d love to hear how it turns out! Perhaps pair it with a cup of Hawaiian Kona coffee for the full experience. Aloha!