
Butter Tart Filling: A Taste of Nostalgia
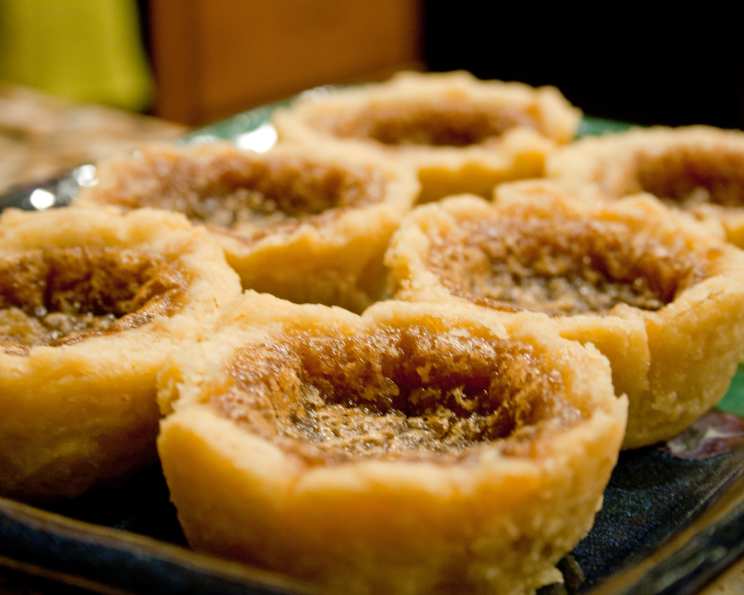
My earliest memory of baking involves the mesmerizing scent of warm butter, vanilla, and caramelized sugar wafting from my grandmother’s kitchen. She always seemed to have a batch of butter tarts cooling on the counter, their golden, slightly jiggly filling beckoning. These weren’t just tarts; they were edible time capsules, each bite a sweet reminder of family gatherings, laughter, and the unwavering love that only a grandmother can provide.
Recipe Overview
- Prep Time: 10 minutes
- Cook Time: 20 minutes
- Total Time: 30 minutes
- Servings: Variable, depends on tart shell size
- Yield: Enough filling for approximately 12 tarts
- Dietary Type: Not specified; contains dairy and eggs
Ingredients
- ½ cup brown sugar
- ¼ cup butter, melted (NOT margarine)
- ½ teaspoon vanilla extract
- ½ teaspoon vinegar
- 1 teaspoon lemon juice
- 2 eggs
- 1 cup corn syrup
- ⅓ cup walnuts or ⅓ cup pecans (optional)
Equipment Needed
- Mixing bowl
- Whisk or fork
- Measuring cups and spoons
- Ladle or spoon
- Tart shells
- Oven
Instructions
-
Preheat your oven to 375 degrees Fahrenheit. This is crucial for even baking and preventing a soggy crust. Make sure your oven is properly calibrated for best results.
-
In a mixing bowl, combine the ½ cup of brown sugar with the ¼ cup of melted butter. Ensure the butter is fully melted but not browned. Browned butter will add a nutty flavor that, while delicious, is not traditional for this recipe.
-
Add the ½ teaspoon of vanilla extract, ½ teaspoon of vinegar, and 1 teaspoon of lemon juice to the sugar and butter mixture. These acidic ingredients balance the sweetness and contribute to the filling’s characteristic tang.
-
In a separate small bowl, lightly beat the 2 eggs. This prevents overmixing and ensures a smooth filling. Gradually add the beaten eggs to the butter and sugar mixture, whisking constantly to combine.
-
Add the 1 cup of corn syrup to the mixture and stir until everything is well incorporated. The corn syrup is essential for achieving the correct texture and preventing the filling from becoming too dry.
-
If using, sprinkle 5 or 6 raisins, walnuts, or pecans into the bottom of each tart shell. Feel free to customize this based on your preference, or leave them plain for a classic taste. The nuts add a delightful crunch and nutty flavor that complements the sweet filling.
-
Ladle the filling into the tart shells, filling them about ⅔ full. Be careful not to overfill, as the filling will expand during baking and could overflow.
-
Bake at 375 degrees Fahrenheit for approximately 20 minutes, or until the filling is just barely set. The edges should be slightly golden brown, and the center should still have a slight jiggle.
-
Remove the tarts from the oven and let them cool completely on a wire rack. The filling will continue to set as it cools.
-
Once cooled, enjoy!
Expert Tips & Tricks
-
Don’t overbake: The key to a perfect butter tart is to underbake it slightly. The filling should still have a bit of a jiggle when you take it out of the oven, as it will continue to set as it cools. Overbaking will result in a dry, crumbly filling.
-
Use real butter: Margarine simply won’t give you the same rich, buttery flavor. Invest in good quality butter for the best results.
-
Customize your additions: While raisins, walnuts, and pecans are traditional, feel free to experiment with other add-ins like chocolate chips, shredded coconut, or even dried cranberries.
-
Blind bake the crust (optional): For an extra crisp crust, blind bake the tart shells before adding the filling. This will prevent the crust from becoming soggy.
-
Make ahead: The filling can be made ahead of time and stored in the refrigerator for up to 24 hours. Just be sure to whisk it again before filling the tart shells.
Serving & Storage Suggestions
Serve these butter tarts at room temperature. They are delicious on their own or paired with a scoop of vanilla ice cream or a dollop of whipped cream. For a truly indulgent experience, serve them alongside a cup of strong black coffee or a glass of ice-cold milk.
To store leftover butter tarts, place them in an airtight container at room temperature for up to 2 days, or in the refrigerator for up to 5 days. They can also be frozen for up to 2 months. To reheat, thaw the tarts in the refrigerator overnight and then warm them in a 350-degree Fahrenheit oven for a few minutes until heated through.
Nutritional Information
(Please note that this is an estimate, and actual values may vary based on specific ingredients and portion sizes.)
| Nutrient | Amount per Serving | % Daily Value |
|---|---|---|
| Calories | 200 kcal | 10% |
| Total Fat | 10g | 15% |
| Saturated Fat | 6g | 30% |
| Cholesterol | 50mg | 17% |
| Sodium | 50mg | 2% |
| Total Carbohydrate | 25g | 8% |
| Dietary Fiber | 1g | 4% |
| Sugars | 15g | N/A |
| Protein | 2g | 4% |
Variations & Substitutions
-
Gluten-free: Use gluten-free tart shells for a gluten-free version.
-
Dairy-free: Unfortunately, it’s difficult to make a true dairy-free butter tart filling without significantly altering the flavor and texture, as the butter is integral. A vegan alternative would need a different recipe to begin with.
-
Different Nuts: Try using chopped almonds, hazelnuts, or macadamia nuts instead of walnuts or pecans.
-
Maple Syrup: Substitute a portion of the corn syrup with maple syrup for a richer, more complex flavor. Start with ¼ cup of maple syrup in place of ¼ cup of the corn syrup and adjust to taste.
-
Boozy Variation: Add a tablespoon of your favorite liqueur (like rum or bourbon) to the filling mixture for an extra kick.
FAQs (Frequently Asked Questions)
Q: Why is my butter tart filling runny?
A: This is likely due to underbaking. Ensure the tarts are baked until the edges are golden brown and the center is just barely set. The filling will continue to firm up as it cools.
Q: Can I use store-bought tart shells?
A: Yes, absolutely! Store-bought tart shells are a convenient option. However, homemade tart shells will generally have a better flavor and texture.
Q: Can I freeze butter tarts?
A: Yes, butter tarts freeze well. Wrap them individually in plastic wrap and then place them in an airtight container. Thaw in the refrigerator overnight before serving.
Q: What’s the best way to prevent the crust from becoming soggy?
A: Blind baking the crust before adding the filling can help prevent sogginess. You can also brush the bottom of the crust with a thin layer of melted chocolate before filling.
Q: Can I make the filling ahead of time?
A: Yes, the filling can be made ahead of time and stored in the refrigerator for up to 24 hours. Whisk well before using.
Final Thoughts
Now it’s your turn to create your own memories with these classic butter tarts. Don’t be afraid to experiment with different flavors and add-ins to make them your own. Share your creations with loved ones, and let the warm, comforting taste of butter tarts bring joy to your kitchen and your heart. I’d love to hear about your experiences and any variations you try!