
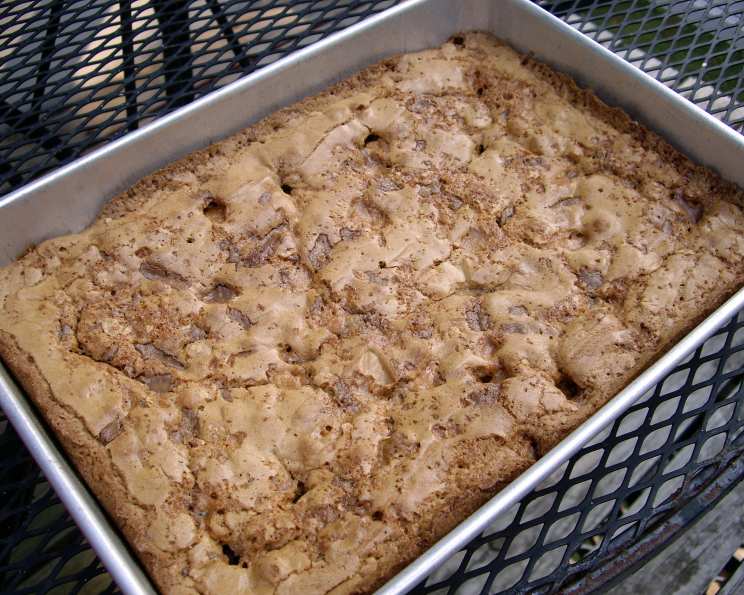
Butterfinger Brownies: A Sweet & Crunchy Nostalgia Trip
My earliest memory involving baking wasn’t a cake or cookies, but a frantic search through the pantry for Butterfingers. My grandma, a champion of all things sweet and peanut-buttery, was on a mission to create the ultimate brownie, one studded with the crunchy, flaky goodness of our favorite candy bar. The aroma of warm butter, melting chocolate, and that unmistakable Butterfinger scent still takes me right back to her sunny kitchen, flour dusting every surface and our faces beaming with anticipation. These brownies aren’t just a dessert; they’re a sweet hug from the past.
Recipe Overview
- Prep Time: 15 minutes
- Cook Time: 30-35 minutes
- Total Time: 45-50 minutes
- Servings: 12
- Yield: 12 brownies
- Dietary Type: Not Gluten-Free, Not Dairy-Free
Ingredients
- 2 ¼ cups flour
- 1 teaspoon baking powder
- ¼ teaspoon salt
- ¾ cup butter (softened)
- 2 ¼ cups brown sugar
- 3 eggs
- 1 ½ teaspoons vanilla
- 4 Butterfinger candy bars, crushed
Equipment Needed
- Medium Bowl
- Small Bowl
- Electric Mixer
- Greased 13×9 inch baking pan
Instructions
- Preheat your oven to 350ºF (175°C). Make sure your oven rack is in the center position for even baking.
- In a small bowl, whisk together the flour, baking powder, and salt. This ensures the baking powder and salt are evenly distributed throughout the flour, leading to a better rise and flavor. Set this mixture aside.
- In a medium bowl, using an electric mixer at medium speed, cream together the softened butter and brown sugar until light and fluffy. This step is crucial for creating a tender brownie. The butter should be properly softened; otherwise, it will be difficult to achieve a smooth and creamy mixture.
- Beat in the eggs, one at a time, followed by the vanilla extract, until the batter is smooth and well combined. Be sure to scrape down the sides of the bowl between each addition to ensure everything is evenly incorporated. Overmixing at this stage can lead to tough brownies, so mix until just combined.
- Gradually stir in the flour mixture into the wet ingredients, mixing until just combined. Be careful not to overmix, as this can develop the gluten in the flour and result in a tough brownie. Stop mixing as soon as the flour disappears.
- Fold in 1 cup of the crushed Butterfinger candy bars into the batter. This infuses the brownies with that signature Butterfinger flavor and adds a delightful textural element.
- Spread the batter evenly into a greased 13×9 inch baking pan. Using a baking spray with flour will prevent the brownies from sticking to the pan.
- Sprinkle the remaining crushed Butterfinger candy bars evenly over the top of the batter. This creates a visually appealing and extra-flavorful topping.
- Bake at 350ºF (175°C) for 30-35 minutes, or until a toothpick inserted into the center comes out with a few moist crumbs attached. The baking time can vary slightly depending on your oven, so keep a close eye on them.
- Remove the pan from the oven and let the brownies cool completely in the pan before cutting them into bars. Cooling them completely will make them easier to cut and prevent them from falling apart.
Expert Tips & Tricks
- Soft Butter is Key: Ensure your butter is softened to room temperature for optimal creaming. Cold butter won’t incorporate properly, and melted butter will result in a greasy texture.
- Don’t Overmix: Overmixing develops gluten, leading to tough brownies. Mix until just combined.
- Butterfinger Prep: For easier crushing, freeze the Butterfinger bars for about 15 minutes before crushing. They’ll break apart more cleanly.
- Even Baking: Rotate the pan halfway through baking to ensure even browning.
- Fudgy vs. Cakey: For fudgier brownies, slightly underbake them. For cakeier brownies, bake them a minute or two longer.
- Enhance the Chocolate: For an even richer flavor, add 1/4 cup of cocoa powder to the dry ingredients.
- Salted Butterfinger Brownies: Use salted butter instead of unsalted butter for a sweet and salty taste.
- Make Ahead: The batter can be made a day ahead and stored in the refrigerator. Let it come to room temperature slightly before baking.
Serving & Storage Suggestions
Serve these Butterfinger Brownies at room temperature for the best texture and flavor. They’re delicious on their own, or you can elevate them with a scoop of vanilla ice cream and a drizzle of chocolate sauce. Leftover brownies can be stored in an airtight container at room temperature for up to 3 days, in the refrigerator for up to a week, or in the freezer for up to 2 months. To reheat, microwave them for a few seconds or warm them in a low oven.
The brownies are perfect for birthday parties, potlucks, or any occasion where you want to bring smiles to people’s faces.
Nutritional Information
| Nutrient | Amount per Serving | % Daily Value |
|---|---|---|
| Calories | 434 kcal | N/A |
| Calories from Fat | 142 kcal | N/A |
| Total Fat | 15.8 g | 24% |
| Saturated Fat | 9.2 g | 45% |
| Cholesterol | 83.4 mg | 27% |
| Sodium | 226.6 mg | 9% |
| Total Carbohydrate | 69.2 g | 23% |
| Dietary Fiber | 0.9 g | 3% |
| Sugars | 47.8 g | N/A |
| Protein | 5 g | 9% |
Variations & Substitutions
- Gluten-Free: Substitute the all-purpose flour with a gluten-free all-purpose flour blend. Be sure to check the label to ensure it contains xanthan gum, which helps bind the ingredients together.
- Dairy-Free: Use a dairy-free butter substitute and ensure the Butterfinger candy bars are replaced with a suitable dairy-free alternative (this may be tricky as the original contains dairy).
- Nut-Free: Although Butterfingers already contain peanuts, you can replace them with another crunchy candy bar like Heath bars for a toffee flavor, if no peanut product is wanted.
- Different Candy: Experiment with other candy bars like Snickers, Reese’s Peanut Butter Cups (if you want even MORE peanut butter flavor!), or chopped-up chocolate bars.
- Espresso Boost: Add a teaspoon of instant espresso powder to the dry ingredients for a richer, more intense flavor.
- Chocolate Chips: Fold in 1/2 cup of chocolate chips (milk, dark, or semi-sweet) for an extra dose of chocolatey goodness.
FAQs (Frequently Asked Questions)
Q: Can I use a different size pan?
A: Yes, but baking time will need to be adjusted. If using an 8×8 inch pan, the brownies will be thicker and require a few extra minutes of baking.
Q: Can I use regular granulated sugar instead of brown sugar?
A: While you can, brown sugar provides a richer, molasses-like flavor and contributes to a chewier texture. If substituting, use light brown sugar for best results.
Q: How do I prevent the Butterfinger topping from burning?
A: If the topping starts to brown too quickly, tent the pan with aluminum foil for the last few minutes of baking.
Q: Can I freeze these brownies?
A: Absolutely! Wrap them tightly in plastic wrap and then foil, or store them in an airtight freezer-safe container. They can be frozen for up to 2 months.
Q: How do I know when the brownies are done?
A: Insert a toothpick into the center of the brownies. It should come out with a few moist crumbs attached, not completely clean. This indicates they are perfectly fudgy.
Final Thoughts
Now that you’re armed with this recipe, it’s your turn to create some Butterfinger Brownie magic! Whether you’re baking them for a special occasion or just to satisfy a sweet craving, these brownies are sure to be a hit. Don’t be afraid to experiment with variations and make them your own. And please, share your baking adventures and feedback – I’d love to hear how they turned out! These brownies pair perfectly with a cold glass of milk or a scoop of vanilla ice cream for an extra indulgent treat. Happy Baking!