
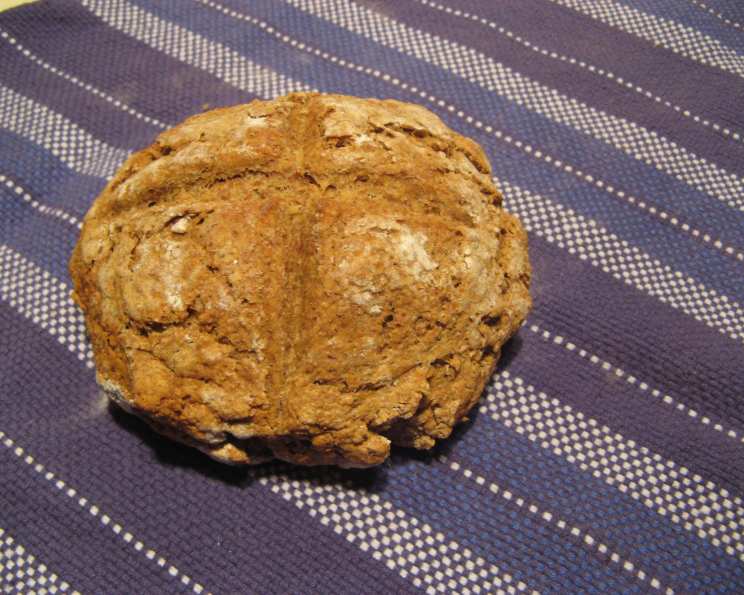
Buttermilk Bannock: A Taste of Heritage
The first time I tasted bannock, I was at a powwow in Montana, the scent of sage and woodsmoke heavy in the air. A kind woman with eyes that held centuries of stories offered me a wedge still warm from the skillet. Its slightly tangy, wheaty flavor was both comforting and intriguing, a taste that seemed to whisper tales of resilience and adaptation across generations. It was more than just bread; it was a connection to a shared heritage, a reminder of the simple sustenance that sustained communities through hardship and celebration. The memory of that bannock, and the feeling of belonging it evoked, has stayed with me ever since, inspiring me to recreate its simple magic in my own kitchen.
Recipe Overview
- Prep Time: 15 minutes
- Cook Time: 40 minutes
- Total Time: 55 minutes
- Servings: 24
- Yield: 1 loaf
- Dietary Type: Vegetarian
Ingredients
- 1 ½ cups whole wheat flour, sifted
- ½ teaspoon baking soda
- 1 teaspoon salt
- ¼ cup buttermilk, plus
- 2 tablespoons buttermilk, if needed
Equipment Needed
- Large mixing bowl
- Wooden spoon or sturdy spoon
- Lightly floured baking sheet
- Very sharp knife
- Foil
- Cooking spray or oil
- Wire rack
Instructions
- Begin by preheating your oven to 425 degrees Fahrenheit (220 degrees Celsius). Ensure your oven rack is positioned in the center for even baking.
- In a large mixing bowl, combine the dry ingredients. This involves adding 1 ½ cups of sifted whole wheat flour, ½ teaspoon of baking soda, and 1 teaspoon of salt. Sifting the flour ensures a lighter, more tender crumb, so don’t skip this step.
- Using a wooden spoon or other strong spoon, thoroughly mix all the dry ingredients together. This ensures the baking soda and salt are evenly distributed throughout the flour, leading to consistent flavor and texture.
- Now, add ¼ cup of buttermilk to the dry ingredients. Mix well with the spoon.
- Observe the dough’s consistency. If it appears too dry, gradually add up to 2 tablespoons more of buttermilk, one tablespoon at a time. The goal is to achieve a soft dough that is neither sticky nor crumbly.
- Once the dough has come together, shape it into a round loaf. A slightly rustic shape is perfectly acceptable and adds to the bannock’s charm.
- Place the dough round onto a lightly floured baking sheet. This prevents sticking and ensures the bottom of the bannock bakes evenly.
- Using a very sharp knife, cut an “X” into the top of the loaf. This allows steam to escape during baking, preventing the bannock from cracking unevenly and promoting a more even rise. Make sure your cuts are deep enough to penetrate about halfway through the dough.
- Spray a piece of foil large enough to completely cover the bannock with cooking spray or oil. This prevents the foil from sticking to the dough during baking.
- Gently place the prepared foil over the bannock, ensuring it is loosely tented to allow for expansion.
- Bake the bannock in the preheated oven for 30 minutes. The foil covering helps to create steam and prevents the top from browning too quickly.
- After 30 minutes, carefully remove the foil from the bannock.
- Return the bannock to the oven and continue baking until the top is nicely browned, approximately 10 minutes more. Keep a close eye on it to prevent burning.
- Once the bannock is golden brown and sounds hollow when tapped on the bottom, remove it from the oven.
- Transfer the baked bannock to a wire rack to cool completely. This allows air to circulate around the bread, preventing the bottom from becoming soggy.
Expert Tips & Tricks
- Sifting is Key: Don’t skip sifting the whole wheat flour. It makes a world of difference in the final texture, creating a lighter, less dense bannock.
- Buttermilk Temperature: Using buttermilk at room temperature can help the dough come together more smoothly.
- Knife Matters: A very sharp knife is essential for making a clean “X” cut on top of the bannock. A dull knife will drag the dough and make for an uneven cut. If you don’t have a very sharp knife, you can also use a lame (baker’s blade).
- Oven Variations: Every oven is different, so keep an eye on the bannock during the final 10 minutes of baking. If it starts to brown too quickly, you can loosely tent it with foil again.
- Doneness Test: To check for doneness, tap the bottom of the bannock. If it sounds hollow, it’s ready. You can also insert a toothpick into the center; it should come out clean.
Serving & Storage Suggestions
Buttermilk bannock is incredibly versatile. Serve it warm with a generous pat of butter or a drizzle of honey for a simple, satisfying treat. It also pairs beautifully with savory dishes like stews, soups, or chili. For a truly authentic experience, try it with smoked salmon or a dollop of crème fraîche.
To store leftover bannock, wrap it tightly in plastic wrap or place it in an airtight container. It will keep at room temperature for 2-3 days or in the refrigerator for up to 5 days. To reheat, wrap a slice in foil and warm it in a low oven (around 300°F or 150°C) for about 10 minutes, or until heated through. You can also toast slices for a crispy texture. For longer storage, bannock can be frozen for up to 2 months. Wrap it tightly in plastic wrap and then in foil to prevent freezer burn. Thaw overnight in the refrigerator before reheating.
Nutritional Information
| Nutrient | Amount per Serving | % Daily Value |
|---|---|---|
| Calories | 27 kcal | 1% |
| Total Fat | 0.2g | 0% |
| Saturated Fat | 0g | 0% |
| Cholesterol | 0.1mg | 0% |
| Sodium | 128mg | 5% |
| Total Carbohydrate | 6g | 2% |
| Dietary Fiber | 1g | 4% |
| Sugars | 0g | 0% |
| Protein | 1g | 2% |
Note: Nutritional information is an estimate and may vary based on specific ingredients and portion sizes.
Variations & Substitutions
- Gluten-Free Bannock: Substitute the whole wheat flour with a gluten-free all-purpose flour blend. You may need to adjust the amount of buttermilk to achieve the desired dough consistency.
- Sweet Bannock: Add 1-2 tablespoons of honey or maple syrup to the dough for a sweeter flavor. You can also incorporate dried fruits like raisins or cranberries.
- Savory Bannock: Add chopped herbs like rosemary, thyme, or chives to the dough for a savory twist. You can also include grated cheese, such as cheddar or Parmesan.
- Different Flours: Experiment with different types of flour, such as spelt flour or rye flour, to create unique flavor profiles.
- Vegan Bannock: Substitute the buttermilk with a plant-based milk alternative like almond milk or soy milk. Add a tablespoon of lemon juice or apple cider vinegar to the milk and let it sit for a few minutes to curdle, creating a vegan “buttermilk.”
FAQs (Frequently Asked Questions)
Q: Why is my bannock so dense?
A: Overmixing the dough can lead to a dense bannock. Mix the ingredients just until they come together, and avoid kneading.
Q: Can I make bannock without buttermilk?
A: Yes, you can substitute buttermilk with regular milk mixed with a tablespoon of lemon juice or vinegar. Let it sit for a few minutes to curdle before adding it to the dry ingredients.
Q: How do I prevent the bottom of the bannock from burning?
A: Ensure your oven rack is positioned in the center and use a light-colored baking sheet. You can also place a baking stone on the rack below to help distribute heat evenly.
Q: Can I cook bannock on a campfire?
A: Absolutely! Bannock is traditionally cooked over an open fire. Shape the dough into a flat disc and cook it in a greased skillet or on a flat rock over the embers until golden brown and cooked through.
Q: How long does bannock last?
A: Bannock is best enjoyed fresh, but it will keep at room temperature for 2-3 days or in the refrigerator for up to 5 days. For longer storage, freeze it for up to 2 months.
Final Thoughts
Buttermilk bannock is more than just a recipe; it’s a connection to the past, a taste of heritage, and a celebration of simple, wholesome ingredients. Whether you’re a seasoned baker or a novice in the kitchen, I encourage you to try this recipe and experience the warmth and comfort of this traditional bread. Share it with your loved ones, experiment with different variations, and let the flavors transport you to a simpler time. And please, let me know what you think! What are your favorite variations? How did it turn out for you? Happy baking!