
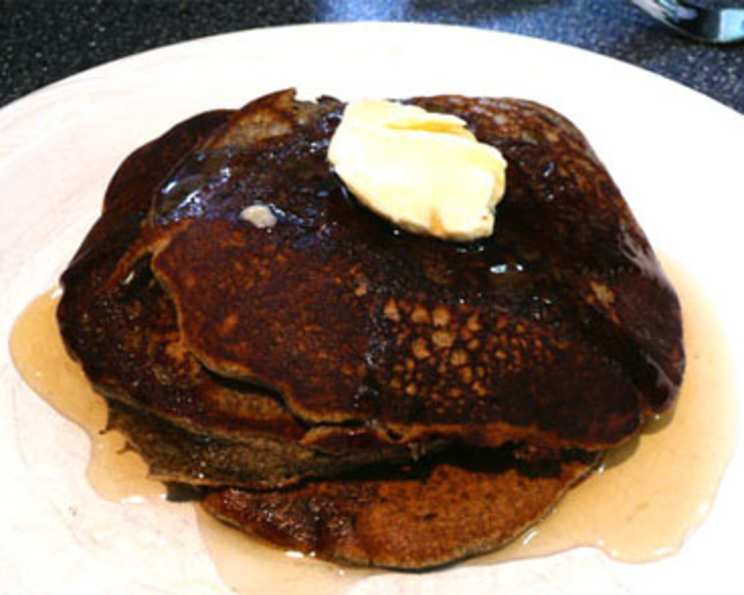
Buttermilk Buckwheat Pancakes (Gluten-Free)
The scent of buckwheat always takes me back to my grandmother’s kitchen. She wasn’t much for elaborate desserts, but on Sunday mornings, a stack of buckwheat pancakes, drenched in maple syrup and served with a dollop of homemade apple butter, was her specialty. The slightly nutty, earthy flavor of the buckwheat, combined with the tang of buttermilk, was a taste of pure comfort and simple joy, a memory I cherish and try to recreate whenever I can. While her recipe likely wasn’t gluten-free, these pancakes capture the essence of those cherished breakfasts, ensuring everyone can enjoy a taste of tradition.
Recipe Overview
- Prep Time: 5 minutes
- Cook Time: 20 minutes
- Total Time: 25 minutes
- Servings: 2
- Yield: 6-8 pancakes
- Dietary Type: Gluten-Free
Ingredients
- 1 cup buckwheat flour
- 2 tablespoons brown sugar
- 1 teaspoon baking powder
- 1/2 teaspoon baking soda
- 1/2 teaspoon salt
- 1/8 teaspoon cinnamon
- 1/8 teaspoon nutmeg
- 1/8 teaspoon clove
- 1 egg
- 1 cup low-fat buttermilk
- 1 tablespoon butter, melted
Equipment Needed
- Large bowl
- Whisk
- Nonstick griddle
- Nonstick cooking spray
- Measuring cups and spoons
Instructions
- In a large bowl, combine the buckwheat flour, brown sugar, baking powder, baking soda, salt, cinnamon, nutmeg, and clove. Whisk these dry ingredients together thoroughly to ensure even distribution.
- In a separate bowl, whisk together the egg and low-fat buttermilk. Add the melted butter and whisk again until everything is well combined.
- Pour the wet ingredients into the dry ingredients. Stir gently with a whisk or spoon just until the dry ingredients are moistened. Be careful not to overmix; a few lumps are perfectly fine. Overmixing can lead to tough pancakes.
- Heat a nonstick griddle or frying pan over medium heat. Lightly coat the hot griddle with nonstick cooking spray.
- Pour the batter by approximately 1/4 cupfuls onto the hot griddle. Ensure there’s enough space between the pancakes for easy flipping.
- Cook the pancakes until bubbles form on the top and the edges look set, usually about 2-3 minutes.
- Turn the pancakes carefully with a spatula.
- Cook the second side until it is golden brown, about 1-2 minutes more. The internal temperature should reach around 200°F.
- Repeat steps 5-8 with the remaining batter, adding more nonstick cooking spray to the griddle as needed.
Expert Tips & Tricks
- Don’t overmix the batter: Overmixing develops the gluten in wheat flour, making pancakes tough. While these are gluten-free, overmixing any batter can still negatively impact the texture. Mix just until combined.
- Temperature is key: Ensure your griddle is hot enough. If it’s too cool, the pancakes will spread and won’t brown properly. If it’s too hot, they’ll burn on the outside before cooking through. A medium heat setting is typically ideal.
- Use a light hand when flipping: Slide the spatula under the pancake gently and flip quickly to prevent it from deflating.
- Keep pancakes warm: Place cooked pancakes in a warm oven (around 200°F) on a baking sheet until ready to serve. This prevents them from getting cold and soggy.
- For extra fluffy pancakes: Separate the egg, whisk the egg white until stiff peaks form, and gently fold it into the batter just before cooking.
- Make it ahead: The dry ingredients can be mixed ahead of time and stored in an airtight container. Whisk together the wet ingredients just before you’re ready to cook the pancakes.
- If you don’t have buttermilk: You can easily make your own by adding 1 tablespoon of lemon juice or white vinegar to 1 cup of regular milk. Let it sit for 5-10 minutes until it thickens slightly.
- Vary the spices: Feel free to adjust the spices to your liking. A pinch of cardamom or ginger can also add a lovely flavor.
Serving & Storage Suggestions
Serve these Buttermilk Buckwheat Pancakes immediately while they’re warm and fluffy. They are delicious with a variety of toppings, such as:
- Maple syrup
- Fresh fruit (berries, bananas, peaches)
- Whipped cream
- Nuts (pecans, walnuts, almonds)
- Chocolate chips
- Fruit preserves
- Nut butter
- A dusting of powdered sugar
Leftover pancakes can be stored in an airtight container in the refrigerator for up to 3 days. To reheat, you can microwave them for 30-60 seconds, toast them in a toaster oven, or reheat them in a skillet over medium heat. For longer storage, freeze the pancakes in a single layer on a baking sheet until solid, then transfer them to a freezer bag. They can be stored in the freezer for up to 2 months. Reheat directly from frozen in a toaster or oven.
Nutritional Information
| Nutrient | Amount per Serving | % Daily Value |
|---|---|---|
| Calories | 195.9 kcal | N/A |
| Calories from Fat | 50 g | 26% |
| Total Fat | 5.6 g | 8% |
| Saturated Fat | 2.8 g | 13% |
| Cholesterol | 56.6 mg | 18% |
| Sodium | 651.6 mg | 27% |
| Total Carbohydrate | 31.4 g | 10% |
| Dietary Fiber | 3.1 g | 12% |
| Sugars | 10.5 g | N/A |
| Protein | 7.4 g | 14% |
Note: Nutritional information is an estimate and may vary based on specific ingredients and portion sizes.
Variations & Substitutions
- Dairy-Free: Substitute the low-fat buttermilk with a plant-based buttermilk alternative, such as a mixture of almond milk or soy milk with a tablespoon of lemon juice or apple cider vinegar.
- Sweetness Level: Adjust the amount of brown sugar to your preference. You can also use other sweeteners like maple syrup or honey.
- Spice it Up: Add a pinch of cayenne pepper for a touch of heat, or use pumpkin pie spice instead of cinnamon, nutmeg, and clove for a seasonal twist.
- Nutty Flavor Boost: Add 1/4 cup of chopped nuts, such as walnuts or pecans, to the batter for extra flavor and texture.
- Fruity Pancakes: Fold in 1/2 cup of blueberries, raspberries, or chopped bananas into the batter before cooking.
- Chocolate Chip Pancakes: Stir in 1/4 cup of chocolate chips into the batter for a sweet treat.
- Vegan Pancakes: Substitute the egg with a flax egg (1 tablespoon ground flaxseed mixed with 3 tablespoons water, let sit for 5 minutes) or a commercial egg replacer. Use plant-based buttermilk and butter.
FAQs (Frequently Asked Questions)
Q: Can I use regular wheat flour instead of buckwheat flour?
A: While you can, the pancakes will no longer be gluten-free, and the texture and flavor will be different. You may also need to adjust the amount of liquid, as wheat flour absorbs more liquid than buckwheat flour.
Q: How do I know when the griddle is hot enough?
A: A good way to test the griddle temperature is to flick a few drops of water onto the surface. If the water sizzles and evaporates quickly, the griddle is ready.
Q: My pancakes are burning on the outside but still raw on the inside. What am I doing wrong?
A: Your griddle is likely too hot. Reduce the heat to medium-low and continue cooking the pancakes until they are cooked through.
Q: Can I make the batter ahead of time and store it in the refrigerator?
A: It’s best to cook the pancakes immediately after mixing the batter. However, if you need to make it ahead, you can store it in the refrigerator for up to 24 hours. The batter may thicken, so you may need to add a little more buttermilk to thin it out before cooking.
Q: Why are my pancakes flat and not fluffy?
A: This could be due to overmixing the batter, using old baking powder, or not having the griddle hot enough. Make sure to use fresh baking powder and avoid overmixing.
Final Thoughts
These Buttermilk Buckwheat Pancakes are a delightful way to start your day or enjoy a leisurely weekend brunch. The slightly nutty flavor of the buckwheat combined with the tang of buttermilk creates a unique and satisfying experience. Whether you’re gluten-free or simply looking for a healthier pancake option, this recipe is sure to become a new favorite. So, gather your ingredients, heat up your griddle, and get ready to enjoy a stack of delicious, homemade pancakes. Don’t hesitate to experiment with different toppings and variations to find your perfect pancake creation. Happy cooking!